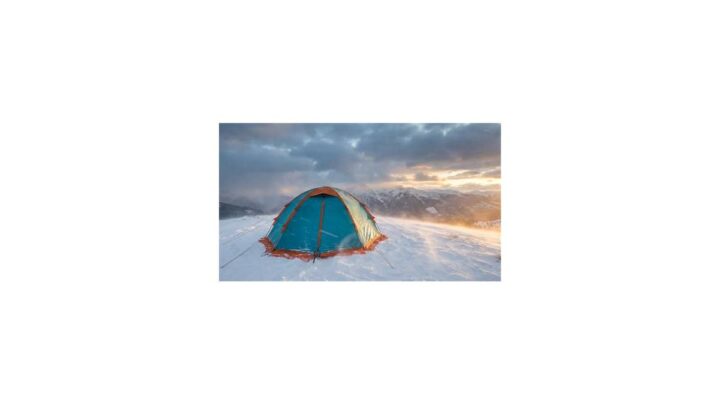
How to How to Stay Warm While Camping 2026
Lead Consumer Product Specialist & Family Gear Director at US Family Mart Consumer Testing Lab · Certified Consumer Products Quality Specialist (CPQS), ASTM F15 Consumer Standards Member · 12+ years evaluating household appliances, smart home hardware, child safety equipment, and consumer lifestyle products.
Staying warm while camping isn't about owning the most expensive sleeping bag. It's about understanding how your body loses heat and blocking each of those losses before they start. Most cold nights come down to one of three things: an under-insulated sleeping pad, a damp sleeping bag, or a body that went to bed cold and never caught up.
In our research, we found that insulation standards like ISO 23537 give sleeping bags three separate temperature ratings (comfort, limit, and extreme), yet many campers still buy based on a single number on the label. Ground insulation matters just as much. A pad with an R-value of 4.0 holds far more warmth than a summer pad at 1.5.
Below, we'll walk through the decision points that actually determine whether you sleep warm or shiver until sunrise.
how to stay warm while camping
Stay warm by blocking heat loss from every direction. Use an insulated sleeping pad with enough R-value for the season. Choose a sleeping bag rated well below the expected low.
Wear dry base layers to bed. Eat a warm meal before sleeping. Pre-warm your bag with a hot water bottle.
Quick Answer: The Three Things That Actually Keep You Warm
Three things decide your night: what's underneath you, what's around you, and what's inside you. Miss any one of them and the other two can't save you.
What's underneath you is your sleeping pad. It stops heat from draining into the cold ground. Most sleeping bags only insulate from above.
Without a warm pad, your body heat leaves through your back and hips within minutes.
What's around you is your sleeping bag or quilt, plus the layers you wear. These trap the heat your body produces. They work best when they're dry, properly lofted, and sized to your body.
What's inside you is your body's own heat production. Food, movement, and hydration before bed all feed that furnace. Skip dinner and drink three pints of lager instead?
You'll feel cold by 2 a.m., guaranteed.
Think of warmth as a three-part system, not one piece of gear.
Why You Get Cold at Night (And Why "Buy a Warmer Bag" Isn't the Fix)
Cold nights happen because heat moves. It always moves from warm to cold. Your body sits at roughly 98.6°F (37°C).
The ground can sit near freezing. The air drops overnight. Every surface around you is a heat sink, and your gear is what stands between them and you.
There are four ways you lose heat in a tent. Conduction is direct contact with cold surfaces like the ground. Convection is cold air moving across your skin through drafts or gaps.
Radiation is heat leaving your body into open space, especially through your head. Evaporation is moisture from sweat or breath cooling your skin as it leaves. A good sleep system addresses all four.
A warmer sleeping bag only fixes one of these. It blocks some radiation and traps warm air above you. It does nothing for ground conduction, tent drafts, or a damp base layer.
That's why campers who "upgrade the bag" still freeze.
Real-world data backs this up. The US Centers for Disease Control and Prevention (CDC) reports that hypothermia can set in at temperatures as mild as 40°F (4°C) when someone is wet or unprepared. Warmth is a system problem.
One tweak rarely fixes it.
The 40°F Trap
Damp cold at 40°F can feel colder than dry cold at 25°F. Humidity pulls heat from your body faster than dry air. If you're camping in the UK, Ireland, or the Pacific Northwest, this matters more than the actual temperature reading.
If the forecast says 42°F and 90% humidity with light rain, treat it like a 30°F night. Pack accordingly.
If, Then: Match Your Kit to the Conditions
- If the overnight low is above 60°F: a summer bag and a pad with R-value 1.5 to 2.0 will do.
- If the low is 40 to 60°F: use an R-value 3.0 to 4.0 pad and a three-season bag.
- If the low is 20 to 40°F: go R-value 5.0+ and add a liner or a second pad.
- If the low is below 20°F: R-value 6.0+, a winter-rated bag, a vapor barrier liner, and hand warmers.
- If the air is damp or rainy at any temperature: bump each category down by one step.
The Decision Variables: What Changes Your Warmth Strategy
Your gear list doesn't change much by location. Your warmth strategy does. The variables below are the ones that flip the answer.
Temperature and Wind Chill
Wind chill strips heat from any exposed skin or fabric. A 40°F night with 15 mph wind feels like 30°F. The National Weather Service wind chill chart makes this obvious: the effective temperature drops fast once wind gets above 5 mph.
If your tent isn't sheltered, treat the wind chill number as your real low.
Dry Cold vs. Damp Cold
Dry cold is honest. Layer up and you'll be fine. Damp cold is sneaky.
Water in the air conducts heat away from your body 25 times faster than dry air. Down insulation loses up to 90% of its loft when soaked. Synthetic insulation keeps roughly 60 to 70% of its warmth when wet, which is why damp climates often favor synthetics.
Shelter Type: Tent, Hammock, Bivy, or Tarp
A four-season tent traps more warmth than a mesh summer tent. A bivy bag traps even more per cubic foot but has almost no room to change clothes. A hammock is the coldest option because cold air flows under you from every direction.
Tarps offer no warmth at all, only wind and rain protection.
How You're Camping: Car, Backpack, or Bike
Car campers can pack a second pad, a bigger bag, and extra blankets. Backpackers count every ounce. If you're driving to the site, weight doesn't matter, so buy warmth first.
If you're hiking in, you'll want clever gear like top-rated backpacking kit that packs small without sacrificing R-value.
Solo vs. Sharing Body Heat
Two people in a double bag generate roughly the same heat as one person but spread it over more space. Whether that helps or hurts depends on the bag's internal volume. Couples usually stay warmer sharing a wider system.
Solo campers in a huge tent actually cool down faster because there's more air to heat.
Branch 1: Your Sleeping Pad Is the Foundation
If you only fix one thing, fix the pad. Ground conduction drains more body heat than any other path. Sleeping on cold earth is like lying on a slab of ice.
Your sleeping bag can't stop it because the bag's insulation gets compressed under your body weight.
The fix is an insulated sleeping pad. These use foam, air, or both to create a barrier between you and the ground. The number that tells you how well they do this is R-value.
R-Value Explained Without the Jargon
R-value measures resistance to heat flow. Higher means warmer. The standard is tested under ASTM F3340, the same test mattress makers use for home beds.
| Pad R-Value | Season | Ground Type |
|---|---|---|
| 1.0 to 2.0 | Summer | Warm grass, soft forest floor |
| 2.5 to 4.0 | Three-season | Cool ground, mild frost |
| 4.5 to 5.5 | Cold weather | Frozen ground, snow edges |
| 6.0 and above | Winter | Snow, ice, deep cold |
Stacking Pads for Modular Warmth
R-values add together. Put a closed-cell foam pad (R-value 2.0) under an insulated air pad (R-value 4.0) and you get roughly R-value 6.0. That's a real winter setup for less money than a single premium pad.
Here's the decision rule. If your pad's R-value is already 1 short of what you need, layer a cheap foam pad under it. If you're more than 2 points short, buy a proper pad.
Inflatable vs. Self-Inflating vs. Closed-Cell Foam
- Inflatable: best warmth-to-weight, packs tiny, can puncture, expensive.
- Self-inflating: middle ground, durable, bulky, mid-price.
- Closed-cell foam: indestructible, cheap, bulky, lower R-value per inch.
If you're backpacking in cold weather, pick an inflatable with R-value 5.0+. If you're car camping in winter, stack a foam pad under any inflatable you already own. If you're a beginner, a self-inflating pad around R-value 4.0 is the safest starting point.
One more thing: more air isn't always better. Over-inflating an air pad reduces its insulating foam's contact with you, which can make it colder. Inflate until firm, then let a little air out for comfort.
Branch 2: Choosing and Rating Your Sleeping Bag Correctly
Here's where most people get burned, often literally. Sleeping bag labels lie a little. Not intentionally.
It's just that the numbers mean different things.
Comfort vs. Limit vs. Extreme Ratings
Every EN or ISO tested bag carries three ratings. Under the ISO 23537 standard, they mean:
- Comfort: the temperature a "cold sleeper" (standard woman) stays comfortable all night.
- Limit: the temperature a "warm sleeper" (standard man) survives in a curled position without shivering excessively.
- Extreme: a survival rating only. Ignore this number. Seriously.
The 10-Degree Rule for Choosing Ratings
Pick a bag whose comfort rating sits roughly 10°F (5°C) below the coldest temperature you expect. That buffer covers humidity, wind, cold sleeping, and the fact that sleeping bags are tested on a bare pad with a mannequin, not a real human tossing around at 2 a.m.
If the forecast low is 35°F, pick a bag rated 25°F comfort. If it's 20°F, pick 10°F comfort. If it's below 10°F, you're into proper winter bag territory with a rated liner.
Down vs. Synthetic: Which Wins in Your Climate
| Factor | Down | Synthetic |
|---|---|---|
| Warmth-to-weight | Best | Moderate |
| Packability | Compresses tiny | Bulkier |
| Wet performance | Loses ~90% loft | Retains 60 to 70% warmth |
| Lifespan | 10+ years with care | 5 years typical |
| Cost | Higher for same warmth | Lower |
| Best for | Dry cold, backpacking | Damp cold, budget, wet trips |
If you camp in the UK, Ireland, or riverside spots, synthetic is often the smarter pick. If you're in Colorado, Utah, or the Alps in winter, down pays off in weight and warmth.
Loft, Fill Power, and Why They Matter More Than the Label
Loft is the height your bag puffs up to when laid flat. More loft equals more trapped air. More trapped air equals more warmth.
Fill power measures how much space one ounce of down occupies. 550 fill is decent. 900 fill is elite. Higher fill power means less down needed for the same warmth, which cuts weight and pack size but raises the price.
If you're comparing two bags with the same temperature rating, pick the one with more loft if weight doesn't matter, or higher fill power if it does.
Bag Shape and the Dead Air Space Problem
Mummy bags are warmest because they hug your body. Rectangular bags have more room but waste heat on air that never warms up. Semi-rectangular is a decent middle ground.
If your bag is too big, your body has to heat a bigger space. If it's too tight, it compresses the insulation. Both kill warmth.
Find a bag that lets you bend your knees without squashing the loft around your feet.
Quilts vs. Bags: A Quick Call
Camping quilts skip the bottom insulation because it would get crushed under you anyway. They save weight and pair with a warm pad. If your pad has R-value 4.0+, a quilt works.
If it's lower, you need the bag. For a deeper look at quilt-style setups and kit choices, browse the outdoor gear hub for related buying context.
Branch 3: The Layering System for Sleep (Not for Hiking)
The layers you wear to bed are not the same layers you hiked in with. That's the mistake most people make. Walking gear is built to wick sweat and ventilate.
Sleep gear is built to trap heat and stay dry. Mix the two up and you'll be cold within hours.
The rule is simple. Layer for sleep the way you'd layer for a cold morning around camp. Base layer against the skin, one mid layer if needed, nothing more.
Anything extra compresses the bag's loft and defeats the insulation above you.
What to Wear to Bed in a Sleeping Bag
Wear a merino or synthetic base layer, top and bottom. Add dry wool socks. Put on a beanie.
That's the core sleep kit for most conditions above 20°F.
- Base layer: merino wool (17.5 to 24 micron) or synthetic polyester. Never cotton. Cotton holds moisture and pulls heat from your skin.
- Sleep socks: dedicated dry wool or alpaca socks, kept in a stuff sack just for sleeping.
- Hat: wool beanie or thin fleece cap. The head accounts for roughly 10 to 30% of heat loss in cold conditions.
- Gloves: thin liner gloves. Skip heavy mittens inside the bag, they reduce circulation.
What Not to Wear
Don't sleep in the clothes you wore all day. They carry moisture from sweat, cooking, and damp air. That moisture will chill you overnight.
Change before bed, every time.
Don't overdress either. If you get too hot, you'll sweat inside the bag. Sweat means moisture.
Moisture means a colder night by 2 a.m. If you feel warm within five minutes of lying down, take off one layer.
Don't wear a heavy puffy jacket inside a snug bag. A loose puffy compresses the loft around your shoulders and neck. That's where a draft collar should be working.
Foot Warmth Is a Separate Project
Cold feet ruin an otherwise good night. Three things fix them. Warm socks, dry socks, and a bit of insulation underneath.
If you've been standing around camp, your feet will be cold when you get in. Warm them first. Do jumping jacks, wiggle your toes, or hold them against your calves for a few minutes.
Once they're warm and inside the bag, they'll stay warm.
Never wear your day socks to bed. Even if they feel dry, they carry fine moisture. Rotate them out like the rest of your sleep kit.
Branch 4: Hammock Camping: Underquilts and the Cold Butt Problem
Hammocks are the coldest way to sleep outdoors. That's not an opinion. It's physics.
Cold air flows under you from every direction, and your sleeping bag's bottom insulation gets crushed against your body weight, just like it would on the ground.
There's a name for the resulting misery: cold butt syndrome. The fix isn't a warmer bag. It's an underquilt.
What an Underquilt Actually Does
An underquilt is a quilted pad that hangs beneath the hammock. It wraps up against your back and shoulders without getting compressed. That contact-free fit is the whole point.
It traps an air pocket between the quilt and the hammock, and that pocket does the insulating.
Underquilts are rated by temperature, similar to sleeping bags. A 20°F underquilt plus a 20°F top quilt is a common cold-weather hammock setup. For winter, you'll want 0°F underquilt ratings or a stacked pair.
Top Quilt vs. Sleeping Bag in a Hammock
A top quilt is the hammock world's equivalent of a sleeping bag without the bottom. Most hammock campers use a top quilt because a bag's bottom insulation is wasted in a hammock.
If you don't own a top quilt yet, you can use a sleeping bag opened up like a blanket. Just don't zip it up. Zipped bags compress oddly in a hammock and reduce loft.
If, Then: Hammock Warmth Decisions
- If it's above 60°F: a good pad or a light underquilt will do, plus a light bag or quilt on top.
- If it's 40 to 60°F: run a 30°F underquilt and a 30°F top quilt.
- If it's 20 to 40°F: 20°F underquilt, 20°F top quilt, plus a beanie and warm baselayer.
- If it's below 20°F: 0°F underquilt, 0°F top quilt, plus a sleeping pad underneath as backup insulation.
- If you get cold butt even in good gear: your underquilt isn't snugged up against the hammock. Tighten the suspension.
Pads in Hammocks Still Work
Some campers skip the underquilt and use a wide sleeping pad inside the hammock instead. This works, but the pad slides around and often fights the hammock's curve. It's a valid budget option for warm-weather trips.
It's a rough choice for deep cold.
Branch 5: Pre-Sleep Routine That Decides Your Night
The hour before bed decides your night, not the gear you bought. A warm body slides into a warm bag and stays warm. A cold, damp, underfed body fights the bag all night and usually loses.
Treat the pre-sleep routine like a checklist. It takes 20 minutes. It's the highest-return habit in cold camping.
Eat, Move, and Pee Before Bed
Eat a warm, calorie-dense meal within an hour of sleeping. Your body burns 60 to 80 calories an hour while sleeping, and more when it's cold. Food is fuel for that furnace.
A bowl of pasta or a hot stew beats a snack bar every time.
Do two to three minutes of light movement before climbing in. Jumping jacks, squats, or a brisk walk around camp. You're not trying to sweat.
You're trying to raise your core temperature before bed.
Pee before you sleep. A full bladder forces your body to keep warming that fluid all night. Emptying it preserves heat and prevents a 3 a.m. exit into the cold.
Change Into Dry Sleep Clothes
Change everything. Base layer, socks, and if you have them, dedicated sleep pants. Keep these in a dry bag with your sleeping bag so they never get wet.
Even if your day clothes feel dry, they aren't. Damp hiking shirts, underpants, and socks all pull warmth out of you overnight. This is the single dumbest way to get cold.
If the night is really cold, change inside the bag. It's awkward. It works.
Pre-Warm the Bag with a Hot Water Bottle
Fill a hard-sided Nalgene bottle (or a proper hot water bottle) with boiling water. Wrap it in a sock or thin shirt. Toss it in the foot of your sleeping bag 10 minutes before bed.
By the time you climb in, the bag is pre-warmed. Push the bottle down to your feet for the first hour. When it cools, it becomes your drinking water for the morning.
Nothing freezes, nothing's wasted.
Know Your Thermostat Before You Zip Up
Give yourself 5 minutes inside the bag before deciding if you're warm enough. Your body takes a few minutes to heat the air inside the sleeping bag. If you feel chilly at minute one, that's normal.
If you're still chilly at minute ten, add a layer.
If you feel hot at minute one, take off a layer now. Sweating at bedtime always ends badly.
Don't Drink Alcohol to Warm Up
A nip of whisky feels warming for 10 minutes. Then it drops your core temperature. Alcohol dilates blood vessels near the skin, which rushes warm blood to the surface and pulls heat from your core.
Peer-reviewed research consistently shows alcohol increases hypothermia risk in cold environments. Hot chocolate or a hot cup of tea is the smarter call.
Hydrate, But Not Too Much
Dehydration reduces circulation and makes you feel colder. Drink water throughout the evening. Just stop drinking large amounts 30 minutes before bed so you're not up twice in the night.
Warm drinks count. Warm water, tea, broth, or cocoa. All of them raise your core temperature slightly and hydrate you at the same time.
Branch 6: Managing Moisture, Condensation, and Sweat
Moisture is the enemy of warmth. It doesn't matter whether it comes from your breath, your sweat, or the air outside. Any water inside your sleep system will pull heat from your body, and it will do it all night.
In our research, condensation is the most commonly overlooked factor in cold camping. It shows up in three places: inside the tent, inside the bag, and inside your clothing. You need a plan for each.
Tent Condensation: Why Your Walls Are Wet in the Morning
Your breath releases roughly a pint of water vapor overnight. Body heat pushes it upward. If the tent is sealed tight for warmth, that vapor hits the cold inner wall and condenses.
You wake up to drips on your bag and a damp sleeping surface.
The fix is ventilation. Open the top vent. Crack the door flap an inch.
Drop the lower mesh panel if you have one. You're trading a little warmth for a lot of dryness. It's a winning trade.
Pitch your tent so the prevailing wind crosses the vents. If you can, camp near a tree line or a rock wall on the windward side to blunt the worst of it.
Sweat: The Silent Night Killer
Sweat cools you twice. Once when it's produced, and again when it evaporates and carries heat away. If you wake in the night feeling clammy, you already lost the night.
Prevent sweat before it starts. Don't overdress. Don't do push-ups inside your bag.
Change into dry layers. If you feel too warm after five minutes, unzip the bag partway, then re-zip once you cool.
Vapor Barrier Liners: A Niche but Effective Tool
A vapor barrier liner (VBL) is a thin, non-breathable sack you sleep inside. It blocks your body's moisture from entering the sleeping bag's insulation. This matters most in multi-day cold trips where down gradually accumulates moisture and loses loft.
VBLs are tricky. They can cause overheating and clammy skin if you use them wrong. They're a serious winter tool, not a weekend accessory.
If you don't need one, don't buy one.
Dealing with Wet Gear from Yesterday
If your base layer or socks are wet, don't sleep in them. Hang them inside the tent overnight. Body heat from the tent will dry light dampness.
For waterlogged items, tuck them into your sleeping bag briefly in the morning while you pack up.
Never store a wet sleeping bag compressed. If it got damp overnight, air it during breakfast. Down loses roughly 90% of its insulating loft when soaked, and it takes hours to dry properly.
Quick Moisture Checklist
- Vent the tent top, even on cold nights.
- Change into dry sleep clothes every night.
- Hang damp day clothes inside, not stuffed in the bag.
- Use a hard water bottle rather than breathing into a soft one.
- Air the bag every morning before packing.
- If it rained, expect a damper night. Layer up accordingly.
For campers who pitch longer trips, keeping dry gear organized also helps. A dedicated dry bag or two, separate from day clothes, is worth the small weight. The kitchen and camp essentials hub covers gear storage that survives wet weekends without falling apart.
Branch 7: Camp Selection and Pitch That Battle the Cold
Where you pitch matters as much as what you pitch. Cold air is heavier than warm air, so it settles into low spots overnight. A campsite that looks perfect at 4 p.m. can be the coldest possible spot by 2 a.m.
The rule: avoid hollows, valleys, and drainage lines. Find a gentle rise, a knoll, or a shelf with good air movement underneath. Cold air flows downhill.
Let it flow past you, not into you.
Windbreaks and Natural Shelter
Wind chill strips heat far faster than still air. The US National Weather Service wind chill chart shows that a 35°F night with 20 mph wind feels closer to 20°F. That's a big chunk of warmth lost to nothing.
Use terrain as a wall. Pitch behind a rock formation, a dense hedge, a ridge, or a cluster of trees. A tent placed on the leeward side of a natural barrier can gain 5 to 10°F of effective warmth versus an exposed pitch.
Don't camp under dead trees or overhanging branches. Falling limbs are a real hazard, especially in windy conditions. A well-placed bush gives you wind protection without the danger.
Orientation and Tent Choice
Face the tent door away from prevailing wind. If the forecast shows westerly wind, point the door east. That single decision keeps your vestibule usable and reduces airflow through the sleeping area.
For real cold, lean toward a four-season tent or a low-profile three-season model with a solid inner wall. Mesh summer tents breathe well but leak heat. Double-wall tents handle condensation better than single-wall ones, especially in damp climates.
Set up on dry ground. Grass, pine duff, or a bed of leaves all insulate far better than bare rock or wet soil. If you must camp on snow, pack it down hard first.
Loose snow sits under your pad as a cold, wet layer.
Ground Prep Under the Tent
Use a footprint or a thick groundsheet. This protects the tent floor and adds a small buffer against ground cold. It also keeps dampness from seeping up into your sleeping pad.
On snow, dig a shallow trench around the tent edge to trap cold air in the trench and block it from moving under you. If snow camping is new to you, this is the trick that separates a decent night from a brutal one.
If the ground is genuinely frozen, don't bother with a footprint alone. Stack a closed-cell foam pad between the tent floor and your inflatable pad. Two layers under you is the winter standard.
Heat Sources: Hand Warmers, Heaters, and What's Actually Safe
Heat sources are support tools, not solutions. Your sleep system does the heavy lifting. Warmers just take the edge off cold spots.
If you're relying on a heater to sleep warm, you're using it wrong.
That said, a small heat source in the right place can rescue an otherwise cold night. Here's how they compare.
Air-Activated Hand Warmers
These are the classic single-use warmers. They work by oxidizing iron powder in the presence of air. Typical burn time is 6 to 10 hours.
They need oxygen, so don't seal them in an airtight pouch or stuff them somewhere the air can't reach.
Best placement: one in each sock at the foot of the bag, or in your jacket pockets during the pre-sleep routine. Don't put them directly against bare skin. They can cause low-grade burns over several hours.
Rechargeable Electric Warmers
Rechargeable electric hand warmers last 4 to 12 hours depending on the model and heat setting. They're reusable, which makes them more economical over a season. The catch is battery performance in cold.
Lithium cells lose 20 to 40% of their capacity below freezing, so a warmer that lasts 10 hours at 50°F may only last 5 or 6 at 20°F.
Charge them inside the tent or inside your sleeping bag overnight to keep the battery warm. Never charge them in a closed, unventilated space.
Hot Water Bottles
Already covered on the pre-sleep routine, but worth repeating here. A hard-sided Nalgene filled with boiling water and wrapped in a sock is the cheapest, most reliable sleeping heat source there is. It lasts 4 to 8 hours depending on the bottle.
Do not use a soft plastic bottle. Do not over-tighten the lid to the point of stripping the threads. Do check for leaks before you put it in the bag.
Propane and Catalytic Heaters: Use With Extreme Caution
These are the ones that kill people. Any fuel-burning heater (propane, butane, catalytic, or kerosene) produces carbon monoxide. In an enclosed tent, CO can reach lethal levels within minutes.
The CDC and the US Consumer Product Safety Commission both publish warnings every winter about campers dying from indoor heaters in tents.
If you use a propane or catalytic heater, you use it in a ventilated vestibule, never in the sealed sleeping space. You shut it off before you sleep. You never fall asleep with it running.
Period.
If, Then: Choosing a Heat Source
- If temps are above 40°F and your system is solid: no heater needed.
- If you have one cold spot (usually feet): air-activated or rechargeable warmers.
- If you're car camping in deep cold: a catalytic heater in the vestibule during the pre-sleep hour only, then off.
- If you're worried about CO poisoning: don't use any fuel-burning heater inside a tent.
Do Not Use a Fire to Warm a Tent
You can't put a campfire inside a tent. Obvious, right? But some campers try to "warm the tent up" with a fire outside and then rush in.
That doesn't work either. A tent cools to ambient temperature in about 10 to 15 minutes once the fire dies down. The warmth you felt was the fire, not the tent.
Fire is for cooking, morale, and drying gear at a safe distance. It's not a sleeping warmth strategy.
Common Mistakes That Freeze Campers (And How to Fix Them)
Most cold nights don't come from bad gear. They come from choices. Here are the ones we see most often in aggregate reviews and outdoor safety reports.
Sleeping in Day Clothes
Damp day clothes pull heat from your body all night. The fix is a dedicated sleep kit in a dry bag. Pack it before the trip.
Don't touch it during the day.
Underestimating Ground Cold
A summer sleeping bag on a bare foam pad in 45°F weather will leave you shivering. The bag is fine. The pad isn't.
Ground conduction beats bag warmth every time. The fix is an R-value 3.0 pad minimum for anything below 55°F.
Sleeping Bag Ratings Taken at Face Value
A "20°F bag" that isn't EN or ISO tested doesn't mean what you think it means. Unrated bags often use inflated marketing numbers. The fix is to buy only bags with ISO 23537 or EN 13537 ratings and to look at the comfort rating, not the extreme one.
Over-Inflating Air Pads
Over-inflated air pads sleep cold. The foam inside the pad needs to touch your back to do its job. When the pad is rock-hard, that contact disappears.
The fix is to inflate until comfortably firm, then release a small amount of air.
Dressing Too Warm
Sweat inside a sleeping bag is worse than a chill. Sweat pulls heat from your skin through evaporation all night long. The fix is to under-dress slightly and add layers if you feel cold after 10 minutes.
Big Tent, One Person
A giant solo tent takes forever to warm up with one body. The fix is a smaller footprint tent for solo cold-weather trips. A two-person backpacking tent works fine for one person in summer but loses warmth per cubic foot of air in winter.
Ignoring Humidity
The forecast low tells half the story. Humidity, dew point, and wind chill tell the rest. The fix is to check all four before choosing gear.
A 40°F damp night in the UK or Pacific Northwest can feel like a 25°F dry night in the Rockies.
Skipping the Pre-Sleep Routine
Cold body in, cold body out. Going to bed without eating, moving, or hydrating means your body starts the night already behind. The fix is the 20-minute routine we covered earlier.
It's the least expensive thing you can do to sleep warmer.
Wearing Wet Socks
Small thing, huge impact. Even slightly damp socks steal heat from your feet all night. The fix is dry wool socks kept in a sleep-only bag.
Rotate them, never wear them during the day.
Cold-Weather Safety: Hypothermia, Frostbite, and When to Bail
This is the section you hope you never need. Read it anyway. Cold injuries start mild and turn dangerous faster than most people expect.
Hypothermia: Signs and Stages
Hypothermia begins when your core temperature drops below 95°F (35°C). The CDC lists early signs as shivering, cold pale skin, fatigue, and confusion. As it progresses, shivering stops and drowsiness sets in.
That's the danger zone. A sleepy hypothermic camper often wants to lie down and drift off, and that's how people die in tents.
If someone in your group shows confusion, slurred speech, or stops shivering in the cold, treat it as an emergency. Get them into dry layers and a sleeping bag. Add a warm person skin-to-skin if needed.
Give warm (not hot) sweet drinks if they're alert enough to swallow. Call for help if symptoms don't improve within 30 minutes.
Frostbite: Early Warning Signs
Frostbite hits exposed skin first: nose, ears, cheeks, fingers, toes. Early signs are numbness, tingling, and waxy or yellow-gray skin. Don't rub the area.
Don't apply direct heat. Warm the tissue gradually with body heat (armpits, belly, or a warm hand).
Deep frostbite is a medical emergency. Get the person to a hospital as soon as possible.
When to Bail Out
Bail if any of these happen. Your sleeping bag is wet and you can't dry it. Someone in your group can't stop shivering.
You've been cold for more than two hours with no improvement. The forecast has turned for the worse and you're not equipped for the new numbers.
Staying out of pride kills more campers than gear failure. Driving home at midnight is embarrassing. Spending the night in a real emergency room is worse.
Legal and Land Access Notes
In the UK, wild camping is legal in Scotland under the Land Reform (Scotland) Act 2003. In England and Wales, it's generally not legal without landowner permission, though some national parks tolerate it in specific areas. Across the pond, US public land rules vary.
The National Park Service, US Forest Service, and Bureau of Land Management each publish their own camping regulations. Check the specific agency before you go.
Burning restrictions vary too. Many UK and US parks ban open fires in dry seasons. Check local rules before you assume you can warm up by a fire.
Carbon monoxide is the other legal and safety angle worth knowing. In the US, the Consumer Product Safety Commission has issued repeated warnings about portable generators and fuel-burning heaters in enclosed spaces. Tents count as enclosed spaces.
Never run a generator or a fuel-burning heater in a sealed tent, even for a quick warm-up.
Gear Maintenance So Your System Keeps Working Next Season
Warmth next season depends on what you do with your gear this season. A lofted, dry, well-stored sleeping bag insulates the way the manufacturer designed. A compressed, damp, abused bag loses warmth year over year.
Sleeping Bag Care
Air your bag after every trip. Lay it flat or hang it in a dry room for at least a day. Never store it compressed.
Use a large cotton storage sack or hang it in a closet. Compression for a weekend is fine. Compression for six months wrecks the down clusters or mats synthetics.
Wash down bags with a proper down wash, no detergent. Detergent strips the natural oils and destroys loft. Use a front-loading machine on gentle, or hand wash in a bathtub.
Dry on low with tennis balls to re-fluff the down.
Synthetic bags are more forgiving. They still suffer from buildup over time. Follow the manufacturer's wash instructions to keep the fiber fill from clumping.
Sleeping Pad Care
Store inflatable pads partially inflated and flat, not rolled tight. The foam inside the pad needs to rest in its natural shape. Roll it tight for six months and it takes longer to re-expand next season.
Check for slow leaks before every cold trip. Inflate the pad, weigh it down, and let it sit overnight. Any softness in the morning tells you there's a puncture or a valve issue.
Patch kits ship with most pads, use them.
Self-inflating pads benefit from an occasional top-off breath. Don't overdo it, moisture from your breath can grow mold inside the foam over years.
Clothing Care
Wool baselayers should be washed cold, on gentle, with wool wash. Never machine dry them. Merino shrinks fast.
Air dry on a rack, flat, away from direct heat.
Synthetic baselayers are easier. Wash warm, tumble low. Keep them separate from anything with zippers or velcro, which snag the fabric.
DWR coatings on shells fade over time. When your jacket stops beading water, it's time to re-treat. Nikwax and similar products renew DWR on both down and synthetic shells.
Follow the label, this is one of the few times when a wash-in product actually helps.
Hand Warmers and Reusable Warmers
Air-activated warmers have a shelf life. Check the expiration date before every cold-season trip. They lose oxidation potency after two or three years in storage.
Keep them sealed until you need them.
Rechargeable warmers should be stored at 50 to 70% charge, not full, not empty. Full-discharge storage shortens lithium battery life. Charge them back to full the day before the trip, not the night before you pack.
Tent and Footprint Maintenance
Seam-seal the tent every two to three years if you camp in rain. Seam sealant breaks down over time. Small leaks in the rain fly ruin a warm night faster than a cold bag.
Wash the footprint with plain water. Mud and grit abrade the coating and shorten its life. Store the footprint dry.
A damp footprint folded into a stuff sack grows mildew by next season.
Costs and Specs: What You'll Actually Spend
Budget matters more than most "buy-the-best" advice admits. You can sleep warm on a modest setup if you understand where the money needs to go. Below are rough price ranges, as of 2026, for the core kit.
| Item | Budget | Mid-Range | Premium |
|---|---|---|---|
| Sleeping pad (R-value 4.0+) | $40 to $70 | $100 to $170 | $180 to $250 |
| Sleeping bag (20°F comfort) | $80 to $140 | $180 to $350 | $400 to $700 |
| Base layer set | $30 to $50 | $70 to $120 | $130 to $220 |
| Beanie and sleep socks | $15 to $25 | $30 to $50 | $50 to $80 |
| Sleeping bag liner | $20 to $35 | $40 to $70 | $75 to $120 |
| Hand warmers (per pack) | $5 to $10 | n/a | $15 to $40 (rechargeable) |
| Hot water bottle (Nalgene) | $10 to $20 | n/a | n/a |
Where to Spend First
If you're building from scratch, put the money in this order. Pad first. Bag second.
Base layers third. Everything else is optional.
A great pad on a mid-tier bag will beat a mid-tier pad on a great bag almost every night. The reason is simple. Ground conduction is the biggest heat thief in the system.
Where You Can Save Money Honestly
- Closed-cell foam pads as a second layer instead of a pricier single pad.
- A sleeping bag liner to boost a three-season bag into shoulder season.
- Mid-tier merino instead of premium merino, the warmth difference is small.
- A hard Nalgene bottle for hot-water warmth instead of buying an electric warmer.
Where Cheap Gear Actually Hurts
Don't cheap out on the sleeping bag's ratings. Off-brand bags with unverified temperature claims leave campers cold in real conditions. If a bag claims 20°F comfort and costs $45, be suspicious.
ISO-tested bags from reputable makers cost real money because they're real bags.
Don't cheap out on baselayers either. A $15 cotton thermal shirt isn't a baselayer. It's a wet blanket against your skin.
For campers who want the wider picture on gear choices, our guide to the most useful campsite kit covers what's worth carrying in a cold-weather bin. If you're also brewing coffee in the mornings, the coffee gear picks work fine in a camp kitchen context. A hot cup before sunrise genuinely helps wake the body up.
Just like the brewing setup at home, everything should be simple, durable, and easy to clean in cold weather.
Branch 5 Extended: Body Temperature Throughout the Night
Your body temperature drops during deep sleep. That's normal, and it happens around 3 to 4 a.m. This is what makes the early hours so brutal in a cold tent, even if you went to bed warm.
The fix is layered warmth. A little extra insulation you can add at 3 a.m. without climbing out of the bag. Keep a light fleece or down jacket inside your sleeping bag, near your feet.
When you wake up cold, pull it on without getting up.
The Warm Loop That Keeps Working All Night
A warm body in a dry bag in a well-insulated tent on a good pad stays warm. A cold body on a damp pad in a leaky tent gets worse over the night. Your pre-sleep work sets the trajectory.
The pattern plays out for 6 to 8 hours. There's no resetting at 3 a.m. unless you do something.
If you wake cold, act. Don't lie there. Do 20 slow crunches inside the bag.
Drink a few sips of water from your bag bottle. Add the fleece. These small interventions break the cooling cycle before it worsens.
The alternative is lying awake, shivering, and burning calories you needed for the next day. That's how a 50°F night turns into a ruined trip even though the gear was fine.
Real Scenarios: How These Decisions Play Out
Two real conditions show how the decision tree works in practice. Both use the same gear list but different outcomes, because the choice points matter more than the gear.
Scenario 1: 42°F Damp Night in the Lake District
Cold, wet, mild temperature, very high humidity. A camper using a summer bag (comfort 50°F), a foam pad with R-value 2.0, and a mesh inner tent would probably sleep cold. Breath moisture, damp air, and ground conduction combine to strip warmth.
The same camper with a three-season bag (comfort 30°F), an inflatable pad at R-value 4.0, and a double-wall tent with vents cracked open would likely sleep warm. The gear shift is modest. The outcome gap is huge.
Humidity is the deciding variable.
Scenario 2: 15°F Dry Night in the Rockies
Cold, dry, clear, low humidity. A camper with the same summer bag and R-value 2.0 pad would be in genuine danger of hypothermia. Dry air doesn't pull heat as fast as damp air, but at 15°F the absolute temperature dominates.
The winning setup here is a winter bag (comfort 0°F), an R-value 5.5+ pad, a vapor barrier liner if multi-night, and pre-warmed bag with a Nalgene. Base layers plus beanie plus socks. No need for a heater.
The system does the work.
What Both Scenarios Prove
Gear matters, but matching gear to conditions matters more. The camper in Scenario 1 doesn't need winter gear. They need a dryer sleep system and a pad upgrade.
The camper in Scenario 2 needs a proper winter setup or a bailout plan. Two different sets of answers, same basic problem.
Frequently Asked Questions
What is the fastest way to warm up a cold sleeping bag?
Fill a hard-sided bottle with boiling water, wrap it in a sock, and put it in the bag 10 minutes before bed. That's the fastest fix. Layer in a few minutes of light exercise before climbing in.
Both steps combined will pre-warm the bag noticeably.
Is it better to sleep in more clothes or a warmer sleeping bag?
A warmer sleeping bag beats more clothes. Clothes compress the bag's loft and trap sweat against your skin, which eventually makes you colder. Wear a thin merino or synthetic baselayer and let the bag do the insulation work.
Add a midlayer only if you wake up cold.
Do you need a heater to stay warm in a tent?
No. A proper sleeping pad, bag, and baselayer routine handle most nights down to 20°F. Heaters are for emergencies or for car camping pre-sleep warming.
Fuel-burning heaters inside a sealed tent are dangerous and can cause carbon monoxide poisoning.
What R-value sleeping pad is warm enough for winter?
R-value 5.5 or higher is the winter standard. For deep snow or sub-zero nights, aim for R-value 6.0 or stack a foam pad under your air pad. Adding a closed-cell foam pad (R-value 2.0) under an R-value 4.0 inflatable gets you to a solid winter setup.
Should I sleep with my head inside or outside the sleeping bag?
Keep your face outside the bag with a beanie on. Breathing inside the bag sends moisture into the insulation, and down loses roughly 90% of its loft when wet. A beanie handles the heat loss from your head without adding moisture to the bag.
Can you get hypothermia at 40°F?
Yes. The CDC reports hypothermia can set in at temperatures as mild as 40°F when someone is wet, exhausted, or underdressed. Damp cold is the big hidden risk.
Always carry a dry sleep kit, even on mild-looking nights.
Final Decision Guide: Match Your Setup to Your Conditions
You don't need every trick in this guide on every trip. You need the right three or four for the specific night you're facing. Here's the decision path.
Start with your forecast low and humidity. Everything else follows from those two numbers. Add wind chill to the equation, then pick your pad, bag, and shelter tier.
The Two-Minute Checklist Before You Pack
Run through it every trip. It takes two minutes and saves nights.
- Check the overnight low, dew point, and wind speed for your campsite, not the nearest town.
- Match pad R-value to the ground and expected temperature.
- Match bag comfort rating to the low minus 10°F of buffer.
- Grab a dry sleep kit: baselayer, beanie, wool socks, liner if needed.
- Pack the Nalgene and a sleeve or sock for the hot water bottle.
- Confirm your shelter vents and your pitch spot avoid hollows.
The Decision Grid
Use this to sanity-check your setup in seconds.
| Overnight Low | Pad R-Value | Bag Comfort | Extra Kit |
|---|---|---|---|
| Above 60°F | 1.5 to 2.0 | 50°F | None needed |
| 50 to 60°F | 2.5 to 3.0 | 40°F | Beanie, thin socks |
| 40 to 50°F | 3.0 to 4.0 | 30°F | Dry sleep kit, Nalgene |
| 30 to 40°F | 4.0 to 4.5 | 20°F | Liner, hand warmers |
| 20 to 30°F | 4.5 to 5.5 | 10°F | Winter baselayer, double pad |
| 10 to 20°F | 5.5 to 6.0+ | 0°F | VBL, hot water bottle, foam layer |
| Below 10°F | 6.0+ stacked | -10°F or lower | Full winter kit, bailout plan |
For damp climates, shift every category down one tier. A 40°F night in Wales isn't the same as a 40°F night in Arizona. Humidity changes the effective temperature by 10 to 15°F in the worst cases.
If You Only Do Three Things
If you're overwhelmed by the options, focus on these three moves.
First, upgrade your pad before your bag. Ground conduction is the biggest heat thief, and a good pad fixes it.
Second, sleep dry. Change into clean sleep clothes and don't let the bag get damp. Moisture kills more nights than cold alone.
Third, eat and move before bed. A warm, fed, slightly exercised body stays warm. A cold, hungry, sedentary body fights the bag all night and usually loses.
If You're Doing a Multi-Night Cold Trip
- Dry your sleeping bag every morning before packing.
- Rotate your sleep socks and baselayer, keep them in a dedicated dry sack.
- Boil water for the Nalgene before bed, every night.
- Check your gear for dampness at least once a day.
- Plan a bailout route. If someone in the group starts showing hypothermia signs, use it.
If You're a Solo Backpacker
- Skip the propane heater. Weight and CO risk both rule it out.
- Use a quilt plus an insulated pad if your pad is R-value 5.0+.
- Carry a liner for temperature flexibility, cheaper than a second bag.
- Keep electronics inside the bag at night so batteries don't die.
- Have a sheltered pitch in mind if the wind picks up.
If You're Car Camping in Winter
- Bring a second pad and a bigger bag. Weight isn't a constraint.
- Take a catalytic heater for pre-sleep warmth in the vestibule. Never run it overnight.
- Pack extra blankets, a wool throw, or a doubled-up quilt.
- Bring real food with calories, cold nights burn more fuel than you expect.
- Keep the car battery warm or bring a jump starter for the morning.
If You're Camping with Kids
- Kids lose heat faster than adults and cool down before they complain.
- Use a bag rated 10 to 15°F colder than your own calculation.
- Layer toddlers and young kids in fleece sleepers instead of sleeping bags, safer and warmer.
- Give each child their own beanie and dry socks. Duplicates aren't overkill.
- Skip the hot water bottle for toddlers, use a warm fleece instead.
The One Rule That Beats Every Piece of Gear
Stay dry. If you take only one thing from this guide, take that. Warm and dry go together.
Wet and cold go together. Every gear decision, layer choice, and campsite setup you make should support staying dry. That single habit does more for warmth than any single upgrade.
When to Upgrade Your Kit
Upgrade when you've hit the same cold problem three trips in a row. If you're always cold on your shoulders, fix the bag's draft collar or add a liner. If your feet are always cold, upgrade your socks and consider a foot box pad.
If your whole body is cold, look at the pad first, then the bag, then your routine. Systematic upgrades beat random gear buying every time.
What Good Warmth Actually Feels Like
You'll know your system is dialed when you feel a slight warmth spreading through the bag within 5 minutes of climbing in. You'll feel warm but not sweaty. You'll sleep through the night without waking up cold at 3 a.m.
You'll wake up dry, not clammy. If that's not happening, something in the system is off. Trace it back through the decision grid.
The point isn't to own the best gear. It's to build a system that lets you sleep. Everything else follows from that.

Similar Posts