How to How to Set up a Tent 2026
Lead Consumer Product Specialist & Family Gear Director at US Family Mart Consumer Testing Lab · Certified Consumer Products Quality Specialist (CPQS), ASTM F15 Consumer Standards Member · 12+ years evaluating household appliances, smart home hardware, child safety equipment, and consumer lifestyle products.
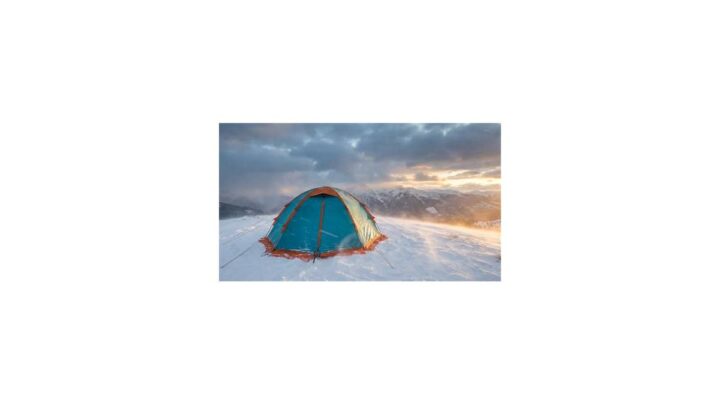
No camp ever got better because someone read the instructions under a headlamp. Learning how to set up a tent is mostly about understanding why each step happens, not memorising a numbered list you'll forget by morning. Tents are built on a handful of simple principles, and once those click, you can pitch almost any shelter you meet.
In our research across manufacturer pitch guides and outdoor safety standards, one number keeps appearing: most three-season dome tents are designed for a solo pitch in 5 to 10 minutes with practice. Instant tents cut that to roughly 60 seconds. Get the fundamentals right and you'll hit those times.
how to set up a tent
Clear a flat patch of ground first. Lay the footprint down. Spread the tent body on top.
Assemble the poles and thread them. Clip or sleeve them into place. Push pole ends into the corner grommets.
Then stake the corners at a low angle. Add the rainfly. Stake the guy lines at 45 degrees.
Tension everything so the fabric sits taut.
Quick Answer: The Right Order for Pitching Any Tent
Order matters more than speed. Pitch in the wrong sequence and you'll wrestle fabric that should have been anchored first.
The universal sequence works like this: stake the corners down, then build the frame, then cover it, then tension everything. That sounds almost too simple, but it's the logic behind nearly every tent design in circulation.
Here's the whole thing in one table:
| Phase | What happens | Why this order |
|---|---|---|
| Prep | Clear ground, lay footprint | Protects floor, levels surface |
| Anchor | Stake corners loosely | Stops the tent sliding mid-pitch |
| Frame | Build poles, thread or clip | Creates the structural shape |
| Cover | Fit the rainfly | Weather protection goes on before you're tired |
| Tension | Stake guy lines at 45 degrees | Removes slack, sheds wind and rain |
If your tent is freestanding, you can skip staking until the end. If it's non-freestanding, the corners must go in first or the whole thing collapses.
That single distinction, freestanding versus not, decides how your pitch flows. We'll come back to it properly in the next section.
Why Tent Setup Is a Visual Skill, Not a Checklist
Written steps only get you so far, because tent setup is genuinely spatial. You need to see which pole goes where, how the sleeves run, and what "taut" actually looks like. That's why almost every manufacturer ships a diagram, not just text.
The cues you can only spot with your eyes
Think about the moments that trip people up. Feeding a shock-corded pole segment through a sleeve that twists halfway down. Finding the two poles that are subtly different lengths.
Working out which way the rainfly faces.
None of these are hard once you can see them. All of them are frustrating if you're guessing from words alone.
A useful trick: look for colour coding before you do anything else. Most modern tents colour-match poles to sleeves, corners, and clips. A red pole goes in the red sleeve.
That's the tent telling you its own sequence.
What a good diagram shows that a paragraph can't
A proper pitch diagram shows you four things at once. The order of the steps, the direction each pole faces, where the tension points sit, and how the rainfly aligns with the door. A paragraph can only give you one of those at a time.
So as you read the steps coming up, picture the geometry. A dome tent wants two crossing poles that bow outward. A tunnel tent wants hoops in a line.
Get the shape in your head and the steps follow naturally.
Know Your Tent Type Before You Touch a Pole
Your tent's construction decides how you pitch it. This is the part generic guides skip, and it's exactly where beginners get stuck. Identify your type first, then apply the right method.
Is my tent freestanding or not?
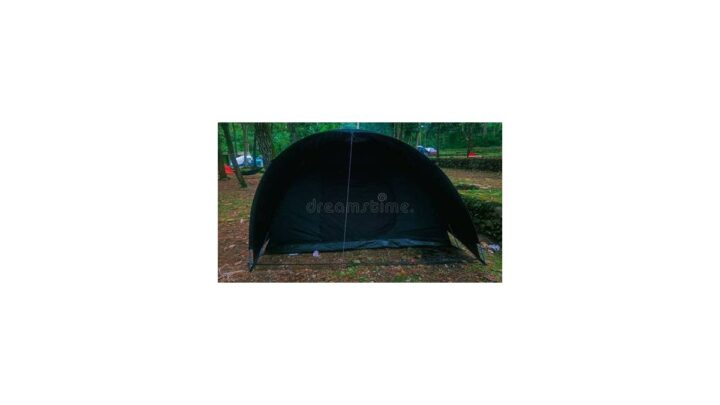
Freestanding means the poles form a self-supporting structure. A freestanding dome or cabin tent stands up on its own before you stake anything. You can even lift it and move it to a better spot.
Non-freestanding tents, mostly tunnel and some lightweight backpacking designs, need stakes or tension to hold their shape. Let go and they flop. If yours won't stand without pegging, it's non-freestanding.
If freestanding: build the frame first, then stake the corners, then tension. If non-freestanding: stake the corners and key guy points first, then build the frame into the tensioned base.
Dome, tunnel, cabin, pop-up, and tarp
Each type pitches differently, and knowing the label saves you time.
- Dome tents: Two or more poles cross at the peak. Clip or sleeve them, then stake. The most forgiving design for beginners.
- Tunnel tents: Parallel hoops form a long tube. They need staking at both ends and along the sides. Great in wind if pitched nose-first into it.
- Cabin tents: Near-vertical walls and a tall peak. Heavier, often two or three poles, common for family car camping.
- Pop-up / instant tents: Pre-assembled frame that snaps into shape. Fast, but bulky and harder to repack.
- Tarp and tarp tents: No poles at all, just fabric and lines. Lightest option, steepest learning curve.
Single-wall versus double-wall
Double-wall tents have a separate inner body and outer rainfly. You pitch the inner first, then add the fly. That gap between the two layers is what manages condensation.
Single-wall tents combine everything into one layer. They're lighter and faster, but condensation control depends almost entirely on ventilation. If you wake up damp in a single-wall tent, airflow is the culprit, not your sleeping bag.
What's Actually in the Bag: Every Part and What It Does
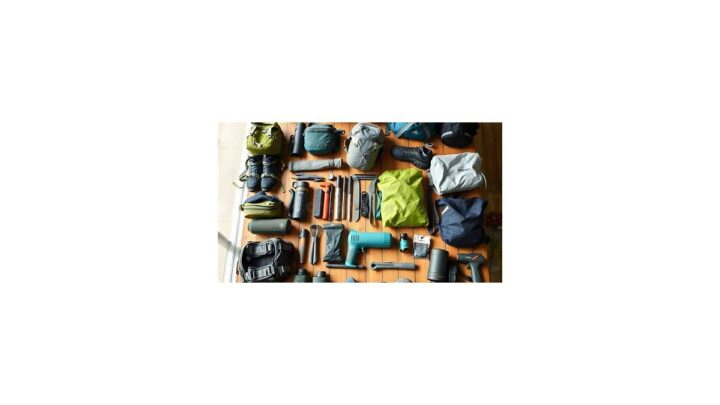
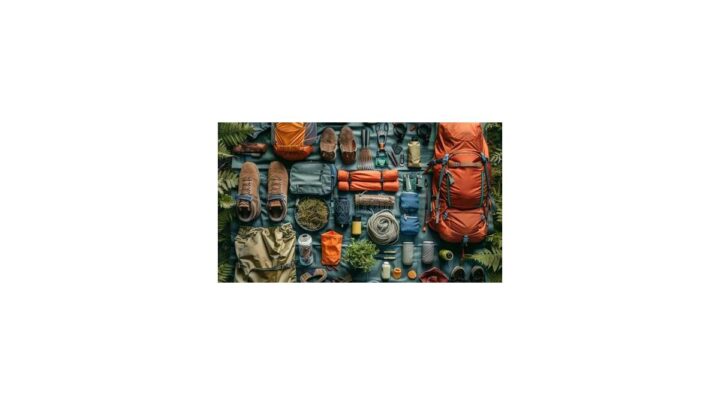
Before you leave home, lay everything out and count it. Missing a single pole segment or stake turns a five-minute pitch into a twenty-minute problem.
Here's what you're looking for:
| Part | What it does | What to check |
|---|---|---|
| Tent body (inner) | The sleeping compartment | No tears in mesh or floor |
| Rainfly | Outer waterproof layer | Seams intact, clips present |
| Poles | The frame | Count them, check shock cord |
| Stakes / pegs | Anchor points | Enough for all corners plus guys |
| Guy lines | Tension and wind support | Cords attached, no fraying |
| Footprint | Ground protection | Correct size for your tent |
| Repair sleeve | Emergency pole splint | Still in the bag |
A few notes on the parts people overlook.
The footprint is a shaped groundsheet that sits under the tent floor. It protects against abrasion, punctures, and ground moisture. Manufacturer specs confirm it also extends floor life significantly, which is why most brands sell one made for your exact model.
The repair sleeve is a short tube of wider fabric. If a pole snaps, you slide the sleeve over the break and splint it. Cheap insurance, and most people forget it exists until they need it.
Stake types matter by ground. Standard 6 to 9 inch steel or aluminum pegs work in most soil. Loose sand needs wide sand stakes, and snow needs long snow stakes with a broad surface.
Match the peg to the ground or you'll be re-staking all night.
Reading Your Campsite: Where to Pitch and Where to Walk Away
Site choice does more for a good night's sleep than any piece of gear. Get this wrong and no amount of clever pitching saves you.
The four checks before you unroll anything
Run these in order, every time.
- Flat ground. Look for level, cleared earth. A slight slope means you'll slide downhill all night. If you must pitch on a slope, sleep with your head uphill.
- Overhead. Scan for dead branches, loose rock, or anything hanging above you. Widowmakers are exactly what they sound like.
- Water and drainage. Avoid dry streambeds, gullies, and low hollows. Flash floods arrive fast and without much warning.
- Wind. Note the prevailing direction. You'll orient your tent's lowest, narrowest end into it.
Distance from water, trees, and trails
Leave No Trace guidance, the widely adopted outdoor ethics framework, recommends camping at least 200 feet from lakes and streams. That protects water sources and keeps you clear of damp ground and bugs.
Don't pitch under an isolated tall tree in a storm. Lightning favours the tallest object around. In bear country, keep food out of the tent entirely, and store it in a hang or a certified canister well away from where you sleep.
If the site fails two or more of these checks, move on. There's always another patch of ground. The wider world of camping gear rewards good site selection more than expensive equipment.
Step-by-Step: Laying Out the Body and Footprint
Spread the footprint flat before the tent body ever comes out. This is the layer that protects your floor, and putting it down first means you're not trying to slide it underneath later.
Line the footprint up so its corners match the tent's corners. If it's larger than the floor, tuck the overhang under. An exposed footprint edge catches rain and channels water straight under your tent.
Now unroll the tent body on top and orient it properly. Find the door, then think about wind. Point the door downwind if you can, and face the lowest, slimmest end of the tent into the prevailing wind.
That single decision reduces pressure on the poles and stops wind driving rain into the doorway. If you're in a tunnel tent, this step is essential. Tunnel tents must face nose into the wind or they flatten.
Lay the body out fully before you insert a single pole. A half-spread tent with a pole threaded through it twists and fights you the whole way.
Step-by-Step: Assembling and Threading the Poles
Poles come in shock-corded segments. That cord pulls the pieces together, but it doesn't lock them. You still have to seat each section fully.
Hold two segments and push them together until the metal ferrule bottoms out. You'll feel a solid click or stop. If a joint sits half-in, it becomes a stress point, and stress points snap.
Work through the whole pole this way, then check for splinters or cracks where the cord exits. A damaged pole end will shred a sleeve or split a grommet.
Now comes the fork in the road. Sleeves or clips?
Manufacturer specifications confirm the two systems behave differently. Sleeves hold the pole along its whole length, which spreads load and handles wind well. Clips are faster and let you pitch without threading anything.
Neither is better in absolute terms, it depends on your tent.
A few pointers that save time:
- Feed poles one at a time, tip first, never the cord end.
- Push through gradually rather than forcing. If it snags, back off and check for a twist.
- For clip tents, clip loosely first, then tighten after the frame is up.
- Match colours if your tent is colour-coded. It tells you which pole goes where.
Once the poles are in or clipped, it's time to raise and anchor.
Step-by-Step: Raising the Tent and Staking It Down
Raising a dome tent is easier than most people expect. Push the poles up and outward until they arch, then lift one side, then the other.
Don't try to force it into shape all at once. Let the frame find its curve. A dome wants to bow outward, and if it fights you, a pole is likely crossed or in the wrong sleeve.
Now seat the pole ends into the corner grommets or pockets. Check each one is fully home. A pole end that pops out mid-pitch can whip back and poke someone.
For a freestanding tent, do this before any staking. Build the frame, then stake the corners, then tension the body. For a non-freestanding tent, stake the corners first so the base holds while you build the frame.
How do you stake a tent properly?
Angle the stake at roughly 45 degrees away from the tent, not straight down. A straight peg pulls out under sideways load. An angled one drives its length into undisturbed soil.
Push or hammer until only the loop sits above ground. Keep the line running from the tent to the peg as flat as you can. A steep line yanks the stake upward.
Now go around the corners in a diagonal pattern, like tightening wheel nuts. Stake one corner, then the opposite, then the other two. Diagonal tension keeps the floor square and stops the fabric twisting.
Once everything's up, tension the body so it's taut but not stretched. You should be able to press the fabric a little with a thumb. A tent strung tight as a drum puts constant stress on its seams.
Step-by-Step: Fitting the Rainfly and Guy Lines
The rainfly goes on while you're still fresh, not after it starts raining. It's the layer doing the real weatherproofing, so treat it as part of setup, not an add-on.
Drape the fly over the frame and find its door. Match that door to your tent's door. Most flies have a vestibule that sticks out over the entrance, and getting it backwards leaves your opening exposed.
Now connect it. Most designs use clips, buckles, or Velcro tabs at key points on the poles. Work from the peak outward so the fabric settles evenly.
Where the fly attaches and where it must not touch
A double-wall tent relies on a gap between the fly and the inner body. If the fly presses against the inner mesh, condensation transfers straight through and you wake up damp.
Create that gap by tensioning the fly properly and using the small struts or poles many flies include. These push the fly away from the body at the points where it would otherwise sag.
For longevity, look after the fabric between trips. Re-proofing treatments and gentle cleaning belong in your regular outdoor gear upkeep, not as an afterthought.
Guy line staking, done right
Guy lines are not decoration. They're what stops your tent from turning into a sail in a gust.
Stake each guy line at about 45 degrees from the tent body, continuing the line's natural direction. Pull it snug. Not bowstring tight, just enough that the line runs straight with no slack.
Some lines have tensioners built in. Others rely on a simple loop you adjust by sliding. Either way, check every line after a few minutes outside.
Fabric relaxes as it settles, and lines that were snug go slack.
Common Setup Mistakes You Can See Coming
Most botched pitches come down to the same handful of errors. Spot them early and you avoid the midnight fix.
Forcing a pole that resists
If a pole won't seat or slide, stop. Resistance almost always means a crossed pole, a misrouted sleeve, or a half-seated ferrule. Forcing it cracks the pole instead of solving the problem.
Pitching without the footprint
The footprint isn't optional on rough or wet ground. Without it, abrasion wears the floor and ground moisture soaks through. Over a season, that's the difference between a five-year tent and a fifteen-year tent.
Ignoring wind direction
A tent pitched door-first into the wind takes pressure on its weakest face. Point the narrow end into it, keep the door downwind, and you'll sleep through gusts that flatten careless pitches.
Staking straight down
Vertical stakes pull out. Angle them away from the tent at 45 degrees and drive them until the loop nearly touches ground. This one change stops most peg failures in soft soil.
Putting the fly on last, in the rain
Fit the rainfly before the weather turns. Trying to wrestle a wet fly over a soaked inner in the dark is miserable, and it leaves your sleeping space damp.
Leaving slack in the guy lines
Slack lines mean a flapping fly. Flapping fly means noise all night and stress on the seams. Tension them after the tent settles, not just when you first pitch.
Skipping the corner count
Before you pull poles out, count the stakes and poles against the bag's listed contents. A missing piece is easier to find at home in daylight than at a campsite at dusk.
Get these eight right and your pitch gets faster every trip. The next section deals with what to do when the weather refuses to cooperate.
Wind, Rain, and Slope: Adjusting the Pitch When Conditions Turn
Conditions change the pitch. You don't just build the same tent the same way regardless of what's happening outside. You adapt.
Pitching in wind
Stake the corners before you build the frame. A half-built tent in a gust becomes a kite. Anchor the base first, then raise the poles while the corners hold.
Face the lowest, narrowest end into the wind. For a tunnel tent, this is essential. For a dome, angle so the wind hits a pole-arch rather than a flat panel.
Once it's up, double-stake the windward corners if you have spare pegs. Add extra guy lines on the wind side. A gust loads an unstaked panel like a sail, and one pole takes the whole force.
If wind is severe and you can't move to shelter, drop the tent to a lower profile. Many dome tents can be pitched with the poles shorter or the fly cinched tighter. Lower means less surface area.
Less surface area means less force.
Pitching in rain
Fit the rainfly before you open the inner. If you must pitch in downpour, don't unroll the inner until the fly's ready to go on. Every extra second the inner is exposed is water inside your sleeping space.
Pitch on high ground with drainage away from you. Avoid hollows and depressions. Water pools in low spots and finds any gap in the floor.
Add a guy line dip to keep the fly fabric from touching the inner when it's wet. A wet inner layer wicks water, and you can't dry it once it's damp inside a sealed tent.
Pitching on a slope
Choose the flattest patch you can find. Orient your body head-up, feet-down if the slope is mild. Sleeping head-downhill forces blood to your head and wrecks rest.
If the slope is noticeable, level your sleeping spot instead. Dig a shallow pit where your hips will lie, or use a folded jacket under your hips. A tent pitched on a slope leaves you sliding downhill all night.
Line your tent's low edge away from any drop. You don't want a gust to drag you and the tent off a ledge.
Cold, condensation, and airflow
Cold nights mean condensation. Warm damp air from your breath hits the cool fly and turns to water. Manage it with ventilation, not with more covers.
Leave the fly's vents open, even if it's cold. Crack the door slightly if your tent allows it. Keep a small gap between fly and inner, and the moisture condenses on the fly, not on you.
Per CDC guidance, never use a fuel-burning stove, heater, or lantern inside a closed tent. Carbon monoxide builds without warning and has killed campers who were trying to stay warm. Insulate with clothing and sleeping bags instead.
Setting Up in the Dark or in Bad Weather
Pitch in the dark and your biggest enemy is losing gear, not losing time. Work by a headlamp on the lowest setting that still lets you see, and keep everything within arm's reach.
Sort gear before you leave the car
If you know you'll arrive late, pack the tent and stakes in one bag, and keep the headlamp in your pocket. Do not pack them in the bottom of a duffel. That's the number one cause of twenty-minute fumbling.
Set the tent bag down where you'll sleep. Lay the footprint there. Then unroll the body on the footprint.
Even in the dark, the sequence holds.
Use feel and colour coding
Colour-coded clips and grass loops make dark pitches much easier. Run your fingers along the pole shaft to find the ferrule. Check the grommet by feel.
Your hands will find the seating point faster than your eyes.
If nothing is colour-coded, mark your tent's front door with a reflective strip of tape before you leave home. That one upgrade saves a lot of cursing in the dark.
Pitch in the rain without soaking the inner
Leave the tent bag sealed until the last possible moment. Assemble poles first, then open the body and get the fly on fast.
Some tents let you pitch the fly first, then hang the inner underneath. If yours supports this, it's the single best rain-pitch method out there. The inner never sees daylight (or rain) until it's sheltered.
Keep a small cloth in the tent bag for wiping condensation off the fly before you roll it up. A tiny bit of preparation prevents the damp-tent aftermath.
Packing Down and Storing It So It Lasts
Take-down is a mirror of setup, and skipping the details shortens your tent's life noticeably.
Dry it completely, every single time
Mildew is the number one killer of camping tents. Pack a damp tent and by the time you unpack it, you may find black spots and a smell that never comes out. Mildew breaks down the fabric coating permanently.
If you can, air-dry the tent at camp before packing. If that's not possible, dry it at home within 24 hours. Spread it over a clothesline, a balcony rail, or two chairs.
Let the fly dry on both sides.
Store it only when the fabric is fully dry to touch, including seams and the underside of the fly.
Fold loosely, don't stuff tight
Sharp crease lines are weak points. Every time you fold on the exact same line, the coating cracks along that fold. Manufacturers confirm that loose folding preserves fabric life better than tight compression.
Don't jam a clean tent back into its original tiny stuff sack. Use a larger storage bag if you have one. Your tent lives longer in a loosely packed state.
Store it in a cool, dry place
Heat and humidity destroy coatings and rubberised floors. Attics and garages hit high summer temperatures and stay humid for months. Store tents indoors, in a closet or under a bed.
Keep them out of direct sunlight when not in use.
UV shortens tent life fast. Pitch in the shade when you can, and don't leave the tent up for weeks at a time in full sun.
Check and repair before the next trip
Before every trip, run these checks:
- Unroll the tent and look for seam separation or pinholes.
- Check shock-cord tension. Slack cords mean broken poles on the next pitch.
- Inspect each pole for cracks, splinters, or bent sections.
- Verify stakes are all present and straight.
- Test zippers by running them fully open and closed.
Field repair kits matter too. A folded strip of duct tape, a pole repair sleeve, and a spare stake or two solve most trip-ending problems.
For durable gear prep and travel essentials, our pick of camping field favourites covers the small stuff people forget.
Safety, Camping Rules, and Gas Warnings Worth Knowing
Safety and rules aren't a footnote. Ignoring them creates real hazards for you and everyone around you.
Carbon monoxide: the silent killer
Never run a fuel stove, lantern, or heater inside a closed tent. Carbon monoxide is colourless and odourless. It kills campers every year who were just trying to stay warm.
If you do use a fuel stove, run it outside on a cleared, non-flammable surface. Ventilate the tent fully if you're doing anything with open flame nearby. The CDC lists cooped-up campers as a recurring CO-poisoning group.
Fire safety and campfires
Check the campsite's fire rules before you arrive. Many public lands enforce seasonal fire bans. Some require a permit for any open flame.
Never build a fire inside or next to a tent. Never use a fire to dry a tent, even from a distance. Fabric coatings ignite fast.
Lightning and storm exposure
Don't pitch on an exposed ridge or knoll if storms are forecast. Move lower and get near (but not directly under) a group of small trees, not a single tall one.
If you're caught in a storm, get out of the tent and into a low crouch away from tall objects. A tent offers almost zero lightning protection. Kayakers, hikers, and campers are all equally at risk.
Campsite rules and leave-no-trace
Most US public lands follow Leave No Trace principles as a baseline. Camp at least 200 feet from lakes, streams, and trails. Pack out everything you brought in.
Bury human waste at least 6 inches deep, and 200 feet from water.
Rules vary by agency. National Park Service lands, Bureau of Land Management dispersed areas, and USDA Forest Service wilderness all have different requirements. Check before you pitch.
In Scotland, wild camping is a legal right under the Land Reform (Scotland) Act 2003, with restrictions. Most of England, Wales, and Northern Ireland require landowner permission. Know the rules where you're camping, because the wrong pitch can mean a fine or a bad night's sleep.
Wildlife and food storage
In bear country, never store food in your tent. Use a bear hang or a certified bear canister, at least 100 yards from your sleeping area. Cook downwind and away from where you sleep.
In every environment, keep food sealed and don't leave scented items in the tent. Small animals chew through fabric for a single snack. Once a raccoon knows a tent holds food, it keeps coming back.
Site hazards worth checking twice
Look up before you stake. Widowmakers are dead branches that drop without warning. Look down for ant nests, thorny plants, and uneven rock.
Look around for creeks and dry washes that can fill fast in rain.
If the site fails any of these, move. A short walk to a safer patch beats a long night dealing with problems.
Frequently Asked Questions
How long does it take to set up a tent?
Most three-season dome tents take 5 to 10 minutes for one person once the pitch is familiar. Instant and pop-up tents average 1 to 2 minutes. Family cabin or tunnel tents typically run 10 to 20 minutes.
First attempts often take double that, mainly while you work out which pole goes where.
Do you stake a tent before or after the poles go in?
It depends on the tent. Freestanding designs let you build the frame first, then stake the corners. Non-freestanding tents, including most tunnel models, need the corners staked first so the base holds its shape while you raise the poles.
If your tent flops without pegs, stake first.
Which way should the tent door face?
Face the door downwind, away from the prevailing wind. Point the lowest and narrowest end of the tent into the wind instead. This keeps gusts off the largest fabric panels and stops rain blowing straight through the entrance.
If wind is calm, face the door toward the view.
Can you set up a tent on concrete or hard ground?
Yes, but you'll need a freestanding tent and weighted anchors instead of stakes. Fill stuff sacks with rocks or use sandbags to hold the corners. Guy lines can be tied to posts, railings, or heavy objects.
Never hammer stakes into concrete or asphalt, because you'll damage the peg and the surface.
What do you do if a tent pole snaps mid-pitch?
Slide the pole repair sleeve over the break and tape it in place. If you don't have a sleeve, a short length of wider tubing, a sturdy stick, or a rolled magazine taped around the break will splint it well enough to finish the trip. Get a replacement pole section or a whole new pole set from the manufacturer afterward.
How do you keep a tent dry in the rain?
Fit the rainfly before opening the inner body, pitch on high ground with good drainage, and add a slight dip to the guy lines so the fly doesn't touch the inner. Keep vents open for airflow. If the tent supports fly-first pitching, use that method.
Air-dry everything thoroughly at home within 24 hours.
Final Word: The Pitch You'll Actually Remember
Every tent has a logic, and once you've found yours, setup stops being a chore. Anchor the base. Build the frame.
Cover it. Tension it. That sequence works on a two-person dome in a Scottish glen and a family cabin tent in a Colorado campground alike.
The details are what separate a good pitch from a bad one. Stake at 45 degrees, not straight down. Fit the fly before the rain arrives.
Keep the fly off the inner for airflow. Dry everything fully before storage. These small habits protect your gear and your sleep.
Safety isn't optional either. No fuel stoves or heaters inside a closed tent, per CDC carbon monoxide guidance. Check fire rules and camping permissions before you arrive, especially on public lands.
Leave No Trace spacing isn't just good manners, it protects the places we all want to keep camping in.
Get the fundamentals into your hands once or twice and you'll shave minutes off every future pitch. Ten trips in, you'll be pitching in the dark without a headlamp. That's the goal: not memorising steps, but understanding the shape of the thing.
Do that, and the woods stop being unpredictable.

Similar Posts