How to Set Up a Home Gym: The Complete Guide 2026
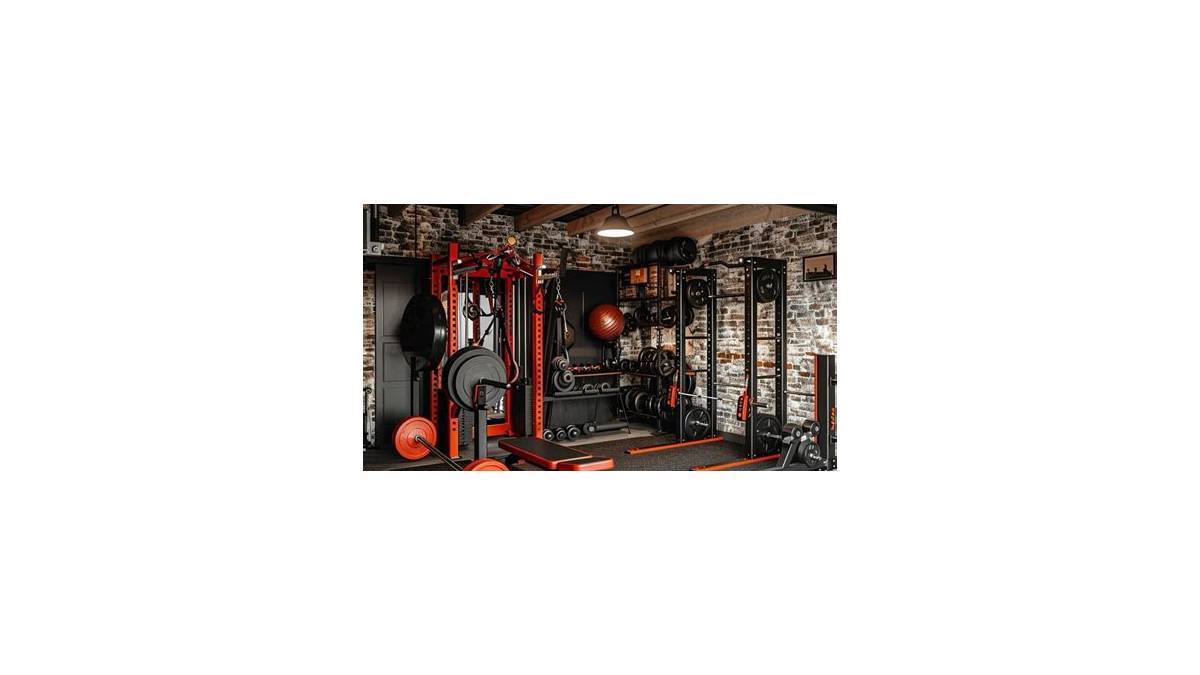
Setting up a home gym isn't complicated, but it does punish people who skip the planning stage. Buy the wrong rack for your ceiling height or drop 45 lb plates on a bare second-floor joist and you'll learn an expensive lesson fast. The good news is that the right setup costs less than three years of a mid-tier gym membership for most people.
Here's how to set up a home gym the smart way. Per American Society for Testing and Materials (ASTM) flooring standards and manufacturer specs from major rack builders, the whole process comes down to measuring your space, matching gear to your training goal, and picking the right anchor equipment, flooring, and safety hardware in that order. Get those five decisions right and everything else falls into place.
how to set up a home gym
Measure your space, ceiling height, and floor load first. Pick a rack, barbell, plates, and bench that match your training goal. Add rubber flooring for protection and noise.
Anchor everything, then test with light loads. A solid starter setup runs $1,000 to $2,000 as of 2026.
Start With the Questions That Decide Everything Else
The biggest mistake we see in aggregate buyer feedback is people buying gear before they answer basic questions. What's your training goal? How much room do you have?
What's your actual budget? Skip those three and you'll end up with a $900 treadmill collecting dust next to a squat stand you outgrew in four months.
Ask yourself these before you spend a dollar:
- What am I training for? Strength, general fitness, Olympic lifting, and rehab all need different anchors.
- How often will I train? Two sessions a week needs less gear than five.
- Who else uses the space? Kids, partners, and pets change your safety layout.
- Do I rent or own? Renters can't anchor racks into walls or rip out carpet.
- What's my real ceiling height? Measure it. Don't guess.
- What's my honest budget? Not the fantasy number. The real one.
If you can answer those six questions, you can build a gym that lasts a decade. If you can't, buy nothing yet.
The Four Setup Profiles
Most home gyms fall into one of four buckets. Find yours.
- Beginner / general fitness. One adjustable dumbbell set, a bench, bands, and a mat. Under $600.
- Intermediate strength. Power rack or squat stand, Olympic barbell, 300 lb of plates, FID bench, and rubber flooring. $1,200 to $2,500.
- Powerlifting / Olympic lifting. Full power rack, competition or calibrated barbell, bumper plates, plywood platform, dedicated bar jack. $2,500 to $6,000+.
- Hybrid / conditioning. Rack, barbell, plates, plus a rower, bike, or kettlebells. $2,000 to $4,000.
Pick the profile that matches what you'll actually do, not what looks cool on Instagram.
Renters, Apartments, and Shared Spaces
If you rent or live above someone, your entire plan changes. You can't drill into walls for a folding rack. You can't drop bumper plates on a bare wood subfloor.
Your neighbor will file a noise complaint the first time you deadlift at 6 a.m.
The renter-friendly move is a squat stand (not a wall-mounted rack), thick rubber mats, and controlled eccentrics. Manufacturer specs on most squat stands confirm they're freestanding and stable without anchors. That's your path if your lease says no modifications.
Match Your Setup to Your Training Goal
Your goal decides what gear actually earns a place in the room. Buying for "general fitness" and then trying to powerlift is how racks get sold on Facebook Marketplace three months later.
Strength and Powerlifting
Powerlifting needs a full power rack with safety straps or spotter arms. The rack is non-negotiable because you're training near-maximal loads alone. You also want a stiff barbell with aggressive knurling and a 29 mm shaft, since whippy bars cost you pounds on the squat and bench.
Plate-wise, iron works fine for powerlifting. Bumper plates are optional here and cost more per pound. A dedicated plywood and rubber platform protects your floor from deadlift drops.
General Fitness and Fat Loss
You don't need a rack. Adjustable dumbbells, a flat or FID bench, resistance bands, and a decent mat cover 90 percent of general fitness programming. Add a rower or stationary bike if you want cardio at home.
This is the cheapest and most space-efficient path. It's also the one most people abandon because "dumbbells feel less serious" than a barbell. Ignore that feeling.
Results come from consistency, not equipment prestige.
Olympic Weightlifting and CrossFit-Style Training
Olympic lifts require bumper plates and a proper platform. You're dropping weight from overhead every session. Iron plates will crack, dent your floor, and damage the bar sleeves.
You want a 20 kg Olympic barbell with decent whip, a set of bumper plates (both 450 mm diameter so the bar loads evenly), and an 8×8 ft platform. A full power rack is standard, though some lifters use a squat stand with separate jerk blocks.
Rehab, Mobility, and Low-Impact Work
Rehab setups prioritize control over load. Resistance bands, light dumbbells, a stability ball, a foam roller, and a mat cover this. A mirror helps you check form during corrective work.
If you're working through an injury, get clearance from a physical therapist before loading anything. Equipment doesn't fix a rehab plan.
Measure Before You Buy: Space, Ceiling Height, and Floor Load
This is the section most people skip and most people regret. Three numbers decide whether your gym works or sits unused.
Ceiling Height Minimums for Pressing and Pull-Ups
Measure floor to ceiling with a tape, not with your arms. Here's what you need:
| Lift | Minimum ceiling | Comfortable |
|---|---|---|
| Standing overhead press | 8 ft | 9 to 10 ft |
| Pull-ups on a rack | 8 ft | 9 ft |
| Kipping pull-ups | 9 ft | 10 ft+ |
| Barbell overhead in a rack | 8 ft (rack dependent) | 9 ft |
A standard US residential ceiling is 8 ft. That's the bare minimum for overhead press if you're under about 5'10" and using a shorter bar path. If you're taller or your rack's crossmembers sit high, you may not clear the lockout.
If your best ceiling is under 8 ft, drop overhead work. You can still squat, bench, deadlift, and row. Seated dumbbell press replaces standing press.
Floor Load Limits Upstairs and in Apartments
This one is serious. Residential floors are typically rated for 40 PSF live load per the International Building Code (IBC). A loaded power rack with a lifter can push 600 to 800 lb into a 4×4 ft footprint.
That's fine on concrete. It's riskier on a second-floor wood subfloor.
If you're setting up upstairs, do two things. First, spread the load with a platform or thick mats. Second, put the rack perpendicular to the joists, not parallel.
Running across multiple joists distributes weight better than loading one.
When in doubt, get a structural engineer's opinion. It's a $200 to $400 consult that saves you from a five-figure repair.
Door Swing, Rack Footprint, and Platform Clearance
Tape out your footprint on the floor before buying. A standard power rack is roughly 4×4 ft at the base. Add 3 ft of clearance on each side for loading plates and 4 ft in front for safety when you fail a lift.
A lifting platform is typically 8×8 ft. A bench adds another 4 ft of depth when in use. Garage gyms usually have the room.
Spare bedrooms often don't.
Measure door swing direction too. Nothing kills a setup faster than a rack that blocks the only entrance.
The Decision Tree: What to Buy First, Second, and Last
Buy in tiers. Start with what you'll use every session, then layer in the nice-to-haves. This prevents you from blowing your budget on cardio gear before you've got a barbell.
Tier 1: The Non-Negotiables
- Power rack, squat stand, or adjustable dumbbells (pick one based on goal)
- Olympic barbell (20 kg / 45 lb) if you're going barbell
- 300 lb of plates minimum (or adjustable dumbbells)
- Flat or FID bench
- Rubber flooring or mats
Tier 2: Flooring and Protection
Flooring goes in Tier 2 only because you can technically train a week without it. Don't wait longer than that. Bare concrete is fine short-term.
Bare hardwood is not.
- ¾-inch rubber mats or horse stall mats
- Plywood base under deadlift zone
- Wall protection behind the rack
Tier 3: Accessories That Earn Their Space
Add these once your core setup is dialed in and you know your programming needs them:
- Adjustable dumbbells
- Kettlebells (16 kg, 24 kg, 32 kg cover most needs)
- Resistance bands
- Landmine attachment
- Dip bars
- Barbell jack
Tier 4: Cardio and Smart Systems
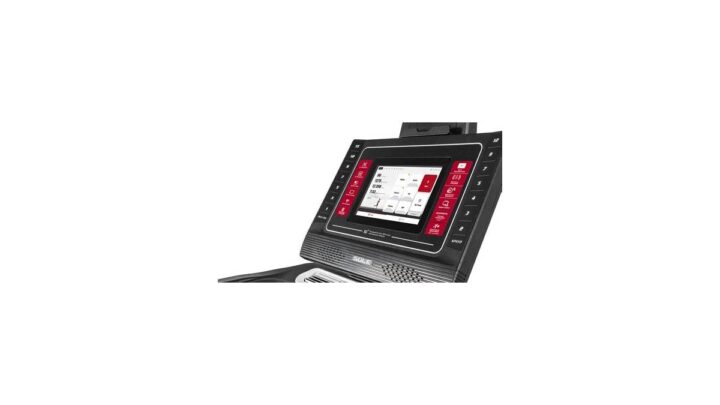
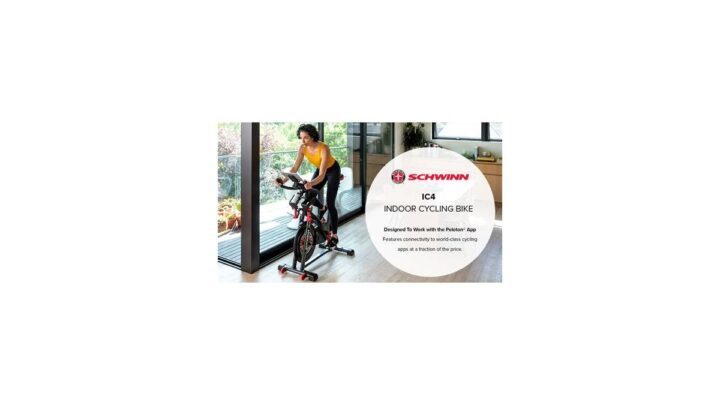
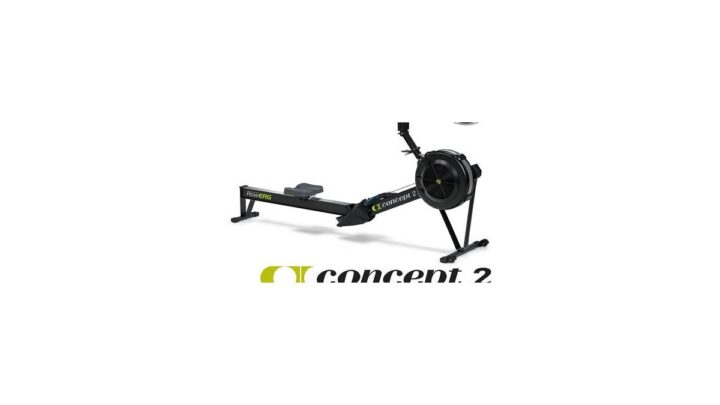
Cardio and smart trainers come last. They're the most expensive per use and the most likely to gather dust. A Concept2 rower or a basic spin bike covers most home cardio.
Smart trainers like Tonal or Peloton make sense only if you genuinely use guided programming.
If/Then Decision Logic
- If your ceiling is under 8 ft, then skip the full rack. Go squat stand plus bench.
- If you rent, then get a freestanding squat stand and rubber mats, no wall mounts.
- If you're upstairs, then use a platform and orient across joists.
- If your budget is under $600, then adjustable dumbbells and a bench beat a cheap barbell set.
- If you train Olympic lifts, then bumper plates and a platform are non-negotiable.
- If you train alone near max, then safety straps on your rack are the single most important upgrade.
Choosing the Right Anchor Equipment
The rack, bar, and bench are your anchor. Everything else is optional. Get these wrong and the whole setup underperforms.
Power Rack vs Squat Stand vs Smith Machine vs Functional Trainer
Each has a clear best-fit lifter.
- Power rack. Best for strength training alone at home. Four uprights, safety straps or pins, pull-up bar. 11- or 12-gauge steel is standard for anything rated over 700 lb. Prices run $300 to $3,000+.
- Squat stand. Best for renters, low ceilings, and small spaces. Two uprights, safety arms optional. Lighter and cheaper but less stable under heavy loads.
- Smith machine. Best for lifters who want a guided bar path, typically bodybuilders or rehab users. The fixed track limits natural movement patterns. Rarely worth the price for home use.
- Functional trainer. Best for cable-based training, rehab, and accessory work. Pairs well with free weights but can't replace them. $1,500 to $4,000+.
Barbell and Plate Options: Bumper, Iron, and Calibrated
Barbell selection hinges on three specs: shaft diameter, tensile strength, and knurling.
- Budget Olympic bar (28 to 29 mm, ~190k PSI). Fine for general strength training under 400 lb.
- Power bar (29 mm, 190k+ PSI, aggressive knurl). Best for squat, bench, deadlift. Stiff, no whip.
- Weightlifting bar (28 mm, 190k to 215k PSI, moderate knurl). Best for snatch and clean and jerk. Has whip.
- Calibrated plates. Required for IPF competition. Cost 2 to 3x iron. Skip unless you compete.
Plate types matter too. Bumper plates are 450 mm diameter and safe to drop. Iron plates range in diameter, so mixing brands can cause uneven loading.
Calibrated plates are matched within grams.
Adjustable vs Fixed vs Loadable Dumbbells
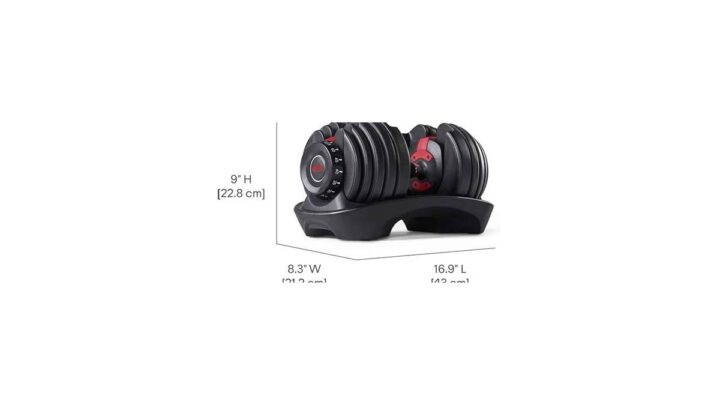
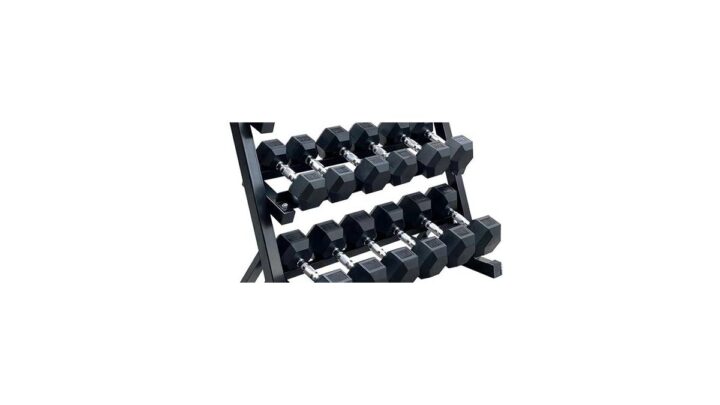
- Adjustable dumbbells. Best for small spaces and general fitness. Range 5 to 50 lb or 5 to 90 lb. Fast enough for most training.
- Fixed dumbbells. Best for serious lifters with space and budget. No adjustment time, but cost $1 to $3 per pound.
- Loadable dumbbells. Best for barbell owners who want dumbbell options without a second rack. Uses your existing plates.
For most home gyms, adjustable dumbbells win on space and cost. Fixed dumbbells win if you train dumbbell-first and have the room.
Flooring, Noise, and Vibration Control
Flooring protects three things at once: your subfloor, your equipment, and your relationships with whoever lives below you. Skip it and you'll regret it by week two.
Horse Stall Mats vs Rubber Tiles vs Plywood Platforms
Each one solves a different problem. Pick based on your worst-case scenario.
| Option | Best for | Thickness | Cost (per sq ft) |
|---|---|---|---|
| Horse stall mats | Deadlifts, general protection | ¾ inch | $2 to $4 |
| Interlocking rubber tiles | Clean look, lighter loads | 8 mm to ½ inch | $3 to $6 |
| Plywood + rubber platform | Olympic lifts, max deadlifts | 2 to 3 inches total | $4 to $7 |
Horse stall mats are the workhorse. They're 4×6 ft, weigh about 100 lb each, and handle dropped weight without denting concrete. The catch is the smell.
New mats off-gas for two to four weeks.
Interlocking tiles look better in a spare room or apartment. They're thinner and won't survive 300 lb deadlifts dropped from lockout. Fine for dumbbells and bodyweight work.
A plywood platform is the gold standard for Olympic lifting. You build an 8×8 ft base from two layers of ¾-inch plywood, topped with rubber strips on the sides where the plates land. The center stays bare wood for grip and consistent bar bounce.
Keeping the Peace With Downstairs Neighbors and Family
Noise is the number one reason apartment home gyms get shut down. Vibration travels through joists, not air. So soundproofing foam on your ceiling does almost nothing.
Here's what actually works:
- Thick rubber mats. ¾-inch minimum. Absorbs impact and cuts airborne sound.
- A plywood platform. Adds mass and spreads vibration across more joists.
- Controlled eccentrics. Lower the bar, don't drop it. Save true drops for platform sessions.
- Time your sessions. Most noise complaints happen before 7 a.m. or after 9 p.m.
- Talk to your neighbor first. A heads-up and a schedule beats a formal complaint every time.
If you're in a top-floor apartment with concrete floors, you've got more room to work. Wood-frame buildings are the hard case.
Humidity, Rust, and Off-Gassing in Garages and Basements
Garages and basements swing in humidity. That's bad for bare steel bars, iron plates, and rubber mats. Manufacturer care guides for Olympic barbells typically recommend wiping down and oiling the shaft every four to six weeks in humid environments.
Watch for these:
- Rust on barbell shaft and sleeves. Wipe down after every session. Oil monthly.
- Condensation on cold plates. Bring plates inside in winter, or accept surface rust as a maintenance cost.
- Rubber off-gassing. New mats smell for weeks. Ventilate the space. Run a fan.
- Mold under mats. Lift mats quarterly and check for trapped moisture.
A $100 dehumidifier solves most of this. Set it to 50 percent humidity and forget it.
Budget Tiers: What You Get at Every Price Point
Here's what real money buys you in 2026. Prices reflect aggregate listings from major US retailers and manufacturer direct sales.
| Tier | Budget | What's Included | Training Level |
|---|---|---|---|
| Bare minimum | $300 to $600 | Adjustable dumbbells, flat bench, mat, bands | Beginner, general fitness |
| Solid starter | $1,000 to $2,000 | Squat stand or entry rack, budget bar, 300 lb iron plates, FID bench, mats | Intermediate strength |
| Serious home gym | $2,500 to $5,000 | Full power rack, good bar, bumper plates, platform, accessories, cardio | Powerlifting, CrossFit |
| Premium / calibrated | $6,000 to $10,000+ | Commercial rack, competition bar, calibrated plates, cable system, smart trainer | Competition prep, hybrid training |
What Actually Drives the Price
Four things push a home gym up the cost ladder:
- Steel gauge and rack build. 11-gauge beats 14-gauge on stability and resale. Doubles the rack price.
- Bar quality. A $150 budget bar and a $550 competition bar look similar. They don't perform similar.
- Plate type. Iron is $1 to $2 per pound. Bumper is $2 to $3. Calibrated is $4 to $6.
- Flooring. One hundred square feet of horse stall mats runs $300 to $500. Interlocking tiles run $300 to $600.
Where to Save Without Regret
Buying used is the biggest single lever. Facebook Marketplace and Craigslist list used racks, bars, and plates at 40 to 60 percent off retail. Iron plates never really wear out.
Racks and barbells can be inspected in person.
Skip the smart trainer on your first build. Add it in year two if you still want it. Most people don't.
Location-by-Location Playbook
Your space dictates your setup more than your budget does. Here's how to plan for the four common locations.
Garage Gyms
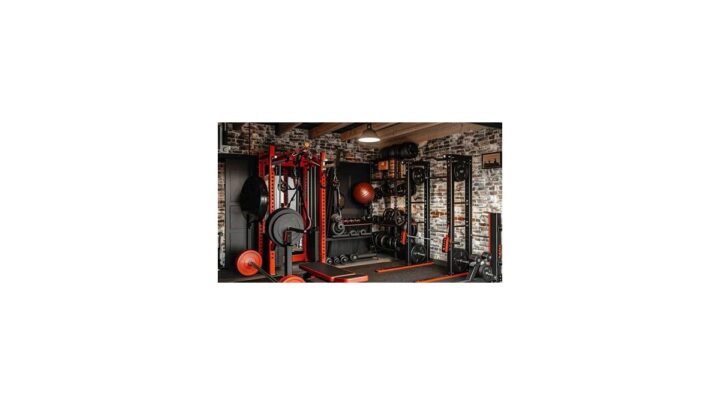
The classic choice. Garage gyms win on space, ventilation, and floor load (usually concrete slab). They lose on temperature swings and humidity.
If you're in a garage, do this:
- Insulate if you can. Uninsulated garages hit 100°F+ in summer in the South.
- Add a dehumidifier. Rust is your enemy.
- Watch the door. Overhead doors limit pull-up bar height above 7 ft.
- Check the slab. Most residential slabs handle a loaded rack fine. Verify no cracks near the rack placement.
Basement Gyms
Basements have the best temperature stability and worst ceiling height. Standard basement clearance runs 7 to 8 ft. That kills standing overhead press for most people.
Measure carefully. A low-profile squat stand fits where a full 90-inch power rack won't. Also check for water intrusion after heavy rain.
Rubber mats on a damp floor trap moisture and grow mold.
Spare Rooms and Apartment Corners
Renters and small-space dwellers live here. The rules change completely.
- No wall anchoring. Go freestanding stand, not wall-mounted rack.
- Noise discipline. Controlled reps, thick mats, and daytime sessions only.
- Weight limits. Check your lease. Some buildings cap equipment weight outright.
- Smell. Skip horse stall mats. Use interlocking tiles.
- Storage. Foldable benches and wall-mounted plate trees keep the room livable.
If you're squeezing gear into a small apartment, the same principles that make space-saving tech setups work apply here: prioritize multi-use gear, hide the storage, and don't buy anything you'll use less than once a week.
Safety, Anchoring, and Legal Considerations
This is the section that decides whether you train for twenty years or get hurt in year one. Read all of it.
Anchoring Racks and Securing Mirrors
A freestanding power rack rated for 1,000 lb is stable under a normal squat. It's not stable when you rack a heavy bar unevenly or fall into a rack. Anchoring changes that.
Manufacturer install guides for full racks typically require floor anchoring or wall anchoring for tipping prevention. Do it if you own the space. Skip it only if the rack is bolted to a platform that itself is heavy enough to resist tipping.
Mirrors are a sneaky danger. Standard gym mirrors are 60 to 100 lb each. Use mirror clips rated for the weight.
Never lean a mirror against a wall.
Training Alone Without a Spotter
Training alone near max is the single biggest injury risk in a home gym. Per NSCA guidance, max-effort lifts should always involve a spotter or a safety mechanism. If you don't have a spotter, you have two good options:
- Safety straps or pins in a power rack. Set them just below your bottom position. They catch the bar on a missed rep.
- Duffalo bar or safety squat bar. These let you bail safely without a spotter.
Never bench press alone in a rack without safeties. Chest-crush deaths happen this way every year. Set the safeties or don't bench.
Insurance, HOA Rules, and Electrical Codes
Three legal things to check before you buy anything.
- Homeowner's insurance. High-value equipment may not be covered by default. Call your insurer if your home gym exceeds $5,000 in value.
- HOA rules. Some HOAs restrict garage conversions, external equipment, and noise windows. Read your covenants.
- Electrical. Garages need GFCI outlets per National Electrical Code (NEC). If you're adding a treadmill or smart trainer, verify your circuit amperage. A 15-amp circuit won't run a treadmill plus lighting plus a space heater.
If you're building in a detached garage or outbuilding, check local building codes before adding a subpanel or running new conduit. This is where consulting a licensed electrician is money well spent.
Common Mistakes That Wreck a Home Gym Setup
Most home gym failures trace back to the same handful of errors. Here are the ones we see come up again and again in buyer feedback and forum threads.
- Buying cardio first. The treadmill becomes a coat rack. The barbell gets used.
- Ignoring ceiling height. You find out you can't press overhead after the rack is assembled.
- Cheaping out on the barbell. A $120 bar bends at 300 lb. Then it stays bent.
- Skipping flooring. One dropped deadlift dents a hardwood floor permanently.
- Mixing plate brands. Different diameters cause uneven bar loading and unstable lifts.
- Underbuilding the rack. A 14-gauge rack wobbles at heavy squats. You'll feel it.
- No safeties. Training alone without pins or straps is how people get hurt.
- Oversized footprint. Buying a 6-post rack in a 10×10 room leaves no room to move.
- No plan for ventilation. Rubber off-gassing and summer heat make the space unusable.
- Buying everything at once. Tier it. Learn what you actually use before adding more.
What the Pre-Purchase Checklist Should Look Like
Before you click buy on anything, run this list:
- Measured floor-to-ceiling height
- Measured rack footprint, door swing, and platform space
- Verified floor load (concrete vs wood, upstairs vs downstairs)
- Chosen training profile (beginner, strength, Olympic, hybrid)
- Set a real budget with a 15 percent buffer
- Confirmed you can anchor (or can't, if renting)
- Checked HOA and lease rules
Twelve minutes with a tape measure and a notepad saves a lot of returns.
Returns Are a Nightmare for Heavy Gear
Heads up on logistics. A 200 lb rack or a 300 lb plate set is expensive to ship back. Most retailers charge return shipping on freight items.
Some charge a restocking fee on top.
The lesson: order the right thing the first time. Measure twice. Read the specs twice.
Call the manufacturer if the details are fuzzy.
Assembly Day: Layout, Installation, and Load Testing
Assembly day is where planning meets reality. Here's how to run it without a six-hour headache.
Step 1: Clear and Clean the Space
Empty the room or bay completely. Sweep the floor. If you're laying rubber mats, get them in place first.
Everything else sits on top.
Step 2: Tape the Layout
Use painter's tape to mark the rack footprint, platform edges, and bench zone. Walk the space. Check that you can load plates without hitting a wall.
Check that you can fail a squat forward without hitting anything.
Step 3: Assemble in Order
- Flooring first. Mats or platform base. Let mats flatten for 24 hours if they were rolled.
- Rack second. Two people minimum for assembly. Follow the manufacturer's torque spec on every bolt.
- Bench third. Check level and stability on the mat surface.
- Bar and plates last. Load plates on a tree or rack storage, not on the floor.
Step 4: Anchor and Verify
If you're anchoring the rack into concrete, use wedge anchors rated for the load. If you're anchoring into wood, hit joists, not subfloor panels.
Then verify:
- Rack doesn't wobble when you shake it
- Safety straps or pins set at the right height for your bottom position
- Bench pad is level and locked
- Pull-up bar clears your head with full hang
Step 5: Load Test Light
Start with an empty bar. Then 95 lb. Then 135 lb.
Then 185 lb if you're heading heavy. Verify rack stability under each load. Check that the bar sits evenly on the J-cups.
Do not go heavy on day one. Break in the setup with real but light sessions for a week.
Assembly Day Tools You'll Actually Need
- Adjustable wrench or socket set (usually 17 mm and 19 mm for rack bolts)
- Rubber mallet for seating plates and mats
- Allen key set (metric for most racks)
- Level, 2 ft or longer
- Tape measure
- Painter's tape
- Utility knife for trimming mats
- Two people minimum for anything over 100 lb
Maintenance and Long-Term Upgrades
A home gym that lasts a decade is one you maintain. Here's the routine.
Weekly Maintenance
- Wipe down the barbell shaft and sleeves
- Sweep or vacuum the mats
- Check that all rack bolts are snug
- Inspect safety straps for fraying or wear
Monthly Maintenance
- Apply a light coat of 3-in-1 oil or dedicated barbell oil to the shaft
- Brush out chalk from knurling with a stiff nylon brush
- Check bench pad for cracks or compression
- Verify dumbbell handles are tight (adjustable models)
- Test the dehumidifier if you run one
Quarterly and Annual
- Disassemble and re-torque rack bolts
- Lift mats and check for moisture underneath
- Inspect plate coating for chips that expose bare iron
- Check cables on any functional trainer or cable system for fraying
- Replace safety straps per manufacturer timeline (usually 3 to 5 years for high-use gyms)
When to Upgrade
You'll know it's time to upgrade when:
- You're consistently maxing out your weight plates
- The rack wobbles under loads you now hit regularly
- Your programming needs equipment you don't have (cables, specialty bars)
- Your barbell has developed a permanent bend over 1 mm
- You've trained consistently for 12+ months and know your real needs
What to Upgrade First
Upgrade order that makes sense for most lifters:
- Barbell. A better bar improves every lift.
- Plates. Add matched plates or upgrade to calibrated if you compete.
- Rack attachments. Landmine, dip bars, and a lat pulldown add variety.
- Cable system. If your programming demands it.
- Cardio machine. Add when you actually want one.
For anyone layering in smart training or recovery gear, our breakdown of connected home gadgets covers what's worth the money and what isn't.
Real Setups: Three Home Gyms, Three Budgets
Here's what three real setups look like in practice.
The $800 Apartment Corner
A 30-year-old renter in a one-bedroom. 9 ft ceilings, wood subfloor, no wall anchoring allowed.
- Adjustable dumbbells, 5 to 50 lb
- FID bench (folds flat)
- Interlocking rubber tiles, 8 mm
- Doorway pull-up bar
- Resistance band set
- Foam roller and mobility gear
This setup handles five sessions per week. It fits under a bed when not in use.
The $2,400 Garage Starter
A 35-year-old homeowner. Two-car garage, 9 ft ceilings, concrete slab, half the garage dedicated to training.
- 4-post power rack, 11-gauge, with safety straps
- Budget power bar, 29 mm, 190k PSI
- 300 lb iron plate set
- FID bench, 1,000 lb rated
- 100 sq ft of ¾-inch horse stall mats
- Barbell jack and plate tree
This handles powerlifting programming with room for a car. Ceiling allows overhead press.
The $6,000 Powerlifting Build
A 40-year-old with a dedicated basement bay. Reinforced concrete slab, 8.5 ft ceilings, one lifter.
- 6-post commercial rack, 11-gauge, with flip-down safeties
- Competition power bar, 29 mm, 205k PSI
- Calibrated kilo plate set (20 kg plates)
- Adjustable bench with a fat pad
- 8×8 ft plywood and rubber platform
- Specialty bars: safety squat bar, trap bar, Swiss bar
- Deadlift jack, loaded dumbbell handles
This is a lifetime setup. It supports competition prep and years of heavy training without upgrades.
What All Three Share
Notice the pattern. All three setups cover the same five non-negotiables: a rack or stand, a bar or dumbbells, plates or adjustable weights, a bench, and flooring. Everything else is optional.
The person who buys the right five things trains for years. The person who buys the wrong five things sells their gear in six months.
Final Decision Guide: Build the Right Gym the First Time
The single biggest predictor of a home gym that lasts is whether your first build matches your actual training. Not your aspirational training. Your real one.
The one you'll do on a Tuesday night after work when you're tired and the couch looks great.
The Three-Question Filter
Before you buy anything, answer these. If any answer is fuzzy, wait another week.
- What will I train, specifically? Name the lifts. Squat, bench, deadlift, press, row. Or dumbbell circuit, cardio, mobility.
- Where will I train, exactly? Not "in the garage." Which bay. Which wall. What's above and below.
- How much will I actually spend? Set the number. Add 15 percent buffer. Then commit.
If You're a Beginner
Buy adjustable dumbbells, a bench, a mat, and bands. Total under $600. Train for three months.
Then decide if you need a barbell setup.
If you buy a rack first and never use it, you've wasted $1,500. If you buy dumbbells first and outgrow them, you upgrade with a clear conscience.
If You're an Intermediate Lifter
Buy a squat stand or entry power rack, a solid budget power bar, 300 lb of iron plates, and a 1,000 lb rated FID bench. Add ¾-inch horse stall mats. Total $1,200 to $2,200.
This is the sweet spot. It handles 95 percent of strength programming and leaves room to upgrade the bar later.
If You're Advanced
Buy the full rack, competition bar, and either bumper or calibrated plates. Add a platform and specialty bars as your programming demands. Total $3,000 to $6,000+.
You already know what you need. Don't let anyone talk you into a smart trainer you'll never plug in.
If You Rent or Have Low Ceilings
Buy a freestanding squat stand, adjustable dumbbells, and interlocking rubber tiles. Skip overhead work. Skip anchoring.
Train with control.
You can build a serious physique in an apartment with $800 of gear. You don't need a commercial rack.
Core Gear Decision Table
| Goal | Anchor Gear | Bar/DBs | Plates | Bench | Flooring |
|---|---|---|---|---|---|
| General fitness | Adjustable DBs | 5 to 50 lb adj. | N/A | Flat or FID | Mat |
| Strength | Squat stand or rack | Power bar, 29 mm | 300 lb iron | FID, 1,000 lb | Horse stall mats |
| Powerlifting | Full power rack | Comp power bar | Iron or calibrated | FID, fat pad | Platform + mats |
| Olympic lifting | Power rack | WL bar, 28 mm | Bumper plates | Flat or FID | 8×8 ft platform |
| Hybrid / conditioning | 4-post rack | Power bar | 300 lb mix | FID | Mats + platform |
Space Planning Table
| Space Type | Ceiling | Floor Load | Anchoring | Best Rack |
|---|---|---|---|---|
| Garage | 8 to 10 ft | Concrete slab | Yes | Full power rack |
| Basement | 7 to 8.5 ft | Concrete slab | Yes | Low-profile rack or stand |
| Spare room (ground) | 8 ft | Wood subfloor | Usually yes | Stand or low rack |
| Spare room (upstairs) | 8 ft | Wood subfloor, 40 PSF | Risky | Stand + platform |
| Apartment (any floor) | 8 to 9 ft | Varies | No | Freestanding stand |
Troubleshooting the Setup After It's Built
Things that go wrong after assembly day. Here's how to fix each one.
The Rack Wobbles Under Load
Tighten every bolt to spec. If it still wobbles, anchor it. If you can't anchor, add weight to the base with sandbags or a plate storage extension.
A wobbling rack is a safety issue, not a cosmetic one.
The Floor Feels Spongy Under the Platform
You've got too much give in the subfloor. Add another layer of ¾-inch plywood. If that doesn't fix it, get a structural opinion.
Don't keep loading until you know.
The Mats Keep Sliding
Rubber mats slip on smooth concrete. Use double-sided carpet tape at the seams. Or lay them over a plywood base.
Once loaded with a rack, they usually stop moving.
The Bar Sits Unevenly in the J-Cups
Check the J-cup installation height. Both must be at the same hole. Then check the bar sleeve for a bend.
A bent bar will never sit true.
The Dumbbells Feel Loose
Adjustable dumbbells loosen at the handles over time. Re-tighten the locking mechanism per the manufacturer guide. If the plates still rattle, replace the handle or the locking collar.
You've Got a Humidity Problem
Rust spotting on plates or bars means the space needs dehumidification. Add a $100 dehumidifier. Keep humidity under 55 percent.
Wipe down bars after every session.
Where to Go From Here
You know the steps. Measure the space. Match the gear to your training.
Buy in tiers. Lay flooring before heavy equipment. Anchor what needs anchoring.
Maintain it monthly. Upgrade only when your programming demands it.
The people who get this right aren't the ones with the biggest budgets. They're the ones who measured their ceiling, read the manufacturer spec, and bought the right five things instead of the wrong ten.
Start with the five non-negotiables. Add the rest as you earn it. And skip the smart trainer until year two.
You'll thank yourself later.
If you're layering in any connected training gear down the road, our picks for small-space living are a good starting point. And if you're building out other parts of the home at the same time, our coverage of kitchen essentials and gear for the great outdoors rounds out the picture.
For the government safety guidance that backs a lot of this, the U.S. Consumer Product Safety Commission publishes injury data on home exercise equipment worth a skim before you train near max alone.
Frequently Asked Questions
How much does it cost to set up a home gym?
A basic home gym runs $300 to $600 (adjustable dumbbells, bench, mat). A solid strength setup costs $1,000 to $2,000. A serious powerlifting or Olympic build runs $2,500 to $6,000+.
Cardio machines and smart trainers push cost higher. Buy in tiers to spread the spend.
What ceiling height do I need for a home gym?
You need 8 ft minimum for overhead press and pull-ups. Nine to ten feet is comfortable for tall lifters and kipping movements. Under 8 ft, skip standing overhead work and use a seated dumbbell press or a shorter rack.
Can I set up a home gym in an apartment?
Yes, if you control noise and load. Use a freestanding squat stand (no wall anchoring), ¾-inch rubber mats, controlled reps, and daytime training windows. Check your lease and building rules first.
Some apartments cap equipment weight outright.
How much space do I need for a power rack?
A power rack needs about 4×4 ft at the base, plus 3 ft on each side for plate loading and 4 ft in front for safety. A full lifting platform is 8×8 ft. A dedicated bay of 10×10 ft gives you room to train; 12×12 ft is comfortable.
How long does it take to set up a home gym?
Rack assembly takes 1 to 3 hours with two people. Flooring adds 1 to 2 hours for mats or a platform. Total setup, including layout and load testing, runs one full day for a basic gym and a weekend for a full build with a platform.
Do I need to anchor my power rack?
Anchoring is recommended per most manufacturer installation guides, especially for full power racks under heavy loads. Anchoring prevents tipping under uneven loading or a hard rack. If you rent and can't anchor, use a freestanding squat stand and train with controlled reps.

Similar Posts