How to What Camping Gear Do I Need for Beginners 2026
Lead Consumer Product Specialist & Family Gear Director at US Family Mart Consumer Testing Lab · Certified Consumer Products Quality Specialist (CPQS), ASTM F15 Consumer Standards Member · 12+ years evaluating household appliances, smart home hardware, child safety equipment, and consumer lifestyle products.
Two tents, one sleeping bag, and a whole lot of overthinking. That's the usual starting point for people asking what camping gear do i need for beginners. The honest answer is that the list changes based on where you're sleeping, what season it is, and whether you're driving to the site or carrying everything on your back.
Get those three things wrong and you'll either freeze at night or waste hundreds of dollars on gear you never touch again.
Here's what the research bears out. The Mountaineers' Ten Essentials framework, used by the US National Park Service and Forest Service as a baseline, says every camper needs navigation, sun protection, insulation, illumination, first aid, fire, repair tools, nutrition, hydration, and emergency shelter. That's the floor.
Everything above it depends on your trip type. As of 2026, aggregate gear reviews and retailer data show beginners spend anywhere from $300 for a basic car-camping kit to $2,000 for a full backpacking setup. So before you buy anything, let's figure out which camper you actually are.
what camping gear do i need for beginners
You need a tent, a sleeping bag, a sleeping pad, a headlamp, water storage, a camp stove, a first aid kit, weather-appropriate clothing, and food storage. Car campers can add a cooler, camp chair, and lantern because weight doesn't matter. Backpackers should keep base weight under 20 pounds.
Buy the big three first: tent, sleep system, and pack.
The First Question That Changes Everything: What Kind of Camping Are You Doing?
The answer to "what gear do I need" is really a series of if/then decisions. The first branch matters most. If you're driving to a developed campground and sleeping next to your car, you can bring a heavy tent, a full cooler, and a folding chair.
If you're hiking in, every ounce gets carried on your back, and gear choices flip completely. Most beginners don't know this yet. That's exactly how they end up with a 12-pound tent they can't stand to carry.
Here's the branching logic that actually works.
- If you're driving to a developed site: weight is irrelevant. Prioritize comfort, space, and cooking gear.
- If you're hiking in more than 2 miles: weight is everything. Every piece of gear gets measured in ounces.
- If you're at a campground with bathrooms and potable water: skip water filters and cat-hole trowels.
- If you're dispersed or backcountry camping: you need water treatment, waste management, and bear-aware storage.
- If you're camping with kids: add shade, extra layers, and a bigger tent than the headcount suggests.
In our research, the single biggest regret beginners report in aggregate reviews is buying backpacking gear for a car-camping trip, or the reverse. The gear categories overlap maybe 40 percent. A sleeping pad that's perfect for a thru-hike is a thin, expensive misery on a car-camping trip where you could've brought a $60 air mattress.
And a car-camping tent that weighs 12 pounds will wreck your first backpacking trip.
Car Camping vs. Backpacking: Two Different Sports
Car camping and backpacking share a name, but they're not the same activity. Car campers sleep within steps of a vehicle, which means weight, volume, and durability don't constrain you the same way. Backpackers carry everything, so every item gets weighed and justified.
If you're starting with car camping, manufacturer specifications indicate you can comfortably use a 4-person dome tent (roughly 8 to 12 pounds), a rectangular sleeping bag rated for 30°F, a self-inflating pad with an R-value of 3 to 4, a two-burner propane stove, and a 50-quart cooler. That's a solid kit for two people, and it costs roughly $400 to $700 at mid-range prices.
If you're starting with backpacking, the math changes hard. A beginner backpacker should aim for a base weight of 15 to 20 pounds. Base weight means everything except food, water, and fuel.
That target means a 2-person tent under 5 pounds, a mummy bag under 3 pounds, an inflatable pad under 1.5 pounds, and a canister stove under 4 ounces.
Here's a side-by-side of how the same categories split.
| Gear Category | Car Camping Pick | Backpacking Pick |
|---|---|---|
| Tent | 4P dome, 10 lbs | 2P trekking-pole or UL tent, under 4 lbs |
| Sleeping bag | Rectangular, 30°F, synthetic | Mummy, 20°F, down |
| Sleeping pad | Self-inflating, R-3.5 | Inflatable, R-3, under 1.5 lbs |
| Stove | 2-burner propane | Canister or alcohol, under 5 oz |
| Cooler | 50 qt hard-sided | None (dehydrated meals) |
| Chair | Folding camp chair | Sit pad or nothing |
Aggregate user reviews show the tent is where beginners overspend or underspend most dramatically. A $60 budget tent can work fine for four or five fair-weather car-camping trips. Take it backpacking and the pole sleeves, zipper, and rainfly coating will fail fast.
The materials weren't designed for pack compression or sustained rain. For a deeper look at which campers work best for which trips, our roundup of camping gear for 2026 covers the categories most beginners ask about.
Dispersed Camping, Festival Camping, and Other Curves
Dispersed camping means camping outside a developed campground, often on Bureau of Land Management or National Forest land. It's legal in many US regions, but it changes your gear list. You'll need water treatment, a shovel for waste, a bear canister or bag if you're in bear country, and the ability to be fully self-sufficient.
It's a step up from car camping in complexity.
Festival camping is the opposite extreme. Gear here is disposable-grade, the site is crowded, and theft risk is real. Don't bring your good gear to a festival.
A cheap tent, a basic sleeping bag, and a headlamp are plenty.
Family camping with young kids pushes the tent size up by one or two berths. A 4-person tent fits two adults and two small kids snugly. You'll want a 6-person model if you also want gear inside.
Look for a full-coverage rainfly, a bathtub floor, and a minimum 2,000mm hydrostatic head rating for reliable rain protection. A bathtub floor is a raised, waterproof floor edge.
Pick Your Branch: Gear Lists by Trip Type
Now that we've defined the branches, here are the actual gear lists. These are starting points. Adjust as you go, but don't skip anything on the essentials side of each list.
The Car Camper's Starter Kit
This is the list for someone driving to a developed or semi-developed campground for one to three nights in spring through fall.
- Shelter: 4-person dome tent, ground tarp or footprint, 8 to 12 stakes, mallet or rock for driving stakes
- Sleep: rectangular sleeping bag rated 10°F below your expected low, sleeping pad with R-value 3+, inflatable pillow, extra blanket for cold sleepers
- Kitchen: two-burner propane stove, 1-pound propane canisters, nesting cookset, utensils, plates, cups, sponge, small wash bin, trash bags, cooler with ice, 5 to 7-gallon water jug
- Lighting: LED lantern, headlamp per person, extra batteries
- Clothing: moisture-wicking base layer, fleece mid-layer, rain shell, warm hat, gloves, camp shoes, wool socks (two pairs per day)
- Safety: first aid kit, fire starter, lighter, multitool, map of the area, bear-safe food storage
- Comfort: folding camp chair, small camp table, bug spray, sunscreen
Total cost at mid-range 2026 prices: $500 to $800 for a two-person setup. The tent and sleeping bags are the biggest line items.
The Beginner Backpacker's Starter Kit
This list assumes a 3-to-10-mile hike in, one or two nights out, and no resupply. Weight matters here. Every item below can be swapped for a lighter version, but the total kit should aim for a 15 to 20-pound base weight.
- Shelter: 2-person UL tent (under 4 lbs) or a tarp setup, trekking poles if the tent requires them
- Sleep: mummy sleeping bag rated 10 to 15°F below expected low, inflatable sleeping pad with R-value 3+, pump sack, inflatable pillow
- Kitchen: canister stove (under 5 oz), 100g isobutane canister, titanium or aluminum pot, spork, lighter, small folding knife
- Water: 2 to 3-liter bladder or bottles, squeeze filter or gravity filter, backup purification tablets
- Lighting: headlamp (no lantern needed)
- Clothing: two base layers, one mid-layer, rain shell, one spare pair of socks, lightweight sandals, warm hat, gloves
- Safety: first aid kit, repair kit (duct tape, tent pole sleeve), signal mirror, emergency blanket, navigation (map, compass, or GPS app with offline maps)
- Storage: 50 to 65-liter internal-frame backpack, bear canister or hang bag, dry bags for sleeping bag and clothes
Total cost for a full beginner backpacking kit: $700 to $1,200 if you shop carefully. Premium pushes it to $1,500 to $2,000.
The Family Camper's Add-Ons
Everything above, plus a few family-specific items.
- 6-person tent instead of 4-person (kids need space)
- Extra headlamp per child
- Shade structure or tarp for midday sun
- Games, cards, and small toys
- Extra water and snacks
- Kids' sleeping bags rated for colder temps than you'd expect. Small bodies lose heat faster.
- Wipes, hand sanitizer, and a dedicated trash bag for diapers if applicable
Your Three Non-Negotiables: Shelter, Sleep, and Water
If you're on a budget and can only spend on three categories, spend on these. A bad tent, bad sleep system, or bad water plan will ruin your trip faster than anything else. Everything else can be improvised.
Shelter: Tent, Tarp, or Hammock
Tents are the beginner default for good reason. They're forgiving, freestanding, and bug-proof. A basic 3-season, double-wall, freestanding tent handles 90 percent of beginner camping scenarios.
Key specs to check before buying:
- Capacity: Add one to the stated number. A 2-person tent is comfortable for one adult plus gear.
- Season rating: 3-season (spring, summer, fall) is the right pick for beginners. 4-season tents are heavy, expensive, and only needed for winter or high wind.
- Hydrostatic head: Minimum 1,200mm for the rainfly. Look for 2,000mm+ for sustained rain.
- Pole material: Aluminum is more durable than fiberglass and worth the price difference.
- Vestibule: At least one, for storing boots and gear outside the sleeping area.
- Freestanding: You can pick up a freestanding tent and move it, which is essential for beginners who pitch on a bad site.
Tarps are lighter and cheaper but require more skill to pitch. They offer less protection from bugs. Hammocks work well in forests but need trees spaced 12 to 15 feet apart.
They also require a rain fly and underquilt for warmth. For beginners, a tent is almost always the right first shelter.
Sleep System: Why the Pad Matters More Than the Bag
Here's the counterintuitive truth our research keeps surfacing: the sleeping pad matters more than the sleeping bag. A pad's R-value measures its resistance to heat loss. It's the single biggest variable in whether you sleep warm.
R-values stack. If you already own a pad rated R-2 and you're cold, adding a closed-cell foam pad (R-2) under it gets you to R-4 without buying a new pad.
Use this table to pick your pad.
| Expected Nighttime Low | Minimum R-Value |
|---|---|
| 50°F+ | 1 to 2 |
| 40°F | 2 to 3 |
| 30°F | 3 to 4 |
| 20°F | 4 to 5 |
| Below 20°F | 5+ |
For sleeping bags, the key spec is the temperature rating. Per ASTM F3340 and the older EN 13537 standard, bags are tested with three ratings: comfort, lower limit, and extreme. Brands advertise the lower limit, which assumes you're a warm sleeper using a pad with a proper R-value and wearing a full base layer.
For beginners, buy a bag rated at least 10°F below your expected low. If the forecast low is 40°F, buy a bag rated to 30°F. If you're a cold sleeper, go 15°F below.
The comfort rating is the one that actually matters. Check the manufacturer's spec sheet rather than the marketing sticker.
Down versus synthetic is a real decision. Down bags are lighter, compress smaller, and last longer. But they lose insulation when wet and cost more.
Synthetic bags are heavier but keep you warm even when damp. They also cost less. For car camping, synthetic is fine.
For backpacking, down pays off in weight savings.
Water: Filters, Tablets, and When the Tap Isn't Trusted
If your campground has potable water spigots, you only need bottles and a jug. Skip filtration entirely.
If you're drinking from streams, lakes, or springs, you need to treat it. Waterborne pathogens include bacteria, protozoa, and viruses. Per EPA guidance, water from natural sources should never be considered safe to drink without treatment.
The common beginner options:
- Squeeze filters (0.1 micron absolute): Remove bacteria and protozoa. They do not remove viruses. That makes them unsuitable for heavily contaminated sources. Lightweight and fast, and most beginners start here.
- Gravity filters: Same filtration as squeeze filters, but you hang the bag and let gravity do the work. Great for groups or basecamps.
- Purification tablets (chlorine dioxide): Kill bacteria, protozoa, and viruses. Take 30 minutes to 4 hours depending on temperature. Good backup, but the taste is off-putting to some.
- UV purifiers: Kill everything but require clear water and batteries. Not the best first purchase.
For US camping, a 0.1-micron squeeze filter is the standard beginner recommendation. Learn more about water safety from the EPA's drinking water guidance.
What the Season and Climate Change About Your List
Season and climate reshape your gear list more than many beginners realize. A July camping trip in Georgia looks nothing like a July trip in the Rockies. An October trip in either place needs a different kit than the same trip in June.
Summer, Shoulder Season, and Winter Branch Points
- Summer (June to August): Lightest kit. 3-season tent, 30 to 40°F bag, R-2 to R-3 pad, bug protection, sun protection.
- Shoulder season (April, May, September, October): Add a warmer bag (20 to 30°F), a puffy jacket, gloves, a hat, and a stove that works in cold. Canister stoves lose pressure below freezing.
- Winter (November to March): 4-season tent or a well-ventilated 3-season with a wind-resistant pitch, 0 to 15°F bag, R-5+ pad, insulated boots, true winter layers, and a stove that runs in cold conditions (white gas or a canister with a pressure regulator).
If you're camping in shoulder season and the forecast is uncertain, bring the winter-warm bag. You can always sleep on top of it if it's too warm.
Desert, Rainforest, Coastal, and High-Altitude Tweaks
- Desert: Shade is more important than insulation. Bring a tarp for sun, extra water (1 gallon per person per day minimum), and a sturdier tent for wind. Nights can drop 40°F below daytime highs.
- Rainforest and humid climates: Full-coverage rainfly, moisture-wicking everything, and a synthetic sleeping bag. Down fails in sustained humidity. Mold risk is real, so dry your gear before storage.
- Coastal: Salt air corrodes zippers and metal poles faster. Rinse and dry your gear after each trip. Wind is the main enemy, so bring extra stakes and guy lines.
- High altitude: UV exposure is 4 to 5 percent stronger per 1,000 feet of elevation gain. Bring stronger sunscreen and extra layers. Plan for sudden afternoon storms. Above 8,000 feet, temperatures drop roughly 3.5°F per 1,000 feet of elevation gain. A 30°F bag that works at sea level may not be enough at 9,000 feet.
Kitchen, Light, and Power: The Gear Beginners Always Underestimate
Cooking and lighting are where beginners cut corners and regret it. They're also the categories where the best pick depends entirely on your trip type. For anyone planning a full camp kitchen setup at home and on the trail, our home and kitchen category covers cookware and prep gear that overlaps with what you'll use camping.
Camp Stoves and Fuel Types
Stove choice comes down to fuel, and fuel comes down to your trip. Here's how the four main types compare.
| Stove Type | Best For | Pros | Cons |
|---|---|---|---|
| Isobutane canister | Backpacking, 3-season | Light, easy to use, cheap stove | Loses pressure below 20°F |
| Alcohol (Trangia-style) | Ultralight, solo trips | Silent, cheap fuel, reliable | Slow, hard to simmer |
| White gas (liquid fuel) | Winter, altitude, groups | Works in cold, powerful | Heavy, requires priming, smells |
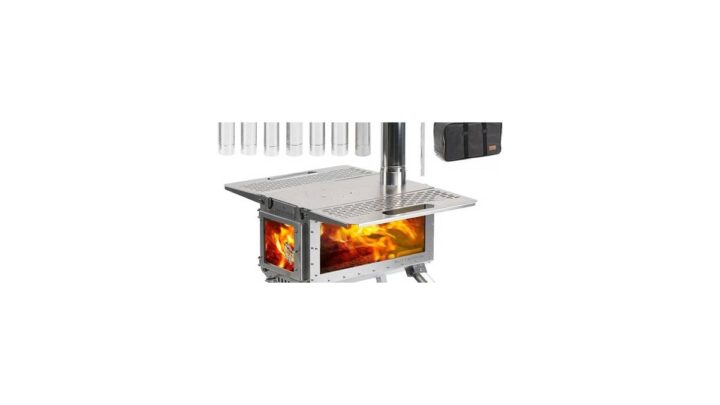
| Wood-burning | Emergency backup | Free fuel, no canister | Smoky, slow, banned in many fire-restricted areas |
If you're car camping, a two-burner propane stove is the right answer. It's cheap, powerful, and works in almost any weather because propane flows down to -40°F. For backpacking, a small canister stove is the default pick.
For winter, white gas is the safest bet. Manufacturers like MSR publish cold-weather performance specs worth checking.
Never cook inside your tent. Carbon monoxide from any fuel-burning stove can kill you. The CDC warns that CO poisoning is entirely preventable and entirely silent.
Cook in a vestibule with the door open, or better, outside.
Headlamps, Lanterns, and Why Your Phone Flashlight Fails
Your phone will die. Your phone will also tie up a hand you need for cooking, hanging bear bags, or finding the trail to the pit toilet at 2 AM. A headlamp costs $20 to $40 and is arguably the single best-value gear purchase a beginner can make.
For car camping, add a lantern for ambient light at the site. For backpacking, one headlamp per person is plenty.
Look for at least 200 lumens, a red-light mode (preserves night vision and doesn't wake tentmates), an IPX4 water resistance rating minimum, and a battery life of at least 6 hours on medium. Alkaline batteries are fine, but rechargeable lithium-ion headlamps save money long-term.
Batteries, Power Banks, and Charging on the Road
If you're car camping, bring a small power bank (10,000mAh) and a car charger. Charge your phone, headlamp, and camera on the drive between sites.
If you're backpacking, keep it minimal: one 10,000mAh battery (about 6 ounces), a short cable, and no excess. Solar chargers sound great but underperform in practice unless you're stationary in full sun for hours.
Clothing and Layers: The System, Not the Shopping List
Camping clothing isn't a list, it's a system. You'll be cold in the morning, warm at midday, cold again at night, and possibly wet in between. The layers you bring matter more than any single item.
The Three-Layer Rule
- Base layer (next to skin): Moisture-wicking. Wool or synthetic. Never cotton. Cotton stays wet and pulls heat from your body up to 25 times faster than dry fabric.
- Mid layer (insulation): Fleece, light puffy, or wool sweater. This traps warmth.
- Shell layer (outer): Rain jacket or wind jacket. Blocks wind and rain.
You can adjust the mid layer up or down depending on temperature. If you're camping in the summer, you might skip the mid layer during the day and add it at night. If you're camping in shoulder season, bring two mid layers (one light, one heavy).
Camp Shoes, Socks, and the Rain Shell You'll Actually Wear
Camp shoes matter more than beginners expect. After a day of hiking, getting your feet out of tight boots and into lightweight sandals or Crocs makes a real difference. Bring them.
Socks: wool (merino) or synthetic only. Two pairs per day if you're hiking. Rotate them.
Let one pair dry on your pack while you wear the other.
Rain shell: This is the one piece of clothing worth spending on. A $40 rain shell will soak through in 20 minutes of sustained rain. A $100 to $150 shell with a hydrostatic head of 10,000mm or higher and taped seams will actually keep you dry.
Manufacturers like Patagonia, Arc'teryx, and REI publish these ratings, and they're worth checking.
The Ten Essentials and the Safety Kit Beginners Skip
The Ten Essentials aren't a suggestion, they're the minimum. The National Park Service and Forest Service both publish this framework as trip-planning guidance. It's the checklist rangers actually use when someone gets into trouble.
If you're missing more than two items, you're not prepared, you're lucky.
Here's what each item means for a beginner, plus the specific gear that hits the mark.
- Navigation: A paper map of the area, a compass, and a phone with offline maps downloaded. Cell service disappears fast outside towns.
- Sun protection: SPF 30+ sunscreen, lip balm with SPF, sunglasses, and a hat.
- Insulation: An extra layer you weren't planning to wear. A puffy jacket or fleece lives in your pack even in summer.
- Illumination: A headlamp with fresh batteries, plus a spare set.
- First aid: A basic kit with bandages, blister care, pain relievers, antihistamines, and any personal medications.
- Fire: Two lighters, waterproof matches, and a fire starter. Fire isn't just for warmth, it's a signal tool.
- Repair tools: Duct tape, a multitool, a tent pole splint, and a needle for gear fixes.
- Nutrition: One extra day of food, no matter how short the trip.
- Hydration: Two ways to carry water, plus a treatment method if you're drinking from natural sources.
- Emergency shelter: A space blanket or emergency bivy. Weighs less than 4 ounces and can save your life in a sudden storm.
The emergency shelter item catches beginners off guard. It sounds redundant if you have a tent. But if your tent fails, or you get separated from your pack, or you're caught out mid-hike, a $10 emergency bivy keeps your core temperature stable.
Per NPS guidance, hypothermia kills more campers than any other environmental cause. It can set in at temperatures as mild as 50°F if you're wet and tired.
Navigation, First Aid, and Repair Basics
Navigation is the skill most beginners skip. Download offline maps before you leave. Google Maps and Gaia GPS both support this.
Carry a paper map as backup because phones die.
For first aid, a store-bought kit often skips the two things you'll use most: blister treatment (moleskin, hydrogel pads) and a way to clean a wound when you have no running water. Boost your kit with antiseptic wipes, a few gauze pads, and athletic tape.
Repair kits are small but mighty. A 3-foot strip of duct tape wrapped around a trekking pole or water bottle handles tent repairs, boot blowouts, and gear hacks. A single tent pole splint (a 5-inch aluminum tube) weighs an ounce and turns a snapped pole into a temporary fix.
Bear Storage, Fire Rules, and Local Regulations
If you're camping in bear country, food storage isn't optional. That includes most of the Rockies, Sierra Nevada, Appalachians, and much of Alaska and Canada. Chances are your campground requires either a bear canister, a hang bag, or a designated food storage locker.
Check the specific rules for where you're going. Yosemite, Yellowstone, Great Smoky Mountains, and Adirondack Park each have their own storage requirements. Rangers do enforce them.
Fines run into hundreds of dollars, and a bear that gets human food often ends up euthanized.
Fire rules vary by county, elevation, and season. During high fire danger, campfires and even gas stoves can be banned. Always check the local ranger district or the forest's website before you go.
Firewood transport is also restricted in many areas because of invasive pests like emerald ash borer and spongy moth. Buy firewood locally, within 10 miles of where you'll burn it, or buy certified heat-treated wood.
Leave No Trace in Practice
Leave No Trace (LNT) is the outdoor ethics framework used by land managers across the US and increasingly worldwide. The seven principles are simple, and they matter more as more people camp.
- Plan ahead and prepare
- Travel and camp on durable surfaces
- Dispose of waste properly
- Leave what you find
- Minimize campfire impacts
- Respect wildlife
- Be considerate of others
For beginners, the two principles that matter most are waste disposal and campfire impact. Pack out everything you bring in, including food scraps and toilet paper. If there's no toilet, dig a cathole 6 to 8 inches deep, at least 200 feet from water, trails, and campsites.
If you can't have a fire in a designated ring, don't build one.
Real Budgets: What a Full Beginner Kit Costs in 2024–2025
Beginners consistently underestimate the total. The tent gets priced first, then the sleeping bag. By the time you've added everything else, the cart is three times what you expected.
Here's the real math, broken into the three tier levels.
Budget vs. Mid-Range vs. Premium Breakdown
| Gear Category | Budget | Mid-Range | Premium |
|---|---|---|---|
| Tent (2P) | $50 to $120 | $150 to $300 | $350 to $600 |
| Sleeping bag | $40 to $80 | $100 to $200 | $250 to $500 |
| Sleeping pad | $25 to $50 | $60 to $150 | $150 to $250 |
| Stove | $15 to $30 | $40 to $80 | $100 to $200 |
| Headlamp | $15 to $25 | $30 to $60 | $70 to $120 |
| Backpack | $50 to $90 | $120 to $250 | $250 to $400 |
| First aid kit | $15 to $30 | $30 to $60 | $60 to $120 |
| Water filter | $20 to $35 | $40 to $80 | $80 to $120 |
| Cookset | $15 to $25 | $30 to $60 | $60 to $100 |
| Camp chair | $15 to $25 | $30 to $60 | $60 to $120 |
Totals for a full two-person beginner kit:
- Budget car camping: $300 to $600
- Mid-range car camping: $700 to $1,200
- Budget backpacking: $500 to $900
- Mid-range backpacking: $1,200 to $2,000
Aggregate retailer data shows most beginners land in the mid-range car camping tier on their first purchase. They then spend another 30 to 50 percent over the next two years replacing gear they outgrew or wore out. Spending slightly more upfront on the big three (tent, sleeping bag, backpack) usually saves money long-term.
Buy, Borrow, or Rent: The Smart First-Trip Move
Don't buy everything before your first trip. Rent or borrow the big items, buy the small ones, and figure out what you actually like.
- Rent: REI Rentals, Arrive Outdoors, and many local outfitters rent tents, sleeping bags, pads, and backpacks for $20 to $60 per item per weekend. A full kit rents for $100 to $200.
- Borrow: University outdoor programs, scout troops, and friends are goldmines. Most people who own gear are happy to lend it.
- Buy used: REI Re/Supply, Geartrade, and Facebook Marketplace sell used gear at 40 to 70 percent off retail. Tents and backpacks hold up well if the previous owner took care of them.
- Buy new: Focus your new purchases on items where hygiene or fit matters: sleeping bags, sleeping pads, and backpacks.
A starter strategy that works: rent the big three for your first trip, buy the small stuff (headlamp, stove, cookset, first aid). Use your first trip to figure out what you actually want to own. If you're also considering kitchen gadgets for the campsite, our guide to the best coffee makers covers a few options that work fine on a camp table.
Starter Gear Comparisons Worth Knowing Before You Swipe Your Card
These are the three comparisons beginners ask about most. Each one shapes your total spend and your trip experience more than any other single decision.
Down vs. Synthetic Sleeping Bags
The short answer: down for backpacking and cold, dry climates. Synthetic for car camping, humid climates, and tight budgets.
| Feature | Down | Synthetic |
|---|---|---|
| Warmth per weight | Highest | Lower |
| Packed size | Very small | Bulkier |
| Wet performance | Loses insulation | Retains warmth when damp |
| Durability | 10 to 15 years with care | 5 to 8 years |
| Cost | $150 to $500+ | $40 to $150 |
| Best for | Backpacking, cold dry trips | Car camping, humid regions, beginners |
Down fill is measured by fill power (550, 650, 800, 850+). Higher fill power means more warmth per ounce. An 800-fill down bag at 20°F will weigh 1.5 to 2 pounds.
The same temp rating in synthetic weighs twice that. But down costs two to three times more and needs careful storage (loose, not compressed) to keep its loft.
If you're a beginner on a budget, buy synthetic. You can upgrade to down later once you know you love backpacking.
Canister Stove vs. Alcohol vs. White Gas
We covered the four stove types in the kitchen section. Here's the deeper comparison on the two decisions that trip up beginners.
Canister vs. alcohol: Canister stoves are faster (2 to 3 minutes to boil a liter) and easier to control. Alcohol stoves are silent, ultralight, and use cheap fuel. They take 6 to 10 minutes to boil and can't simmer.
For 90 percent of beginners, canister wins.
Canister vs. white gas: Canister is easier, cleaner, and lighter for 3-season trips. White gas wins in winter, at altitude, and for large groups. It works when it's cold (down to -20°F with proper priming) and one fuel bottle lasts days.
If you're camping only in summer, don't bother with white gas.
Name-Brand vs. Budget Tents: Where the Money Actually Goes
Budget tents (Coleman, Ozark Trail) hit $50 to $120. Premium tents (MSR, Big Agnes, NEMO, Hyperlite) start at $350. What are you paying for?
- Weight: A premium 2P backpacking tent weighs 2 to 3 pounds. A budget equivalent weighs 5 to 8.
- Materials: Higher denier fabrics, aluminum poles, and taped seams on premium tents. Budget tents use thinner polyester, fiberglass poles, and often untaped seams.
- Rain performance: Premium tents publish hydrostatic head ratings of 2,000mm to 3,000mm. Budget tents often skip the rating entirely.
- Warranty: Premium brands often offer lifetime repair services. Budget brands offer 1-year warranties.
For car camping, a budget tent is genuinely fine. It'll handle fair weather and even moderate rain for several seasons. For backpacking or serious weather, the premium jump pays off in weight savings and reliability.
Our camping gear category has more on the specific brands and models worth considering.
Mistakes That Ruin First Trips (And How to Dodge Them)
Every beginner makes at least one of these. The goal isn't to make none. It's to avoid the ones that keep you up all night or send you home early.
Buying Too Much, Too Fast
The single biggest mistake is overbuying on trip one. Beginners buy a full kit, use half of it, and regret the rest. Buy the essentials, rent or borrow the big three, and add gear only when you've identified a real gap.
A rule that works: after each trip, write down the three things you wished you had, and the three things you didn't use. Buy the first list. Don't buy the second.
Sleeping Cold Because of a "Survival Rating"
Sleeping bag temperature ratings aren't standardized across all brands. The "extreme" rating on the tag is the temperature at which a warm sleeper in a base layer on a proper pad might just barely survive, not sleep. Per ASTM F3340 (and the older EN 13537 standard it replaced), bags are tested for comfort, lower limit, and extreme.
For beginners, buy a bag rated 10°F below your expected low. Go 15°F below if you sleep cold. Remember that sleeping temperature depends on the pad.
A 20°F bag on an R-1 pad will freeze you. A 30°F bag on an R-5 pad will sleep warm.
Forgetting Stakes, Tarps, and the Small Stuff
The small stuff is what ruins trips. Beginners forget:
- Stakes (a tent without stakes is a kite)
- A ground tarp or footprint (punctures and moisture eliminate tent floors fast)
- A mallet or rock for driving stakes
- Bear storage (bag, canister, or hang line)
- Trash bags (you'll want at least two)
- A small sponge and dish soap
- Bug spray and sunscreen (both, always)
- A backup lighter
- Toilet paper and a trowel if there's no toilet
Pack these before the fun gear. They're cheap, light, and the ones you'll miss most when they're gone.
Underestimating How Cold It Gets at Night
Temperatures drop 15 to 30°F from daytime highs. A 75°F day becomes a 45°F night fast. In the desert, that swing can be 40°F.
In high mountains, it can be more.
If the forecast low is 45°F, pack for 35°F. If you're at altitude, subtract another 5 to 10°F. A puffy jacket, warm hat, wool socks, and gloves live in your camp bag even in summer.
They weigh a pound and save your trip.
Skipping the Test Pitch and Shakedown Trip
Pitch your tent in the yard before you go. Light your stove on the kitchen counter. Try on your pack loaded with 20 pounds of books.
Every item that fails at home is one fewer thing to troubleshoot in the dark.
If you can, take a shakedown trip: one night close to home or the car, with your new gear. You'll learn more in that one night than in 20 hours of reading. You'll also find the missing items before they matter.
Ignoring the Forecast and Trip Rules
Weather changes trip plans. Fire bans change what you can cook. Bear rules change where you sleep and eat.
Campground rules change quiet hours and generator use.
Check three things before every trip: the 7-day forecast for your area, the local fire restrictions, and the campground or land manager's rules. All three are usually a quick web search or phone call away. If you're building out your camp kitchen and want to pair coffee prep with your cooking setup, our picks for a dependable everyday brewer work fine on a picnic table too.
How to Pack, Pitch, and Break Camp the First Time
The gear list is done. Now the workflow that keeps you from fumbling in the dark. Pitch order, packing categories, and campsite selection are the difference between a smooth setup and a stress spiral, especially on your first few trips.
Packing by Category, Not by Whim
Pack in groups, not in a jumble. Grouping lets you find things fast and repack quick. Duct tape wrapped around a water bottle at the bottom of a duffel is functionally lost.
Use these four categories and keep them separate:
- Sleep: tent, footprint, sleeping bag, pad, pillow, extra blanket
- Kitchen: stove, fuel, cookset, utensils, food, water, wash bin, dish soap, sponge, trash bags
- Clothing: base layers, mid layers, shell, camp shoes, socks, hat, gloves
- Safety and smalls: first aid kit, headlamps, batteries, multitool, map, bear storage, bug spray, sunscreen, toiletries
Weight distribution matters more for backpacking than car camping, but the rule is the same. Heavy items sit in the middle of your pack, close to your spine. Lighter items go at the top and bottom.
Anything you'll need during the day (snacks, water, map, rain shell) goes in the top pocket or an outside pocket.
Tent Pitch Order and Site Selection
Site selection comes before the pitch. Get it wrong and no pitch job will save you.
- Look up: No dead branches overhead. A limb from a widow-maker tree can kill.
- Look down: No slope more than a few degrees, no obvious drainage paths, no low spots. You're looking for a flat, well-drained surface.
- Check for rocks and roots: Kick the ground with your boot or press with your hand. If you feel hard spots, move on.
- Consider the wind: Pitch so the tent's lowest edge faces prevailing wind. That keeps the door from catching gusts.
- Respect the rules: Most campgrounds require pitching on established pads or in designated zones. Don't move to a better spot if the rules say otherwise.
Once the site is chosen, here's the pitch order that works for almost every tent:
- Lay down the footprint or ground tarp. It should be slightly smaller than the tent floor so rain doesn't pool underneath.
- Stake the four corners of the tent body if it's freestanding. Lay out poles first if it's not.
- Assemble the poles and feed them through sleeves or attach them to clips. Most beginner tents use clips.
- Raise the tent body by inserting pole ends into the corner grommets.
- Attach the rainfly over the tent body.
- Stake out the vestibule and guy lines.
- Adjust tension. A taut tent sheds water and wind. A floppy tent flaps and leaks.
- Clip in and tighten any interior loops or gear pockets.
Breaking Down and Drying Gear Before Storage
Pack-out matters as much as pack-in. The goal is to leave the site looking like no one was there, and to keep your gear alive for the next trip.
- Empty and shake the tent. Remove every crumb, leaf, and bug.
- Wipe the tent floor with a damp cloth. No soap needed unless it's badly soiled.
- Shake out the sleeping bag. Let it air for 10 to 15 minutes before packing if there's any dampness.
- Drain the stove. Run the fuel canister until it's empty if you're storing it long-term. Don't over-tighten connections.
- Dump the cooler. Never leave ice or food inside.
- Pack out all trash. Even the small stuff. Even food scraps.
- Do a final sweep. Walk the site in a slow grid. You'll find stakes, guy lines, and small items you forgot.
When you get home, unpack the tent and sleeping bag. Both need to air-dry completely or they'll mildew within 48 hours. Set the tent up in the garage or a sunny yard, and hang the bag loosely in a closet.
This single habit doubles the lifespan of both.
Your First-Trip Decision Guide: Answer 5 Questions, Get Your List
Five questions. Answer each and you'll land on a specific gear list, no more guessing. Here's the full branch logic.
Question 1: What Kind of Camping Are You Doing?
- Car camping (developed site): Full car camping list. Prioritize comfort. Skip filters, water treatment, and ultralight gear.
- Car camping (dispersed/boondocking): Car camping list plus water filter, trowel, bear storage, and a way to deal with waste.
- Backpacking (under 5 miles in): Backpacking list. Base weight target under 20 pounds.
- Backpacking (5+ miles in): Backpacking list, ultralight priorities, careful food planning.
Question 2: What Season Are You Camping In?
- Summer: 30 to 40°F bag, R-2 to R-3 pad, 3-season tent, light clothing.
- Spring or fall: 20 to 30°F bag, R-3 to R-4 pad, extra mid-layer, hat, gloves.
- Winter: 0 to 15°F bag, R-5+ pad, 4-season tent if possible, insulating layers, white gas or pressure-regulated canister stove.
Question 3: How Many People?
- Solo: 2-person tent, 1 sleeping bag, 1 pad, small cookset, solo stove.
- Couple: 2 to 3-person tent, 2 bags, 2 pads, larger cookset, 2-burner or higher-output stove.
- Family (2 adults + kids): 4 to 6-person tent (add a berth for gear), full cookset, larger cooler, extra water, extra lighting.
Question 4: What's the Climate Like?
- Temperate (mild, occasional rain): Standard 3-season kit. Reliable rain shell.
- Hot and dry (desert): Shade tarp, extra water (1 gallon per person per day), sun protection, light layers.
- Humid or rainforest: Synthetic sleeping bag, full-coverage rainfly, moisture-wicking everything.
- Coastal: Extra stakes, guy lines, corrosion-resistant gear, wind-resistant pitch.
Question 5: Do You Have Vehicle Access at the Site?
- Yes: Full car camping kit. Cooler, camp chair, big tent, heavy stove.
- No: Backpacking kit. Every item must earn its place by weight.
Here's the full decision table for quick reference:
| Trip Type | Tent | Bag | Pad R-Value | Stove | Water Plan |
|---|---|---|---|---|---|
| Summer car camping | 4P, any weight | 30°F synthetic | 2 to 3 | 2-burner propane | Campground tap |
| Shoulder car camping | 4P, 3-season | 20°F synthetic | 3 to 4 | 2-burner propane | Campground tap or filter |
| Summer backpacking | 2P, under 4 lbs | 30°F down | 2 to 3 | Canister | Filter |
| Shoulder backpacking | 2P, 3-season | 20°F down | 3 to 4 | Canister with regulator | Filter |
| Winter backpacking | 4-season or bomber 3-season | 0 to 15°F down | 5+ | White gas | Filter + insulated bottles |
If you're still on the fence about one item, our camping gear category has deeper dives on the specific pieces.
Keeping Your Gear Alive: Simple Maintenance That Doubles Its Lifespan
Good gear doesn't die. It gets neglected. The single biggest factor in how long your kit lasts is what you do in the 24 hours after you get home.
Tent and Rainfly Care
- Dry completely before storage. Set the tent up indoors or in the shade for a few hours. Never store a damp tent.
- Clean the zippers. Zipper teeth get grit and pine needles. A soft brush and water fix it. Don't use oil or grease on tent zippers, it attracts dirt.
- Reproof the rainfly every 1 to 2 years. DWR (durable water repellent) coating wears off with UV exposure and use. When rain stops beading, wash the fly with a tech wash and reapply a DWR spray or wash-in.
- Store loosely. Never keep the tent compressed long-term. Stuff it loosely in a breathable bag and keep it in a cool, dry space.
- Watch for UV damage. Ultraviolet light degrades tent fabric fast. If you pitch in full sun every trip, your tent will wear out in 3 to 5 years instead of 10. Use a shade tarp if you can.
Sleeping Bag and Pad Storage
- Never store a sleeping bag in its stuff sack. Compression destroys loft, and loft is warmth. Hang it in a closet or store it loose in a large cotton or mesh bag.
- Spot clean only. Washing machines stress sleeping bags. Use a front-loader on gentle if you must, but spot cleaning with a damp cloth is usually enough.
- Air out after every trip. Open the bag and let it dry fully. Even a small amount of overnight condensation inside the bag can trigger mildew.
- Protect your pad. Inflate your pad at home to check for slow leaks. Store it flat with the valve open if possible, or loosely rolled. Never leave a pad compressed.
- Watch for pinholes. Small leaks from thorns and grit are common. A patch kit costs a few dollars and fixes most pads for years. Find a leak by inflating the pad and running a soapy water solution over the surface. Bubbles mark the spot.
Stove, Filter, and First Aid Refresh
- Stove: Empty fuel canisters before long storage. Check O-rings each season. Replace if they crack or harden.
- Water filter: Backflush after every trip and use the manufacturer's cleaning method. Hollow-fiber filters last hundreds of liters if backflushed, but freeze damage kills them. In winter, keep the filter in your sleeping bag or coat.
- First aid kit: Inventory each season. Replace anything that expires, including medications and antiseptic wipes. Add items specific to your region. A tick removal tool matters in the Northeast. A snake bite kit matters in the Southwest.
- Headlamp: Remove batteries for long storage. Clean the contacts with a pencil eraser if they corrode.
A simple maintenance schedule keeps your kit in shape:
| Item | After Every Trip | Every Season | Every 1 to 2 Years |
|---|---|---|---|
| Tent | Dry, shake out, check stakes | Inspect seams and zippers | Reproof rainfly |
| Sleeping bag | Air out, store loose | Spot clean dirt | Deep wash if needed |
| Sleeping pad | Deflate, store flat | Inflate and check for leaks | Replace if failing |
| Stove | Empty fuel, wipe clean | Check O-rings | Replace O-rings |
| Water filter | Backflush | Clean with filter cleaner | Replace cartridge per use count |
| First aid kit | Replace used items | Full inventory, check expiration | Full restock |
Treat your gear well and a $500 beginner kit easily lasts 5 to 8 years. Neglect it and you'll be replacing pieces every season.
Beginner Camping Gear FAQs
Do I really need a sleeping pad if I'm car camping?
Yes. Ground pulls heat from your body all night, no matter how comfortable the mattress feels. A pad with at least R-2 is the minimum, and R-3 to R-4 is better for shoulder-season trips.
Skipping a pad is the fastest way to sleep cold even in summer. A $50 self-inflating pad is a solid beginner choice.
Can I use a regular blanket instead of a sleeping bag?
You can, but it works worse. Blankets slide off in the night, let in drafts, and provide no insulation from below. A sleeping bag rated for the temperature you'll face is warmer, lighter, and packs smaller.
For car camping in mild weather, a blanket plus a warm pad is a viable backup.
What's the cheapest way to try backpacking before buying gear?
Rent or borrow. REI Rentals, Arrive Outdoors, and local outfitters rent tents, packs, sleeping bags, and pads for a weekend. Many colleges and universities rent gear to students.
Borrow from friends if possible. A first backpacking trip costs $50 to $150 if you rent, versus $700 to $1,200 to buy.
How do I know what temperature rating I need?
Check the expected overnight low for your trip's location and dates. Then subtract 10°F. If the forecast low is 40°F, buy a bag rated to 30°F.
If you sleep cold, subtract 15°F. The comfort rating on the bag is the number that matters, not the lower limit or the extreme rating.
Is a bear canister required where I'm camping?
In many US national parks and wilderness areas, yes. Yosemite, Sequoia, Kings Canyon, Great Smoky Mountains, and much of the Adirondacks require approved hard-sided canisters. Check the specific land manager's website for the area you're visiting.
If a canister is required, rental is often available at the park entrance or a local outfitter.
What gear should I never buy used?
Anything that touches your body long-term, or that has an expiration. Skip used sleeping bags and sleeping pads unless you know the previous owner. Also skip used helmets, climbing gear, and anything safety-critical.
Tents, backpacks, stoves, cooksets, and camp chairs are fine to buy used if they're in decent shape.

Similar Posts