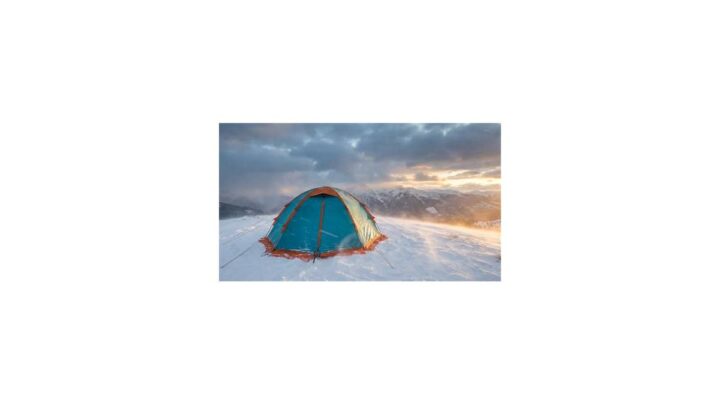
How to How to Choose a Camping Tent 2026
Lead Consumer Product Specialist & Family Gear Director at US Family Mart Consumer Testing Lab · Certified Consumer Products Quality Specialist (CPQS), ASTM F15 Consumer Standards Member · 12+ years evaluating household appliances, smart home hardware, child safety equipment, and consumer lifestyle products.
Selecting the right camping tent starts with your trip, not the tent. The shelter that works for a solo backpacker in the Rockies is completely wrong for a family car camping in Florida. So before you look at a single product page, you need to know how to choose a camping tent based on where you're sleeping, who's with you, and what you're carrying.
The tent industry rates almost everything on a 3-season scale, which covers late spring through early fall in most climates. As of 2026, the accepted waterproofing floor for sustained rain sits at a 1,500mm hydrostatic head rating, per the EN 5912 European tent standard adopted by most manufacturers. Below that number, a storm will find its way in.
Everything else flows from there.
how to choose a camping tent
Match your tent to your trip type first. Count the real people sleeping inside, not the marketing number. Pick a 3-season tent for normal weather and a 4-season only for snow or severe wind.
Check packed weight if you're hiking in. Set a budget before you browse.
Start With the Trip, Not the Tent
Your trip type is the single biggest filter. It kills about 80% of the options on any outdoor retailer's site in one move. Decide this before anything else.
Everything downstream, weight, capacity, season rating, price, flows from that first fork in the road.
Here's the core question: are you carrying this tent on your back, or driving it to the campsite?
If you're hiking in and camping overnight on a trail, you're a backpacker. Weight is the dominant constraint. You'll want something under 5 lbs, ideally under 3 lbs for solo.
If you're driving to a site and pitching within a few hundred feet of your car, you're a car camper. Weight barely matters. Comfort, height, and floor space matter much more.
If you're paddling in, bikepacking, or carrying gear on horseback, you're in a hybrid zone. Packed size becomes critical alongside weight.
There's a second fork that trips people up: how many nights a year will you actually use this tent? A tent you'll pitch twice a summer doesn't need the same build as one you'll live in for six months on a thru-hike.
In our research across aggregate buyer reviews, the people who most regret their purchase are the ones who overbought. They bought a featherweight ultralight setup for occasional car camping, then hated the cramped, low-ceiling interior on a weekend trip. Or they bought a massive family palace for one backpacking attempt and left it in the garage forever after.
Match the tent to the trip you actually take, not the trip you imagine.
The Five Questions That Decide Everything
Answer these five in order, and you'll land on a shortlist of maybe three tents that fit your actual situation. Skip one and you'll waste money.
1. Am I carrying it or driving it?
Backpacking sets a hard weight ceiling. Anything over 6 lbs per person gets miserable after mile 8. Car camping removes that ceiling entirely, so lean into space and height.
2. How many people are really sleeping inside?
Count adults, kids over the age of 6, and dogs. Then add one to the count. Tent capacity ratings assume people lying shoulder-to-shoulder with zero gear inside.
3. What weather am I likely to face?
July in the Ozarks means bugs and humidity. October in the Rockies means hard frosts. July in Iceland means sideways rain and wind.
Your season rating follows the answer.
4. Will I be pitching on dirt, rock, sand, or snow?
Freestanding tents stand up on their own poles and work nearly anywhere. Non-freestanding models depend on stakes, so they need soft, penetrable ground.
5. What's my honest budget?
Tent pricing has four clean tiers, and spending more buys durability and lower weight, not a fundamentally better shelter. A $200 tent will keep you dry. A $700 tent will keep you dry for 10 years instead of 3.
Write those five answers down somewhere. Every product decision from here is a lookup against that list.
Tent Types, Decoded: Dome, Tunnel, Cabin, Bivy, and Tarp
Tent type is where most buyers get lost. There are six shapes that cover nearly everything on the market, and each one solves a different problem.
Dome tents
The market workhorse. Two or three poles cross at the top, creating a self-supporting arch. Dome tents resist wind well, shed rain reliably, and pack small.
Best for: Almost everyone. If you're unsure, buy a dome.
Tunnel tents
Long, sleeve-and-pole designs that run ridge-style from front to back. They offer excellent headroom down the length of the tent but rely heavily on guyline tension in wind.
Best for: Car campers and base-camp users who want front-to-back living space. Less ideal for exposed alpine pitches.
Cabin tents
Vertical walls and near-vertical ceilings, often 6 to 7 feet tall. Cabin tents feel like a small room. They're heavy, take longer to pitch, and catch wind like a sail.
Best for: Families and long-stay car campers. Terrible for backpacking.
A-frame tents
The classic canvas shape. Still common in heavier canvas models for base camps and glamping setups.
Best for: Nostalgia and cold-weather canvas camping. Rarely the smartest modern choice.
Bivy sacks
A single-person, single-wall shelter barely bigger than a sleeping bag. Weighs 1 lb or less.
Best for: Fast-and-light alpine climbers, ultralight thru-hikers, and emergency backup. Not comfortable for anyone wanting to sit up.
Tarp shelters
A flat or shaped tarp pitched with trekking poles or trees and guylines. Weighs as little as 8 oz packed.
Best for: Experienced ultralight backpackers who know how to pitch in bad weather. Steep learning curve.
| Tent Type | Weight Range | Wind Resistance | Interior Space | Best Use |
|---|---|---|---|---|
| Dome | 2 to 8 lbs | High | Moderate | All-around |
| Tunnel | 4 to 12 lbs | Moderate | High | Car camping, base camp |
| Cabin | 15 to 40 lbs | Low | Very high | Family car camping |
| Bivy | 0.5 to 2 lbs | Moderate | Minimal | Ultralight, emergency |
| Tarp | 0.5 to 2 lbs | Low to moderate | Minimal | Experienced UL hikers |
If you're building out your whole kit alongside the tent, our outdoor field essentials hub covers the rest of the loadout.
Matching Capacity to Real People (Not Marketing Math)
Tent capacity ratings are the single most misleading spec on any box. A "2-person" tent means two adults, in mummy bags, with no gear between them, lying shoulder to shoulder on a flat floor.
Add a single backpack, a pair of boots, and a dog, and that same tent feels like a coffin.
Here's the rule experienced campers use: buy one size larger than your actual headcount.
A solo camper who wants space for gear and the ability to sit up comfortably buys a 2-person tent. A couple buys a 3-person. A family of four buys a 6-person, because two of those people are kids who want their own corner.
Dogs deserve their own slot. A 60 lb dog needs roughly the floor footprint of a small child.
Interior livability matters as much as floor area. Look at two more specs:
- Peak height. Below 40 inches, you cannot sit up in the center. Aim for 42 to 48 inches for backpacking, 60 to 84 inches for car camping.
- Floor area in square feet. 20 sq ft fits one person. 30 to 35 sq ft fits two comfortably. 60+ sq ft is family territory.
Vestibule space is the sleeper spec. A good vestibule (the covered porch area under the rainfly) holds two packs and a pair of muddy boots without tracking dirt into the sleeping space. Two doors and two vestibules make a tent dramatically more livable for two people.
Budget tip: a 3-person tent with two doors and two vestibules usually costs only 10 to 15% more than the 2-person version of the same model. Buy the 3P. Always.
3-Season vs. 4-Season: What the Rating Actually Means
Season ratings are the most misunderstood spec in tent shopping. Read them wrong and you either freeze or boil.
A 3-season tent is designed for late spring through early fall. It's the standard tent most people buy. It has mesh panels for ventilation, a partial rainfly that allows airflow, and enough structure to handle typical wind and rain.
A 4-season tent (also called a mountaineering tent) is built for winter and severe alpine weather. It trades ventilation for wind resistance and snow-load capacity. Solid inner walls block spindrift and retain warmth.
Poles are stronger. Guyline points are more numerous.
Here's the thing: a 4-season tent is the wrong tent for summer camping. The reduced ventilation turns it into a condensation oven. You'll wake up soaked from your own breath.
There's also a 3.5-season category. This is a marketing term, not a standardized rating. It generally means a 3-season tent with reinforced poles and a slightly beefier fly.
Useful for exposed fall camping, pointless for casual summer trips.
How to pick your season rating
- Camping June through September in most of the US and UK: 3-season.
- Camping year-round or in sustained snowfall: 4-season.
- Camping shoulder seasons (April, October) at moderate elevation: 3-season with a full-coverage rainfly.
- Camping in severe wind (coastal, alpine, exposed ridgelines): 4-season, regardless of temperature.
One warning that matters: a 3-season tent pitched in real winter conditions can collapse under moderate snow load, burying you in the process. Never rely on a 3-season shelter for snow camping. This is one of the genuine safety lines in tent selection.
For a broader look at general camping prep, our camping essentials section digs into the rest of the overnight picture.
Freestanding vs. Non-Freestanding: Where You'll Pitch It Matters
A freestanding tent stands up on its own pole structure without needing a single stake. You can pick it up, shake it out, and set it down in a new spot in seconds. Stakes just hold it in place.
A non-freestanding tent (also called a trekking-pole tent or tarp tent) relies on stakes and guyline tension to hold its shape. Without a good stake holding each corner, it collapses.
Here's the if/then logic that decides this one:
- If you camp mostly on forest floors, grassy pitches, and established campsites with penetrable soil, then non-freestanding works fine and saves serious weight.
- If you camp on rock, granite slabs, sand, or snow, then you need freestanding.
- If you're a beginner who hasn't mastered guylines and tensioning, then buy freestanding. It's more forgiving.
- If you're an ultralight backpacker chasing a sub-2 lb shelter, then a trekking-pole tent is often the answer.
The weight difference is real. A freestanding 2-person backpacking tent typically runs 3 to 5 lbs. A trekking-pole equivalent often comes in under 2 lbs.
The tradeoff is skill. Non-freestanding tents require a proper pitch to survive wind and rain. Badly pitched, they leak and flap.
Well-pitched, they handle storms better than most freestanding tents in the same weight class.
For any camper who wants to pitch on beach sand, snow, or rock, freestanding is the safe call. Sand and snow stakes exist, but they're fussy and unreliable.
If you're also setting up your wider shelter plan for weather, our long-term gear guide covers what to pair with your tent across a full camping season.
Fabrics, Denier, and Hydrostatic Head: Reading the Spec Sheet
The spec sheet tells you more about a tent's real-world performance than any product photo ever will. Three numbers matter most: fabric type, denier, and hydrostatic head.
Fabric type breaks into two families. Nylon is lighter and stronger for its weight, but it stretches when wet and degrades under UV faster. Polyester is slightly heavier but more UV-resistant and doesn't sag in rain.
Both work. Nylon wins for backpacking, polyester wins for long-term car camping.
You'll also see coated fabrics with brand names. Silnylon is silicone-coated nylon, extremely light and strong, common in ultralight tents. Dyneema Composite Fabric (DCF) is the premium option, roughly 3x the price and half the weight. It's used on expedition-grade shelters.
Denier is the fiber thickness unit. Lower denier means lighter fabric but less abrasion resistance.
- 15D to 20D: Ultralight territory. Feathery, but puncture-prone. Usually paired with a footprint.
- 40D to 75D: The everyday mid-range. Good balance of weight and durability.
- 150D and above: Heavy-duty floors and car camping tents. Nearly bombproof, but heavy.
Hydrostatic head measures how much water pressure a fabric resists before it leaks. It's tested by clamping fabric under a column of water and measuring the height at which water penetrates.
| Hydrostatic Head | Real-World Performance |
|---|---|
| Under 1,000mm | Light drizzle only. Will fail in real rain. |
| 1,000 to 1,500mm | Light rain, brief exposure. |
| 1,500 to 3,000mm | Solid general camping. Handles most storms. |
| 3,000mm and above | Sustained heavy rain, expedition conditions. |
The EN 5912 European tent standard sets 1,500mm as the practical minimum for a tent you'll actually camp in. Anything claiming under 1,000mm should not be trusted for real weather.
Seam sealing matters as much as the fabric. Factory-taped seams mean the manufacturer sealed the stitching on the inside. Untaped seams need to be sealed yourself with a silicone seam sealer.
Check this before you buy. Cheap tents often skip it.
PU coatings (polyurethane) are the standard waterproof layer on most production tents. Silicone coatings last longer and don't degrade into a sticky mess, but they're harder to repair on the trail with common seam-sealer products.
One more spec people miss: DWR (durable water repellent) finish. This is the coating that makes rain bead up and roll off. It wears off over a few seasons and can be restored with a spray-on or wash-in DWR treatment.
Poles, Zippers, and Seams: Where Cheap Tents Fail First
Every tent fails at one of three places: the poles, the zippers, or the seams. If you know which one to inspect, you can predict a tent's lifespan before you buy it.
Poles
Four materials show up on tent poles.
- Fiberglass. Cheap, heavy, breaks easily. Common on budget tents under $100. If the pole cracks, the tent caves in.
- Aluminum 7001. The industry standard for mid-range to premium tents. Light, springy, holds shape.
- Aluminum 7075. Slightly stronger and stiffer than 7001. Found on 4-season and mountaineering tents.
- Carbon fiber. The lightest option. Expensive, and it shatters rather than bends under stress.
Pole diameter matters too. 8.5mm poles are ultralight but flex more in wind. 11mm to 13mm poles are stiffer and hold up in alpine conditions. If the listing doesn't name a diameter, it's usually on the thin and weak side.
Check the pole configuration. Clip poles snap onto the tent body and pitch fast. Sleeve poles slide through fabric channels and are slightly more weathertight but slower to assemble. Most modern tents use clips.
Zippers
The zipper brand stamped on the pull is a genuine quality signal. YKK zippers are the global standard for outdoor gear. They survive thousands of cycles. No-name zippers on cheap tents often fail within a season, usually at the door curve where stress is highest.
Look for water-resistant zippers on the rainfly and door. They're a tighter weave and less likely to leak, but slightly stiffer to operate.
Seams
Stitching creates thousands of tiny holes in the fabric. Untaped seams leak. Every good tent has either factory-taped seams or is sold with the expectation that you'll seal them yourself.
The bathtub floor design matters for seams too. This is where the floor fabric curves up 4 to 8 inches at the sides before meeting the wall. It creates a waterproof tub shape so ground water pools outside the tent, not inside.
In our research across aggregated user reviews, the single most common first failure on budget tents is a seam leak at the floor-wall junction after 8 to 15 nights of use. Taped seams and a tall bathtub floor push that failure point out by years.
The 5-minute pre-purchase inspection
If you're buying in person, do this in the aisle:
- Unzip and rezip the main door twice. Feel for catching or grinding.
- Check the pole sections for even wall thickness and clean ferrules.
- Run your hand along the floor-wall seam. Look for tape or exposed stitching.
- Confirm the rainfly covers the entire tent body, not just 80% of it.
- Check that guyline attachment points are stitched reinforcement, not just fabric loops.
Weight vs. Comfort: The Backpacking Tradeoff
Weight is the tax you pay for every feature you add. Understanding the tradeoff lets you spend your weight budget on the things that matter most to you.
Trail weight is the honest number. It's the tent body, rainfly, and poles, without stakes, guylines, or the stuff sack. Packaged weight adds all that back and usually runs 0.5 to 2 lbs heavier. Always compare trail weights across tents.
Here are realistic trail weight targets by tent size and use case.
| Tent Size | Ultralight | Standard Backpacking | Comfort Backpacking |
|---|---|---|---|
| 1-person | 1.5 to 2.5 lbs | 3 to 4 lbs | 4 to 5 lbs |
| 2-person | 2 to 3 lbs | 4 to 5 lbs | 5 to 7 lbs |
| 3-person | 3 to 4 lbs | 5 to 7 lbs | 7 to 9 lbs |
Per-person weight is the number that actually matters. A 5 lb 2-person tent split between two hikers is 2.5 lbs each. That's a very different experience from a 5 lb 1-person tent carried solo.
What you gain when you add weight
- A second door. Adds 4 to 8 oz, but the difference in livability is enormous for two people.
- A larger vestibule. Adds 3 to 6 oz. Keeps packs and boots outside the sleeping area.
- A full-coverage rainfly. Adds 4 to 10 oz. Essential in sustained rain.
- More interior height. Usually a wash on weight, but requires a different pole design.
- A freestanding structure. Adds 6 to 14 oz over a trekking-pole equivalent.
What you lose when you cut weight
Ultralight tents use thinner fabrics (15D to 20D), thinner poles (8.5mm or less), and fewer features. They're more delicate. They require more careful site selection.
They tolerate less wind. They typically cost 30 to 100% more than a comparable mid-weight tent.
For a hiker covering 15 to 25 miles a day, a 2 lb savings is worth every dollar. For a hiker doing 5 to 8 mile days, it's barely noticeable.
Honest advice: if you're new to backpacking, buy a mid-weight 2-person tent around 4 to 5 lbs. Get a season or two of experience. Then decide whether the ultralight route is worth the money and care requirements.
Size, Height, and Livability for Car Campers and Families
Car camping flips the entire tradeoff. Weight is nearly irrelevant. You can drive a 40 lb tent to the site without noticing.
So the specs that matter shift toward comfort, standing room, and setup speed.
Floor area for families
The rule of thumb: 20 square feet per adult sleeper, 12 to 15 sq ft per child, and 10 sq ft per dog. Add 15% for gear.
A family of four with two young kids and a medium dog needs roughly 90 to 100 sq ft of floor area. That's typically labeled as a 6-person tent. The same family buying the "4-person" version of the same model will be miserable.
Standing room and height
For car camping, you want to be able to stand up inside. Look for a peak height of 72 to 84 inches. Anything below 66 inches forces tall adults to stoop.
Family cabins often have a center peak that's tall but slopes steeply toward the edges. The claimed 84-inch peak might only exist in a 3-foot-wide strip. Check the interior height at the door and at the walls, not just the peak.
Divider rooms and privacy
Many family tents include a removable room divider that splits the interior into two sleeping chambers. This is a genuine quality of life feature for parents and kids sharing a tent. It's also handy for separating sleep schedules.
Setup speed
Pop-up and instant-set tents can go up in under 2 minutes. Traditional pole-and-sleeve designs usually take 5 to 10 minutes for two people. Cabin tents are slower, often 10 to 20 minutes, and are genuinely difficult for one person to pitch in wind.
If you're camping with kids, a fast-pitch design is worth the extra weight and packed size. Setup speed matters when it's getting dark and everyone's tired.
Blackout and darkroom tents
Some modern family tents use a dark-coated fabric that blocks 90% or more of incoming light. These are ideal for summer camping at high latitudes where the sun sets at 11pm, or for families with young kids who wake at sunrise. The tradeoff is a slightly heavier, hotter interior during the day.
Ventilation in warm weather
Family car camping often happens in summer heat. Look for:
- Two doors on opposite sides. Cross-ventilation makes a huge difference.
- Large mesh panels on the inner wall.
- Rainfly vents at the peak. These allow hot air to escape.
- A rainfly design that leaves part of the mesh exposed. Full coverage is warmer; partial coverage breathes better.
Packed size in the car
A 6-person cabin tent typically packs to 40 to 60 L of volume. A 3-person backpacking tent packs to under 15 L. When you're packing a car for a family trip, that extra volume adds up fast.
Measure your trunk space before committing to a huge tent.
If you're outfitting the whole camping kitchen alongside your shelter, our compact brewing equipment picks work well for campsite mornings.
What You'll Actually Pay (and Where the Money Goes)
Tent pricing has four honest tiers. What separates them is durability, weight, and materials, not fundamentally different shelter performance.
| Tier | Price Range | What You Get | Realistic Lifespan |
|---|---|---|---|
| Budget | $50 to $150 | Fiberglass poles, untaped seams, heavy fabrics, fewer doors | 1 to 3 seasons |
| Mid-range | $150 to $400 | Aluminum poles, taped seams, decent fabric, proper rainfly | 4 to 8 seasons |
| Premium | $400 to $900 | Ultralight materials, DWR treatment, advanced pole design | 8 to 15 seasons |
| Expedition | $900 to $1,500+ | Dyneema fabric, 4-season build, storm-rated | 10 to 20+ seasons |
The jump from budget to mid-range is the biggest quality leap. A $200 tent is dramatically better than a $100 tent. The jump from mid-range to premium buys weight savings and lifespan, not a fundamentally different experience in good weather.
Where the money actually goes
- Poles: Aluminum over fiberglass is roughly 40% of the mid-range price bump.
- Fabric: 20D nylon vs. 68D polyester is a 25 to 50% cost swing.
- Seam sealing: Factory taped seams add $20 to $40 to production cost.
- Doors and vestibules: Each additional door adds material and labor.
- Brand markup: Established outdoor brands carry a 15 to 30% premium over generic equivalents.
Hidden costs people forget
- Footprint: $30 to $80. Not required, but extends floor life significantly. A cheap Tyvek sheet cut to size works almost as well for $10.
- Replacement stakes: $15 to $30 for quality Y-beam stakes. Stock stakes are usually junk.
- Seam sealer: $10 to $20 if your tent isn't factory-taped.
- DWR reproofing spray: $15 to $25, needed every 2 to 3 seasons.
- Pole repair splints: $8 to $15. Buy these before your trip, not after a pole breaks.
Should you buy used?
Used tents can be excellent value if you inspect them properly. Check for mold or mildew smell, sticky residue on the fabric (degraded PU coating), stretched or bent poles, broken zipper pulls, and pinholes in the floor. A well-kept 5-year-old premium tent often beats a new budget one on every metric.
Avoid any tent with visible mildew. It weakens fabric permanently and can't be fully removed.
If you're building out your entire car camping kit and want to spend intelligently, our home and kitchen equipment picks cover the essential camp kitchen side.
Mistakes That Cost You Sleep, Money, or Both
Every tent regret we've seen in aggregate reviews traces back to one of these eight mistakes. Fix them before you spend.
Buying the marketed capacity instead of the real capacity. A "2-person" tent is cramped for two adults with gear. Buy one size up. This is the single most common regret.
Choosing a 4-season tent for summer camping. Solid walls and limited ventilation turn it into a condensation chamber. You'll wake up wet. Buy 3-season for normal weather.
Ignoring packed size for backpacking. A light tent that doesn't fit your pack forces awkward strapping. Measure the packed dimensions against your pack volume before ordering.
Skipping the footprint. A $10 Tyvek sheet or a $40 branded footprint doubles or triples the floor's lifespan. Skipping this is a false economy.
Trusting the "waterproof" claim without checking hydrostatic head. No number means no guarantee. Look for 1,500mm or higher.
Pitching without testing at home. Setting your tent up in the yard once before your trip catches missing stakes, wrong poles, or confusing instructions while you're still calm.
Not sealing seams on untaped tents. A 20-minute seam-sealing session after purchase saves you a wet night on the trail.
Overbuying weight savings you'll never use. A $700 ultralight tent for occasional car camping is wasted money. Spend that money on space and comfort instead.
Quick pre-purchase checklist
Before you click "buy," confirm all of the following:
- Real headcount plus one
- Trip type (car vs. backpack) matches tent weight class
- Season rating matches your camping window
- Hydrostatic head is 1,500mm or higher
- Poles are aluminum, not fiberglass
- Seams are taped or you're prepared to seal them
- Packed weight fits your carrying setup
- Rainfly covers the full tent body
- At least one door per two occupants
- You have a footprint plan (branded or DIY)
Pitching, Sealing, and Maintenance That Extends Tent Life
A $400 tent cared for properly lasts 10+ years. The same tent ignored will fail in three. Here's the routine.
Pitching in bad weather
Choose your site before you unbag the tent. Look for:
- High ground. Dry creek beds and low spots pool water fast.
- Windbreaks. Trees, boulders, or a hillside take the worst of the wind.
- Away from dead trees. Widowmakers fall without warning.
- Flat enough to sleep. A 2% grade sounds minor and isn't.
Pitch the tent with the lowest-profile end (usually the tail) facing into the wind. Attach guylines to all available points if wind is in the forecast. A tent is only as storm-worthy as its guyline setup.
If you're pitching in sand or snow, use wide-stance stakes like snow stakes or sand augers. Standard Y-beam stakes pull out under moderate load.
Seam sealing step by step
Do this once, ideally the day you buy an untaped tent.
- Pitch the tent fully in a shaded spot. Sealer cures better in the shade.
- Mix the seam sealer per the bottle instructions. Most are ready to use.
- Apply a thin bead along every exposed seam on the rainfly and floor.
- Work the sealer into the stitching with the applicator brush or your fingertip (wear gloves).
- Let it cure fully, typically 12 to 24 hours, before packing.
The cure window matters. Packing a tent with uncured sealant fuses the fabric permanently. If in doubt, wait longer.
After every trip
- Dry the tent fully before storage. Even one damp fold becomes mildew within a week.
- Shake out debris. Pine needles, sand, and grit abrade the floor coating.
- Check for pinholes. Hold the floor up to a light source. Small holes are easy to patch with tent repair tape.
- Clean zippers. A soft brush removes grit. A silicone zipper lubricant restores smooth operation.
- Store loosely. Never keep a tent compressed long-term. Hang it or stuff it into a large cotton sack.
Seasonal and long-term care
Once a year, do a deeper pass:
- Reproof with DWR spray. If water stops beading on the fly, it's time. Wash the tent first with a technical fabric cleaner, then apply DWR.
- Check pole shock cord. Elastic stretches over time. If poles won't stay connected, replace the shock cord.
- Inspect guylines. Replace any that are frayed or stiff.
- Check seam tape. Peeling tape needs to be trimmed and re-sealed.
Field repairs that get you home
Carry a small repair kit: two pole splints, a patch of Tenacious Tape or similar, a few spare stakes, and 10 feet of extra cord.
If a pole snaps mid-hike, slide a splint over the broken section and tape it in place. If the fly tears, patch it from both sides. If the floor punctures, clean and dry the area, then tape it and cover with a patch.
None of these repairs are permanent. They get you through the trip. Repair properly at home or send the tent to a gear repair service.
If you're packing a camp kitchen alongside your shelter, a reliable compact brewer is one of the small luxuries worth the pack weight.
How to Match a Tent to a Specific Camper Profile
Generic "best tent" advice fails because campers come in completely different shapes. Here's how the same set of variables resolves for six common profiles.
The solo weekend backpacker
If you hike 5 to 12 miles a day and camp 10 to 20 nights a year, then a 2-person, 3-season, freestanding tent at 3 to 4 lbs is your sweet spot. You get space for a pack inside without the coffin feel of a true 1-person tent.
Look for one door and one small vestibule to save weight. Skip ultralight materials unless you're covering serious mileage.
The couple thru-hiking
If you're hiking 15 to 25 miles a day for weeks, then weight is the entire game. A 2-person trekking-pole tent under 3 lbs is standard. Look for a 20D or lower fabric, aluminum poles, and a full-coverage fly.
Buy a footprint. Buy pole splints. Learn to pitch it in wind before you start.
On a long trail, a pole failure without a spare can end your trip.
The family car camper
If you're driving to a site with two adults and two kids, then a 6-person cabin or dome tent with a room divider, 72-inch-plus peak height, and two doors is the target. Weight is irrelevant. Floor area and setup speed are not.
Add a footprint. Add a spare set of stakes. Add a small battery-powered lantern for inside the tent.
The festival or weekend-only camper
If you'll camp 2 to 4 times a year at festivals or near a car, then a pop-up or instant-set 4-person tent at $100 to $200 is honest value. You're not chasing durability. You're chasing setup speed and a dry night.
Skip premium materials. Skip ultralight anything. Buy what fits your actual use.
The alpine climber
If you camp on snow, above tree line, or in exposed terrain, then a 4-season single-wall or double-wall mountaineering tent is non-negotiable. Look for 11mm+ pole diameters, 4 to 6 guyline points, and a reinforced pole sleeve structure.
Training bodies like the American Alpine Institute emphasize that a 4-season shelter must handle sustained 40+ mph winds and snow load. Never take a 3-season tent into real winter terrain.
The overlander or base camper
If you set up one campsite for a week or more, then a tall tunnel or cabin tent with a large vestibule area beats a backpacking design. The priority is standing room, gear storage, and weather protection over days, not weight carried over miles.
Climate and Terrain: Picking for Where You Actually Camp
Where you camp changes the answer more than almost any other variable. Here's how to adapt.
Hot, humid summers
Heat and humidity are a ventilation problem, not a waterproofing problem. Look for:
- Large mesh inner panels on the tent body
- Two doors on opposite sides for cross-breeze
- A rainfly you can leave partially open during dry spells
- Light, reflective colors that reduce heat buildup
A 4-season tent in humid summer heat becomes a condensation trap. You'll wake up soaked from your own breath.
Sustained rain
Long, wet trips demand a specific setup. Prioritize:
- Hydrostatic head of 3,000mm or higher on the fly
- A full-coverage rainfly that drops close to the ground
- Taped seams or a scheduled re-sealing
- A bathtub floor at least 6 inches high
- A large vestibule so you can cook and store gear without opening the main door to rain
In our research, the biggest cause of wet nights in sustained rain isn't tent leaks. It's water wicking through untaped seams and soaked guyline cords running into the tent. Replace factory guylines with reflective cord and re-seal seams annually.
High wind and exposed terrain
Wind is a structural failure risk, not just an annoyance. In exposed campsites:
- Low, aerodynamic shapes beat tall cabins every time
- More guyline points means more stability under load
- Thicker poles (11mm+) resist bending
- Pitch with the tail into the wind and stake every point
Never camp under dead trees or in dry creek beds. Widowmakers and flash floods both kill campers every year. The National Park Service and US Forest Service publish site-selection guidance that's worth reading before any exposed camping trip.
Sand and snow
Standard Y-beam stakes will not hold in either. Use:
- Snow stakes or deadman anchors (bury a stuff sack or stick horizontally) for snow
- Sand augers or wide-scoop stakes for beach camping
- Rocks as weight in any ground you can't stake into
Freestanding tents shine here. A trekking-pole tent on sand is a fight.
Jungle, forest, and buggy terrain
Humidity plus bugs is the worst combination for tent comfort. Look for:
- Mesh inner with fine no-see-um netting
- A full-coverage fly you can ventilate
- A bathtub floor tall enough to block crawling insects
- Quick-dry fabrics (polyester dries faster than nylon)
Keep the tent zipped at all times, even during the day. A single open zipper invites mosquitoes that stay inside for the rest of the trip.
Altitude
UV intensity increases roughly 10 to 12% for every 1,000 meters of elevation. Nylon and polyester both degrade faster at altitude. If you camp above 8,000 feet regularly, prioritize UV-resistant fabrics (polyester holds up better here) and reproof with DWR more often.
Family Camping With Kids: Setup, Safety, and Sanity
Family tenting has its own rules, and they don't match backpacker logic at all. This is where a $400 ultralight tent is a straight-up bad purchase.
Picking the right size
For two adults and two kids under 12, a 6-person tent is the honest minimum. Add a dog and you're into 8-person territory. Never squeeze a family into the marketed capacity.
For a family of four with teenagers, plan for two small tents rather than one giant one. Teens want their own space. Two 3-person tents often cost less than one 8-person cabin and are easier to pitch.
Setup speed matters more than specs
A tent that pitches in 5 minutes vs. 20 minutes is a completely different experience at the end of a long drive with tired kids. Pop-up and instant-set family tents genuinely earn their reputation here.
Safety items specific to family camping
- Carbon monoxide: Never use a fuel-burning heater or stove inside a tent or vestibule. The CDC and CPSC both warn that CO poisoning is a leading cause of camping fatalities.
- Flame: Most modern backpacking tents are intentionally not flame-retardant treated. Keep all flames outside the tent footprint.
- Doors: Teach kids to keep doors zipped. Open doors let in bugs and rain and let small kids wander out at night.
- Storage: Keep a headlamp and small first aid kit in a fixed pocket near the door.
If you're setting up a full camp kitchen, our guide to top-rated brewers covers the field coffee side of a family morning.
Keeping kids warm and dry inside
Ground insulation matters more than tent insulation for kids. A well-insulated sleeping pad prevents far more cold than any tent upgrade. R-value of 4+ is a good target for kids sleeping on cold ground.
Sleeping bags rated 10 to 15°F below the expected low give a safety margin. Kids sleep cold and don't always communicate discomfort well.
Tent Accessories and Add-Ons That Actually Matter
The tent itself is only part of the shelter system. These add-ons make the difference between a comfortable trip and a rough one.
Essential accessories
| Accessory | Why It Matters | Rough Cost |
|---|---|---|
| Footprint | Protects floor from abrasion and ground water | $30 to $80 |
| Extra stakes | Stock stakes are usually weak or too few | $15 to $30 |
| Pole repair splint | Saves a trip when a pole snaps | $8 to $15 |
| Tenacious Tape | Field-repairs fly and floor tears | $8 to $12 |
| Seam sealer | Required for untaped seams | $10 to $20 |
| DWR spray | Restores water beading after 2 to 3 seasons | $15 to $25 |
Accessories that are genuinely optional
- Gear loft: Helpful for small items overhead, but it often becomes a floor-space replacement. Usually unnecessary.
- Lantern hook: Nice for a specific lantern model only.
- Custom footprint (branded): Cheaper DIY alternatives work just as well. Tyvek cut to size costs about $10.
- Extra guylines: Some tents ship with too few. Buy a 50-foot reflective cord spool and cut your own.
Accessories to skip
- Air mattresses for backpacking. Too heavy. Use a closed-cell or inflatable pad.
- Battery tent fans for backpacking. Battery weight and reliability issues. Ventilation is the real answer.
- Camp shoes inside the tent. Keep camp shoes in the vestibule to keep the floor clean.
- Heavy cotton sleeping bags. Once damp, they never dry and stay cold.
Choosing a footprint
You have three options:
- Branded footprint: Perfect fit, matched material, most expensive.
- Generic footprint: Cheaper, may not match exactly, works fine.
- DIY Tyvek or polycro: Cheapest, cut to size, adds little weight.
The branded footprint is worth it if you plan to keep the tent long-term. The DIY option is worth it if you're cost-focused or replacing the tent soon.
Camping Tent FAQs
How do I know what size tent to buy?
Buy one size larger than your actual headcount. Count adults plus children over 6, then add one for gear and movement. A 4-person tent is genuinely comfortable for three, and a 6-person tent is comfortable for four to five.
Is a 3-season or 4-season tent better for me?
A 3-season tent fits most camping from late spring through early fall. A 4-season tent is only for winter camping, alpine conditions, or sustained severe wind. Buy 3-season unless you're specifically camping in snow or mountaineering.
What hydrostatic head rating do I need for rain?
Look for 1,500mm minimum for general camping. Aim for 3,000mm or higher if you'll face sustained heavy rain. Anything under 1,000mm is fair-weather-only and will leak in a real storm.
Do I really need a footprint?
You don't need one, but it's the cheapest way to extend your tent's lifespan. A $10 Tyvek sheet cut to size does the same job as a $40 branded footprint. Skip it and expect the floor coating to wear through in three to five seasons.
Can I use a 3-season tent in winter?
Only in very mild conditions with no snow load. A 3-season tent can collapse under even moderate snow accumulation, which can trap or injure you inside. Never rely on a 3-season shelter in real winter terrain.
How long should a good camping tent last?
A well-maintained mid-range tent lasts 4 to 8 camping seasons. A premium tent with proper care lasts 8 to 15 or longer. Budget tents typically fail, via pole snap, seam leak, or zipper break, within 1 to 3 seasons.
The Decision Guide: Picking Your Tent in Under 10 Minutes
Run through these steps in order. Each one narrows your options. Ten minutes and you'll have a shortlist.
Step 1: Car or backpack?
Backpacking means weight matters. Aim under 5 lbs for one person, under 4 lbs per person for two. Car camping means weight is irrelevant.
Step 2: Count real people.
Adults plus children over 6, plus one. Add another half-person for a dog. This number plus one is your ideal capacity.
Step 3: Pick 3-season vs. 4-season.
3-season unless you're camping in snow or sustained severe wind. Year-round camping in mild climates is still 3-season territory.
Step 4: Choose freestanding vs. non-freestanding.
Freestanding unless you're chasing ultralight and camp on penetrable ground. Non-freestanding saves weight and demands more pitching skill.
Step 5: Verify the specs.
- Hydrostatic head: 1,500mm minimum, 3,000mm+ for wet climates
- Poles: aluminum, 8.5mm minimum, 11mm+ for wind
- Seams: taped, or you're prepared to seal them
- Rainfly: full coverage
- Doors: one per two occupants minimum
- Zippers: YKK or named brand
Step 6: Add the accessories.
Footprint (or DIY equivalent), extra stakes, splint, tape, DWR spray. These are the add-ons that turn a $200 tent into a 5-year tent.
Step 7: Buy from a seller with returns.
Pitch the tent in your yard on day one. If something's wrong, you want to know before your first trip, not during it.
The right tent isn't the most expensive one or the lightest one. It's the one that matches your trip type, your headcount, your weather, and your honest budget. Get those four right and everything else falls into place.

Similar Posts