

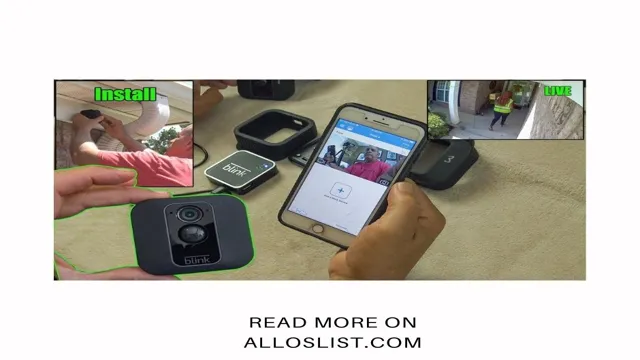
If you’re considering purchasing a Blink camera for your home or business security needs, one common question that may come to your mind is whether it is recording. After all, what good is a security camera if it isn’t functioning properly? So, the answer is yes, Blink cameras are designed to record. However, it’s essential to understand how they work and what may affect their ability to record.
In this article, we’ll dive deeper into the Blink’s recording mechanism, how to view its recordings, and some factors that can interfere with its ability to capture footage. So, keep reading to learn more about Blink camera recording!
Check Camera Status Light
One easy way to tell if your Blink camera is recording is by checking the camera status light. When the status light is solid blue, it means that the camera is connected and receiving power. If the light is blinking blue, it indicates that the camera is currently recording.
However, if the light is off or showing a red light, then your camera is not recording. Another way to check if your camera is recording is by accessing the live view feature through the Blink app on your phone. This will allow you to see what the camera is currently capturing in real-time.
By keeping an eye on these indicators, you can always ensure that your Blink camera is working properly and capturing any activity or events that you need it to.
Solid Blue: Recording, Blinking Blue: Arm Mode, Amber: Disarmed
If you want to keep your home safe, it’s important to understand the status light of your security camera. The status light indicates three different states: solid blue for recording, blinking blue for arm mode, and amber for disarmed. Understanding these states is crucial for ensuring the security of your home and loved ones.
When the status light is solid blue, your camera is actively recording footage and uploading it to the cloud, so you can access it at any time. This mode is perfect for when you’re out of the house, as it provides an extra layer of security. Blinking blue indicates that the camera is in arm mode, which means that it’s monitoring the area and will sound an alarm if it detects any movement.
Finally, amber means your camera has been disabled and is not recording or monitoring. Understanding the different modes and their respective status lights is key to keeping your home and family safe from unwanted intruders.
View Recorded Clips
If you’re wondering whether your Blink camera is recording, there are a few ways to tell. First, if the camera is armed and motion is detected, it will automatically start recording a clip. You can view any recorded clips in the app by going to the “Clips” section.
Additionally, if your camera has a blue LED light, this indicates that it is currently recording. However, if the light is off, it does not necessarily mean that the camera is not recording. It could just mean that the camera is unarmed or not set up to detect motion.
Overall, the best way to ensure that your Blink camera is recording is to check the app for any recorded clips. So, if you’re ever unsure, just open up the app and take a look.
Access the Blink App and Click on ‘Clip’ Tab
If you’re looking to view your recorded clips on the Blink app, you’re in the right place. First, ensure that you’ve downloaded the app and logged in. From there, click on the “Clip” tab on the bottom menu bar.
This will take you to a list of all your recorded clips. You can scroll through this list to find the specific clip you’re looking for and tap on it to play it. If you have a lot of clips, you can also use the search bar to look for specific dates or times.
One thing to keep in mind is that the clips will only be available for a limited time, depending on your subscription plan. So, make sure to download any important clips before they expire. With just a few clicks, you’ll be able to view all your recorded clips on the Blink app.
Find Recorded Clips with Blue Dot and Play
If you are using a Nest Cam or a Nest Hello video doorbell, you can easily find your recorded clips using the blue dot feature. This blue dot appears on the timeline of the Nest app and provides a quick way to identify parts of the day that have recordings available. To view the recordings, simply select the blue dot on the timeline, and the app will start to play the footage associated with that time of day.
Finding your recorded clips has never been easier, thanks to the blue dot feature that makes it easy to pinpoint exactly when you need to access footage. Once you have identified the part of the day that you want to view, you can quickly access your recordings and play them right within the Nest app. Whether you are concerned about the safety of your home, want to keep an eye on your pets, or simply want to see what has been happening while you were away, the Nest app makes it easy to view everything that has been captured by your Nest Cam or Nest Hello video doorbell.
So, take advantage of the blue dot feature today and start watching your footage with ease.
Check Timeline
If you own a Blink camera and you’re wondering how to tell if it’s recording, there are a few key things to look out for. One way is to check the timeline in the Blink app. The timeline shows all recorded activity, so if you see new events listed there, it’s a good sign that your camera is recording.
Another way to tell if your Blink camera is recording is to look for the blue LED light on the front of the camera. This light will illuminate when the camera is actively recording, so if you see it on, you can be sure that the camera is working. If you’ve enabled motion detection, you can also check to see if the camera is capturing motion by looking for clips in the Blink app that show activity.
By keeping an eye on these indicators, you can easily tell if your Blink camera is recording and functioning properly.
Select Camera and Click on ‘Timeline’ Tab
After selecting your camera, the timeline tab is an essential feature to check out. This tab allows you to view the timeline of all the videos and images captured by your camera. It gives you a well-organized view of everything that has been captured, making it easy for you to quickly locate specific recordings or images.
By clicking on the timeline tab, you can see the dates and times of each recording. This feature is particularly helpful when you need to find a specific moment that was captured, such as an event that took place on a particular day. In addition, the timeline tab also allows you to view your recordings in a chronological order, so you can easily track any changes or progression that may have happened over time.
So, if you want to keep an eye on your camera footage and images and check out its timeline tab!
Find Blue Lines Indicating Recorded Activity
If you’re looking to find recorded activity on your device, checking the timeline is a good place to start. One way to identify this is to look for blue lines indicating activity. These lines show when activity occurred, such as text messages, phone calls, or emails.
By reviewing the timeline, you can see what your device has been doing and when. This can be particularly helpful if you’re trying to troubleshoot a problem with your device or if you want to track your own usage habits. So, the next time you need to find recorded activity on your device, take a look at the timeline and keep an eye out for those blue lines.
Check Camera Settings
Are you wondering how to tell if your Blink camera is recording? Checking the camera settings is the easiest way to ensure your Blink camera is working correctly. Start by opening the Blink app and navigating to the camera you want to check. Look for the “last activity” time stamp to see if the camera has recorded any motion or activity recently.
If that time stamp is outdated, then the camera may not be recording. Additionally, check the status of the camera’s battery, signal strength, and Wi-Fi connection. If any of these values are low or have a weak signal, then it may prevent the camera from recording.
Always make sure your camera settings are configured correctly to ensure they are recording and providing the protection you need.
Access Camera Menu and Verify Recording Status
When it comes to checking camera settings, the first step is to access the camera menu. This menu can usually be found by pressing the “menu” or “settings” button on the camera. Once you have accessed the menu, you can then navigate to the recording settings to verify the recording status.
It’s important to make sure that your camera is set up correctly before recording, as this will ensure that your footage is of the highest quality possible. You can check the resolution, frame rate, and other settings to make sure that they are optimal for your needs. By taking a few minutes to double-check your camera settings, you can save yourself a lot of headaches and frustration down the line.
Just remember to always consult your camera manual for specific instructions on how to access and navigate the camera menu.
Ensure Motion Detection is Turned On
One of the most important things to consider when setting up a security camera is ensuring that motion detection is turned on. This feature allows your camera to detect movement and send alerts when it happens. Before installing your camera, it’s important to check your camera settings and make sure that motion detection is enabled.
Depending on your camera, you may be able to adjust the sensitivity of the motion detection feature so that it only triggers when significant movement occurs. This helps to reduce the amount of false alerts you receive. Without motion detection, your security camera won’t be able to provide the type of surveillance you need, leaving you vulnerable to potential threats.
So, make sure to double-check your settings and get yourself some peace of mind by enabling motion detection on your security camera.
Conclusion
So, there you have it folks – a foolproof way to know if your Blink camera is recording: just look at the little red light. And if you really want to be sure, try doing a little dance in front of it – if you see yourself grooving in the live view, you’re definitely being recorded. Now go forth and keep an eye on all your important things with your trusty, Blinky eye in the sky!”
FAQs
How can I confirm if my Blink camera is recording?
To check if your Blink camera is recording, open the Blink app and go to the camera view. If the small red recording icon is displayed, then your Blink camera is recording.
Can I access the recordings of my Blink camera remotely?
Yes, you can access your Blink camera recordings remotely through the Blink app or the Blink website. Ensure that you have a stable internet connection to access the recordings.
What happens if my Blink camera loses power or internet during recording?
If your Blink camera loses power or internet during recording, the recording will be automatically saved and uploaded to the cloud once the camera is back online and connected to power.
How can I save my Blink camera recordings permanently?
Blink offers cloud storage plans that allow you to save your Blink camera recordings permanently. You can subscribe to any of the available plans that fit your needs and access the recordings anytime you want.