

Are you new to owning a generator and feeling a little intimidated by the prospect of having to start it up for the first time? Don’t worry, we’ve all been there. Starting a generator may seem daunting at first, but with a little guidance, you’ll be able to get it up and running smoothly in no time. Think of starting a generator like starting a car – it’s a process that you need to follow step by step, but once you know what you’re doing, it becomes second nature.
In this beginner’s guide, we’ll cover everything you need to know to start your generator safely and efficiently. We’ll go over the different types of generators and their starting methods, as well as the necessary precautions to take before starting up your generator. We’ll also cover some troubleshooting tips in case you encounter any issues along the way.
So sit back, relax, and let us guide you through the process of starting your generator. With our help, you’ll be ready to tackle any power outage or camping trip with confidence.
Preparation
Starting a generator is a crucial step in ensuring that you have access to power during a blackout or emergency situation. Before starting your generator, it is important to prepare it properly. First, you should check the oil level in the engine.
If the oil is low, you should add more to prevent damage to the engine. Next, you should check the fuel level and ensure there is enough gasoline in the tank. If necessary, refill the tank to avoid running out of fuel while the generator is running.
If your generator has a battery, ensure that it is fully charged and ready to go. Finally, make sure the area around the generator is clear of any debris or obstacles that could interfere with its operation. By properly preparing your generator, you can ensure it runs smoothly and provides the power you need when you need it.
So let’s get started and keep your generator up and running with proper preparation!
Check Fuel and Oil Levels
When planning a long car trip, it’s important to prepare your vehicle to ensure a smooth and safe journey. One of the most critical tasks is checking the fuel and oil levels. Running low on either of these fluids can lead to serious engine problems or even a breakdown.
Additionally, if you’re traveling through remote areas, it may be challenging to find a gas station or mechanic to refill or fix your vehicle. To avoid such a situation, it’s wise to check the oil level and gas tank before embarking on your journey. This will not only give you peace of mind but also ensure your car is in peak condition to handle any unexpected events along the way.
Remember, an ounce of prevention is worth a pound of cure. So take the time to check the fuel and oil levels before starting your trip and enjoy the ride without any worries.
Ensure Safety Precautions
When it comes to ensuring safety precautions, preparation is key. Whether you are engaging in potentially hazardous activities like rock climbing or simply getting ready to take a long hike in the wilderness, taking time to prepare yourself and your equipment can make all the difference. Start by doing your research and gathering all the items you will need, from proper footwear to protective gear.
Make sure you are well-rested and hydrated before setting out, and always let someone know where you are going and when you plan to return. Remember, accidents can happen even to the most experienced adventurers, so it’s important to take steps to mitigate risk and ensure your safety. By being well-prepared and informed, you can enjoy your outdoor excursions with confidence and peace of mind.
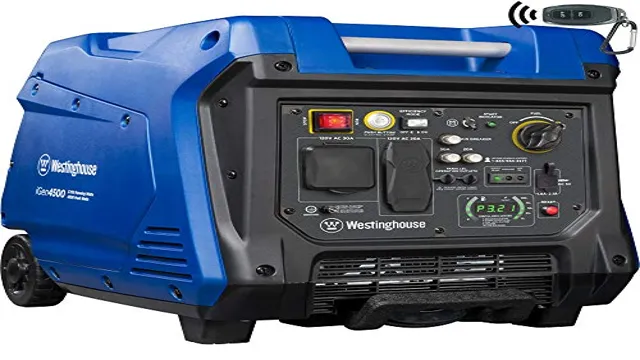
Starting the Generator
Learning how to start a generator may seem daunting, but it’s actually quite simple once you know the steps. First, make sure that your generator is in a well-ventilated area, with plenty of space around it. Next, check the oil and fuel levels, as running a generator with low levels can cause damage.
Connect any necessary power cords or transfer switches, and then turn the fuel valve to the “on” position. Turn the choke to the “closed” position, and then turn the key or pull the starter cord until the engine ignites. Once it has started, gradually open the choke and let the generator run for a few minutes to fully warm up.
By following these basic steps, you can start your generator with confidence and be ready for any power outage or outdoor adventure.
Turn the Fuel Valve On
Starting up your generator can seem a bit daunting at first, but it’s actually quite simple. First and foremost, make sure that your fuel valve is turned on before starting the generator. This valve regulates the flow of fuel from the tank to the generator’s engine.
If it’s off, there will be no fuel to burn, and your generator won’t start. To turn the fuel valve on, you’ll need to locate it. It’s usually located near the carburetor or the fuel tank.
Once you have found it, turn it to the “on” position. You may need to use a bit of force to turn it, especially if it’s been off for a while. Before starting the generator, be sure to check the oil level and fill it if necessary.
Once you’ve done that, follow the manufacturer’s instructions for starting the generator. Depending on the type of generator you have, this could involve pulling a cord or pressing a button. Remember, safety should always come first when starting a generator.
Make sure that you have read and understood the manufacturer’s instructions, and be sure to operate the generator in a well-ventilated area. By taking these precautions and turning the fuel valve on, your generator will be up and running in no time.
Choke the Engine
When it comes to starting a generator, one important thing to keep in mind is to choke the engine. The primary purpose of this step is to make it easier for the engine to start by restricting the airflow and increasing the fuel-to-air ratio. However, it is essential to understand that different generators may have different choking mechanisms.
Some have manual chokes, while others have automatic chokes that activate when the engine is cold. Whatever the case may be, choking the engine can be the key to starting the generator successfully. Once the engine has started, it is essential to release the choke gradually, allowing the engine to adjust to the normal fuel-to-air ratio.
Failing to release the choke may cause the engine to stall or suffer other engine issues. Therefore, it is necessary to understand the choking mechanism of your generator and follow the manufacturer’s instructions carefully. By doing so, you ensure that your generator starts up and runs smoothly every time you need it.
Pull the Starter Cord
Starting a generator is easy and straightforward, as long as you know what you are doing. To begin, locate the starter cord and give it a firm pull. This action will start the engine and allow the generator to produce electricity.
However, before you pull the starter cord, ensure that the generator’s fuel tank is full and that the choke is set to the correct position. It is also essential to check the oil level before starting the generator. Remember, the oil is what lubricates the engine, keeping it running smoothly.
Running a generator with low or no oil will result in engine damage, which can be costly to repair. Finally, it is best to start the generator in a well-ventilated area and away from any flammable materials. With these steps in mind, start your generator and enjoy the peace of mind that comes from knowing that you are ready for any power outage.
Troubleshooting Tips
Starting a generator can seem intimidating, but with a little guidance, it’s a straightforward process. Firstly, ensure that your generator has plenty of fuel, oil, and a charged battery if applicable. Then, switch off all electronics and appliances that may overload the generator when starting.
Turn the fuel valve to the on position and engage the choke if needed. Next, turn on the ignition switch and pull the starter or push the electric start button. If the generator fails to start, wait a few minutes and repeat the process with the throttle slightly open.
If the generator continues to be unresponsive, check the spark plug and air filter for dirt or damage. By following these troubleshooting tips, you should be able to start your generator without any difficulty.
Check for Clogged Air Filter
When it comes to troubleshooting your HVAC system, one common issue that may arise is a clogged air filter. Neglecting to replace or clean your air filter regularly can result in reduced airflow and efficiency, which can put stress on your system and potentially lead to costly repairs. You may notice that your home isn’t cooling or heating as effectively, or that there is more dust and debris accumulating in your home.
Luckily, this issue is relatively easy to fix. Locate your air filter and check to see if it’s dirty or clogged, then simply replace or clean it as needed. By doing so, you’ll not only improve your system’s performance but also improve your home’s indoor air quality.
Don’t neglect this important step in HVAC maintenance, as it can save you time and money in the long run.
Inspect Spark Plug
When it comes to troubleshooting your vehicle, one important item to inspect is the spark plug. Over time, spark plugs can become worn and dirty, and this can cause a variety of issues with your engine. To inspect your spark plug, you will need to remove it from the engine and examine it closely.
Look for signs of wear or damage, such as cracks or chipping. You should also inspect the electrode for buildup of dirt or corrosion. If you notice any issues with your spark plug, it’s important to replace it as soon as possible to prevent further damage to your engine.
With a high-quality spark plug properly installed, your engine will run smoother and with improved performance. So if you’re experiencing any issues with your vehicle, be sure to check the spark plug first to ensure it’s in good working condition.
Maintenance Tips
Starting a generator requires some basic steps to ensure its smooth running. Firstly, check the oil level and fuel tank before starting the generator. Ensure there is enough oil to lubricate the engine and sufficient fuel to power it.
Next, connect the negative and positive cables of the battery to the corresponding terminals of the generator. Turn on the fuel valve and switch on the ignition key. Finally, use the choke to help the engine start in cold weather.
Once the generator starts, let it run for a few minutes to warm up before connecting any electrical loads. Following these simple steps ensures your generator starts easily and continues to provide reliable power. Remember, timely maintenance of your generator will keep it operating efficiently for years to come.
Conclusion
In conclusion, starting a generator is like jump-starting your creativity. First, make sure you have a full tank of fuel (or a fresh pot of coffee) to keep the energy flowing. Then, turn the switch to the on position and give it a good pull (just like you would with a stubborn idea).
And voila! Your creative power is now up and running like a well-oiled machine. Now go forth and let the ideas flow!”
FAQs
What type of fuel should be used to start a generator?
Most generators are designed to use gasoline as fuel, although some models are also capable of running on propane or diesel.
How do you properly maintain a generator to ensure it starts smoothly?
To maintain a generator, you should change the oil and air filter regularly, keep the fuel tank clean and dry, and test the battery regularly.
What are some common reasons why a generator might not start?
Some common reasons why a generator might not start include a dead battery, clogged fuel filter, or improper fuel mixture.
Can you start a generator indoors?
No, you should never start a generator indoors as it can produce deadly carbon monoxide gas. Generators should always be used in a well-ventilated area.