

Have you ever experienced frustration with your Sony wireless headphones not working properly? Perhaps they’re not connecting to your device or the sound quality is subpar. Luckily, there is a simple solution to this problem: resetting your headphones. In this step-by-step guide, we’ll show you how to reset your Sony wireless headphones in just a few easy steps.
Think of it like hitting the refresh button on your computer – sometimes your headphones just need a fresh start to operate at their best. So grab your headphones and let’s get started!
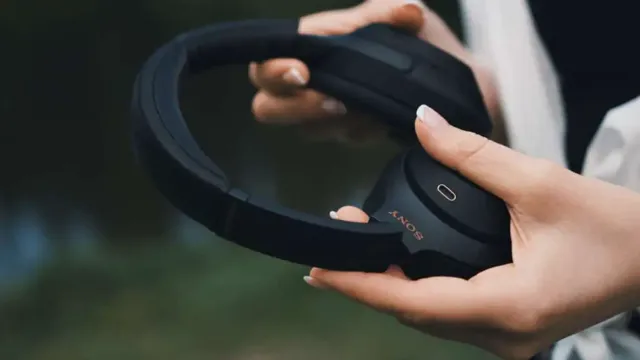
Locate the Reset Button
If you’re having trouble connecting your Sony wireless headphones to your device, resetting them might be the solution you need. But how do you reset Sony wireless headphones? The first step is locating the reset button, which can be found on different areas depending on the model. On some models, the button is on the left earcup, while on others, it’s on the right earcup or the control module.
To find the reset button, consult your headphone’s manual or look up the instructions online. Once you’ve located the button, press and hold it until the LED light begins flashing. This indicates that your headphones are resetting.
After the reset process is complete, try reconnecting your headphones to your device and see if the issue is resolved. Remember to always consult your manual or online resources for specific instructions on how to reset your Sony wireless headphones.
Identify the Model of Your Headphones
When it comes to troubleshooting headphones, one of the first things you want to look for is a reset button. But before you can do that, you need to identify the model of your headphones. Depending on the make and model, the reset button could be located in different areas.
Some headphones have a button on the earcup, while others have a small pinhole on the earcup or even the control module. Once you’ve determined the model of your headphones, it’s time to search for the reset button. Don’t worry if you can’t find it right away; it might be hidden in a small crevice or labeled with a different name, like “pairing” or “sync.
” Once you locate the reset button, simply press and hold it for a few seconds until you see the LED light blink or hear a chime. This will clear any issues or glitches and hopefully get your headphones back up and running like new. So, take a deep breath, stay calm, and keep an eye out for that reset button.
Find the Reset Button on Your Headphones
If you’re having trouble with your headphones, one of the first things to try is resetting them. But where is that elusive reset button? The location of the reset button varies from brand to brand and model to model, so it’s best to consult your headphones’ manual. However, in many cases, the reset button can be found on the headphones themselves, usually in a small hole or on the side of the ear cup.
It may be marked with the word “reset” or a small symbol. If you can’t find it, try searching online for your specific headphones’ reset instructions. Once you’ve located the reset button, use a small object such as a paperclip or toothpick to press and hold it down for a few seconds until the headphones’ lights flash or you hear a sound indicating they’ve been reset.
With a little exploration and some troubleshooting, you can find the reset button on your headphones and get them working like new again.
Resetting the Headphones
If you’re experiencing any issues with your Sony wireless headphones, it may be helpful to reset them. The process for resetting the headphones will vary depending on the model you have, but it typically involves pressing and holding the power button for several seconds until you see a flashing light or hear a beep. Once you’ve reset the headphones, you should be able to connect them to your device and use them as normal.
It’s important to note that resetting your headphones will erase any saved pairing information, so you’ll need to reconnect them to your phone or tablet afterward. Overall, resetting your Sony wireless headphones is a simple process that can help resolve any issues you’re experiencing quickly and easily.
Press and Hold the Reset Button
If you are having issues with your headphones, resetting them could be the solution. One way to do this is by pressing and holding the reset button. The location of the reset button may vary depending on the brand and model of headphones that you have.
However, it is usually located somewhere on the earcup or the control panel. Pressing and holding the button for a few seconds should initiate the reset process. After you release the button, your headphones may turn off, and then turn back on again.
This indicates that the reset process is complete. Keep in mind that resetting your headphones will erase any saved settings or pairings. So, be prepared to set them up again after the reset is done.
By executing a reset, you can troubleshoot many issues and get your headphones back to working smoothly.
Wait for the LED Light to Blink
If you’re experiencing issues with your headphones, resetting them can be a quick and simple solution. To start the reset process, you’ll need to wait for the LED light to blink. This can indicate that the headphones are in pairing mode and ready to be reset.
Depending on your model of headphones, the LED light may blink in different patterns or colors. It’s essential to consult the user manual for specific instructions on how to reset your headphones properly. Once you’ve located the reset button and pressed it, hold it down until you see the LED light start to blink rapidly.
This should indicate that the headphones have been successfully reset. With this quick and easy process, you can potentially resolve any issues you may be experiencing with your headphones and get back to enjoying your favorite tunes in no time.
Release the Reset Button
If you’re encountering some problems with your headphones, resetting them is often the go-to solution. It’s a quick and easy fix that can remedy issues like connection problems, audio cutouts, and other bugs. To reset your headphones, the first thing you need to do is locate the reset button, which is usually located on the side of the device.
Press and hold it for a few seconds until the LED light flashes, indicating that the resetting process has begun. It’s important to note that not all headphones have the same reset procedure, so be sure to consult the user manual or contact the manufacturer for specific instructions. After the reset is complete, ensure to pair the headphones with your device to check if the problem has been resolved.
Resetting your headphones is an effective and simple solution to fix technical issues, and it could save you a trip to the repair shop or buying a brand new set.
Connecting the Headphones
If you’re having trouble with your Sony wireless headphones, resetting them can often solve the problem. To reset your headphones, first make sure they’re turned on and in pairing mode. Then, press and hold the power button for 7 seconds until the indicator light starts flashing.
This will reset your headphones and clear any previous connections. After resetting, you can connect your headphones to your device again using Bluetooth. Simply go to your device’s settings, select Bluetooth, and choose your headphones from the list of available devices.
With these steps, you should be able to reset your Sony wireless headphones and get them working like new again.
Connect the Headphones to Your Device Using Bluetooth
Connecting the headphones to your device using Bluetooth is a breeze. It’s a quick and easy process that takes only a few steps. First, make sure that your device has Bluetooth turned on.
Then, turn on the headphones and put them in pairing mode. This is usually done by holding down the power button for a few seconds until the indicator light starts flashing. Next, go to the Bluetooth settings on your device and select the headphones from the list of available devices.
Once you’ve connected, you’re good to go! You can now listen to your music, watch a movie, or take a call without any cords getting in the way. It’s a liberating feeling to be free from the tangle of wires. The best part is that you can keep your device in your pocket while you listen, giving you more mobility.
So, go ahead and try connecting your headphones via Bluetooth today. You won’t regret it!
Check if the Headphones are Functioning Correctly
Connecting the headphones is the first step to ensuring that they are functioning correctly. Begin by checking if your device has a headphone jack or if you need an adapter. If your headphones have a Bluetooth capability, ensure that your device’s Bluetooth is activated and pair them up.
Once they are connected, test them by playing some audio. If there are any issues, check if they are plugged in and seated correctly or if they are charged if they are wireless. Sometimes the sound quality can be affected by background noise or interference.
Be sure to check for this if you find that the sound quality is unsatisfactory. By checking that your headphones are correctly connected, you can enjoy the music with crystal clear audio.
Final Thoughts
If you’re experiencing connection issues or your Sony wireless headphones are not working as they should, resetting them might be the solution you need. Resetting your headphones can be done in a few simple steps depending on the model you have. For most models, close the headphones and hold down the power button for at least seven seconds.
The light indicator should flash to indicate that the headphones have been reset. For models with physical buttons, hold down the power button, and volume up button at the same time for at least five seconds. Once the indicator light flashes, release the buttons, and your Sony wireless headphones are reset to their default settings.
After resetting, you can repair your headphones with a new device, update their firmware, or customize the settings to suit your needs. Resetting your Sony wireless headphones is a quick fix that could save you from the frustration of malfunctioning headphones.
Conclusion
And there you have it, folks! Resetting your Sony wireless headphones is as easy as 1, 2, It’s like hitting the “refresh” button on your headphones, giving them a clean slate and a new lease on life. Just remember, when in doubt, read the manual and take a deep breath – fixing technology can be a daunting task, but with a little patience and know-how, you’ll be jamming out to your favorite tunes in no time.
“
FAQs
What is the process to reset Sony wireless headphones?
To reset Sony wireless headphones, you need to press and hold the Power button and the NC/Ambient button simultaneously for about 7 seconds. The indicator lights will flash 4 times to indicate that the headphones have been reset.
Why do I need to reset my Sony wireless headphones?
You may need to reset your Sony wireless headphones if you are experiencing connection problems, audio distortion, or other bugs. Resetting the headphones can help in solving such issues.
Will resetting my Sony wireless headphones delete any of my saved settings?
Yes, resetting your Sony wireless headphones will erase all the saved settings, including previously paired devices and equalizer settings. You will need to re-pair your headphones with your devices and adjust the settings accordingly.
Can I reset my Sony wireless headphones while they are charging?
Yes, you can reset your Sony wireless headphones while they are charging. However, make sure to disconnect the charging cable before resetting the headphones as it may interfere with the reset process.
What should I do if resetting my Sony wireless headphones doesn’t solve the issue?
If resetting your Sony wireless headphones doesn’t solve the issue, try updating the firmware or contacting the Sony support team for further assistance.