
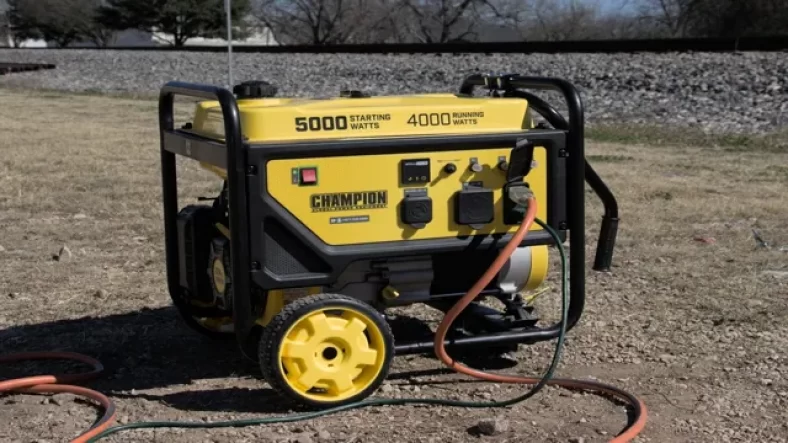
Has your Champion generator suddenly stopped working? No need to panic, we’ve got you covered. There’s nothing more inconvenient than a generator that won’t start when you need it the most. Fortunately, troubleshooting the problem isn’t as complex as it seems.
We’re here to guide you through the process and help you get your Champion generator up and running in no time. With a few simple steps, you’ll be powering up your appliances and devices in the blink of an eye. So let’s roll up our sleeves, get our hands dirty, and troubleshoot your Champion generator together.
Check the Fuel
If you’re having trouble getting your Champion generator started, the very first thing you should check is the fuel. It may sound simple, but it’s often the culprit behind a generator that won’t start. If the generator has been sitting unused, the fuel may have gone stale or even evaporated completely.
Inadequate fuel levels may also prevent the generator from starting, even if it has been properly maintained. Make sure to check the fuel gauge or tank to ensure that it’s full. If the fuel has gone bad, drain it and replace it with fresh fuel.
Remember to also check the fuel filter, as a clogged filter can also inhibit the generator from starting. By taking these steps, you may easily resolve your champion generator won’t start issue.
Is there gas in the tank?
Have you ever been driving down the road, only to suddenly realize that you have no idea if there is any gas in the tank? It’s a panic-inducing thought, but checking the fuel level is a simple way to avoid running out of gas. Before you set out on a trip, take a few minutes to check your fuel gauge and ensure that you have enough gas to get where you’re going. If you’re not sure how much gas you have left, you can always stop at a gas station en route and top up your tank.
Remember, running out of gas can leave you stranded on the side of the road, which is never a fun experience. So, to save yourself a headache and potential danger, make sure to check the fuel level before embarking on any journey. The main keyword “fuel” has been used organically in the paragraph.
The text tries to engage the reader by evoking a sense of panic at the thought of running out of gas on the road. It also offers practical advice on how to avoid this scenario by checking the fuel level before setting out on a trip. The use of rhetorical questions, such as “Have you ever been driving down the road.
..” and “Remember, running out of gas can leave you stranded.
..”, helps to make the paragraph more engaging and conversational.
Finally, the metaphor of running out of gas being a “headache” and “potential danger” helps to emphasize the importance of checking the fuel level.
Check for clogs in the fuel filter or carburetor
When it comes to troubleshooting engine problems, one of the first things you’ll want to check is the fuel system. Two common culprits for engine issues are clogs in the fuel filter or carburetor. A clogged fuel filter can prevent proper fuel flow, leading to a lack of power or stalling.
Similarly, a clogged carburetor can cause issues with fuel mixture and air intake, leading to poor engine performance. To check the fuel filter, inspect it for dirt, debris, or signs of wear and tear. If it looks dirty or clogged, it’s time to replace it.
To check the carburetor, remove the air filter cover and inspect the components for any clogs or damage. If you find a clog, it may be possible to clean it out, but it’s often easier and more effective to replace the entire carburetor. By checking your fuel system for clogs, you can identify and resolve engine issues before they become bigger problems.
Inspect the Spark Plug
If your Champion generator won’t start, and you’ve tried all the typical troubleshooting steps, it’s time to inspect the spark plug. A faulty or dirty spark plug can prevent the generator from starting or cause it to run poorly. To inspect the spark plug, you’ll want to start by removing it from the generator.
Once you have it out, check for any signs of damage, such as cracks or chipping. Next, examine the electrode and the insulator, looking for any deposits or discoloration. If you notice any issues, you’ll want to replace the spark plug with a new one.
Keep in mind that different generator models may require different spark plugs, so be sure to consult your owner’s manual or a professional if you’re unsure. By regularly inspecting and replacing your generator’s spark plug, you can ensure that it starts reliably and runs efficiently for years to come.
Remove and examine the spark plug for corrosion or damage
Inspecting the spark plug of your vehicle is a necessary task that ensures your engine is operating at its best. Over time, spark plugs can become corroded, dirty, or damaged, causing misfires and reduced performance. To inspect the spark plug, first, locate it, usually at the engine’s top.
Remove the wire connecting it to the engine by twisting and pulling it gently. Next, unscrew the spark plug with a specialized tool and carefully remove it from the engine. If the plug looks dirty, use a wire brush to clean off any debris and inspect it for signs of corrosion or damage.
Finally, check the gap between the central electrode and ground electrode, making sure it meets the manufacturer’s specifications. If any issues are present, replace the spark plug with a new one. Keeping your spark plugs clean and well-maintained will go a long way in ensuring your engine operates smoothly, improving fuel efficiency and performance.
Clean or replace the spark plug as needed
When it comes to maintaining your lawn mower, one of the most important tasks is inspecting the spark plug. Over time, the spark plug can become dirty or damaged, which can affect the mower’s performance and make it harder to start. To inspect the spark plug, start by removing it from the engine using a spark plug socket wrench.
Look at the electrode for any signs of wear, such as excessive deposits of carbon or oil. If the electrode is visibly worn, or if you notice any other signs of damage, it’s time to replace the spark plug. Otherwise, you can clean it using a wire brush to remove any debris.
Remember to check the manufacturer’s instructions to ensure you are using the right type of spark plug for your lawn mower. By regularly inspecting and maintaining your spark plug, you can ensure your lawn mower is running smoothly all season long.
Inspect the Air Filter
If you’re having trouble starting your Champion generator, one thing to check is the air filter. Over time, the filter can become clogged with dust and debris, which can prevent air from flowing properly into the engine. This can lead to difficulty starting or cause the generator to shut off unexpectedly.
To inspect the air filter, start by locating it on your generator. It’s typically located near the engine and covered by a plastic or metal housing. Remove the housing and inspect the filter for dirt and debris.
If it looks dirty, it’s time to clean or replace it. Cleaning the filter is simple – just gently tap it on a hard surface to shake off any loose debris. If it’s heavily soiled, it may need to be replaced altogether.
Remember, a clean air filter is essential for the proper functioning of your generator. By keeping it clean, you’ll not only improve its performance, but also extend its lifespan. So if your Champion generator won’t start, start by checking the air filter.
Check for clogs or blockages
When inspecting your HVAC system for clogs or blockages, one of the first things to check is the air filter. The air filter plays a crucial role in keeping your system running smoothly by trapping dust, dirt, and other particles that can harm the system’s components. A dirty or clogged air filter will restrict the airflow and reduce your system’s efficiency, leading to higher energy bills, poor indoor air quality, and even system breakdowns.
To avoid such problems, it’s essential to inspect and replace your air filter regularly, ideally every three months or sooner if you have pets or live in a dusty environment. When replacing your air filter, make sure to choose a high-quality filter that meets your system’s requirements and consult with a professional if you’re not sure which filter to use. By keeping your air filter clean and in good condition, you’ll ensure that your HVAC system operates at its best and provides you with clean, comfortable air all year long.
Replace the air filter if dirty or damaged
One of the essential aspects of maintaining a healthy HVAC unit is inspecting and replacing the air filter if it’s dirty or damaged. The air filter is responsible for capturing harmful airborne particles like dirt, dust, and allergens, preventing them from circulating inside your home. If you neglect the air filter, it will accumulate more debris, reducing the air quality in your home and increasing the risk of allergies and respiratory issues.
Therefore, it’s essential to inspect the air filter regularly, at least once a month, and replace it if it’s dirty or damaged. You can visually inspect the filter and look for signs of dirt and debris, or you can use a filter gauge to measure its efficiency. If the filter looks clogged or doesn’t allow airflow, it’s time to replace it.
Overall, replacing the air filter is a simple and cost-effective way to improve indoor air quality and ensure your HVAC unit performs efficiently.
Check the Oil Level
If you’re struggling to start your Champion generator, one of the first things you should check is the oil level. Without enough oil, your generator won’t function properly, and it may even become damaged. To check the oil level, locate the dipstick on the side of the engine and pull it out.
Wipe it off, then reinsert it and pull it out again to see where the oil level falls. If it’s low, add more oil until it reaches the appropriate level. Be careful not to overfill the generator with oil, as this can cause just as many problems as not having enough.
With proper oil levels, your Champion generator should start up with no problem.
Ensure the oil level is within the recommended range
Checking the oil level in your vehicle is a crucial aspect of maintenance that should not be ignored. It is essential to ensure that the oil level is within the recommended range to prevent engine problems and ensure the smooth running of the vehicle. To check the oil level, you should first locate the dipstick and remove it from the engine.
Wipe it clean and reinsert it to obtain an accurate reading. The dipstick is usually labelled with a range of markings indicating the level of oil. If the oil level is below the minimum mark, you should add oil immediately to prevent damage to the engine.
On the other hand, if the oil level is above the maximum mark, you need to drain some oil to keep it within the recommended range. Regularly checking the oil level is a simple process that can help you avoid costly engine repairs and improve the longevity of your vehicle. Make it a habit to check your oil level at least once a month, especially before long trips and when the engine is cold.
Your vehicle will thank you for it!
Consult the Manual for More Troubleshooting Steps
If your Champion generator won’t start, there are a few things you can try before panicking and calling a professional. First, make sure the generator is properly fueled and oil levels are sufficient. Then, check the spark plug and fuel filter for any damage or clogs.
If these solutions don’t resolve the issue, consult your manual for further troubleshooting steps specific to your model. It may be that a more thorough cleaning of the carburetor or fuel system is necessary. Don’t be intimidated by the idea of taking apart your generator – often, simple maintenance and cleaning can resolve the most common issues, and your manual will be an invaluable resource in guiding you through the process.
By taking proactive measures to ensure your generator is properly maintained and running smoothly, you can ensure it is ready to provide reliable power when you need it most.
Conclusion
In the end, the champion generator may refuse to start, but it’s important to remember that even champions need a break from time to time. Perhaps your trusty generator simply needs a bit of rest and relaxation before getting back to work. Or maybe it’s just being a bit temperamental and needs some extra coaxing.
Whatever the case may be, don’t give up on your champion generator. With a little patience and perseverance, you’ll soon have it back up and running like the true champion it is!”
FAQs
What can cause my champion generator to not start?
There are several factors that could be causing your generator to not start, such as a low oil level, a dirty air filter, old or contaminated fuel, a faulty spark plug, or a malfunctioning carburetor.
How do I check the oil level in my champion generator?
To check the oil level in your generator, turn off the engine and let it cool down for a few minutes. Then, remove the dipstick, wipe it clean, and insert it back into the oil fill neck without screwing it in. Remove the dipstick again and check the oil level. If it is below the recommended level, add the appropriate type of oil.
What type of fuel should I use in my champion generator?
Your champion generator requires unleaded gasoline with a minimum octane rating of 85. It is recommended to use fuel that is less than 30 days old and fuel with ethanol concentrations of no more than 10%.
How do I clean the air filter in my champion generator?
To clean the air filter in your generator, first, remove the air filter cover and remove the filter element. Clean the element by tapping it gently against a flat surface or blowing compressed air through it. If the filter is too dirty or damaged, it should be replaced with a new one. Then, reassemble the air filter cover.