

Do you want to beef up your home security system but aren’t sure where to start? Look no further than the Blink Outdoor Camera. But once you’ve made the decision to install this smart device, the next step can feel daunting. Don’t worry – this expert guide has got you covered.
We’ll take you through the steps for a successful Blink Outdoor Camera installation so that you can rest easy knowing that your property is being monitored. Whether you’re a tech wizard or a complete novice, we’ve got tips and tricks to make the process as smooth as possible. So, let’s dive in and get your smart camera up and running!
Why Choose Blink Outdoor Cameras?
Blink outdoor cameras are an excellent choice for those who value security and convenience. These cameras are easy to install, making them ideal for homeowners who want to keep an eye on their property without having to deal with complicated setups. Installing a blink outdoor camera is a straightforward process that can be done by almost anyone.
All you need to do is follow the simple instructions provided, and you can have your camera up and running in just a matter of minutes. Once installed, these cameras offer a wide range of features, including motion detection, two-way audio, and night vision, making them an excellent choice for both indoor and outdoor use. Whether you’re looking to keep an eye on your kids playing outside or want to monitor your front door for package deliveries, a blink outdoor camera is an excellent choice that won’t disappoint.
So why not take the first step towards boosting the security of your home by installing a blink outdoor camera today?
Advanced features for outdoor surveillance
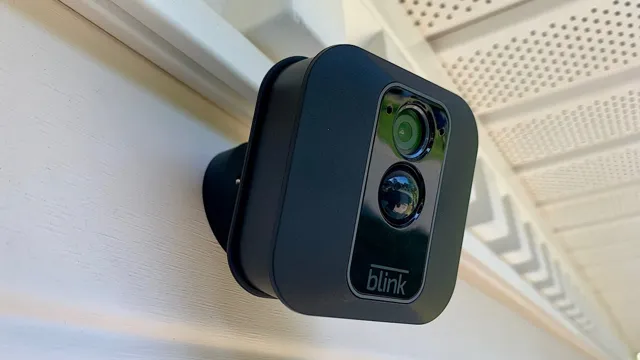
When it comes to outdoor surveillance, Blink outdoor cameras offer advanced features that make them stand out from other options on the market. With weather-resistant construction and a long-lasting battery life, these cameras are built to withstand even the toughest conditions. But what sets them apart is their advanced motion detection technology.
Using infrared and thermal sensors, Blink cameras can detect movement even in complete darkness, providing clear video footage and alerts to your phone. Additionally, the cameras can be integrated with Amazon Alexa, allowing for easy control through voice commands. So why choose Blink outdoor cameras? Their advanced features and reliable performance make them an excellent choice for anyone looking to increase the security and surveillance of their outdoor space.
Affordable prices for quality product
Blink Outdoor Cameras are the perfect choice for those who want a quality product at an affordable price. Their cameras are designed to be easy to use and set up, so even beginners can feel confident in their ability to monitor their home. One of the main reasons why many people choose Blink cameras is because they offer a high level of security without breaking the bank.
Unlike some other cameras on the market, Blink cameras are priced competitively and are designed to withstand even the toughest weather conditions. Additionally, Blink cameras are wireless, making them an excellent choice for those who want a low-maintenance option. With their long battery life and easy-to-replace batteries, Blink cameras are an affordable and convenient way to keep your home safe and secure.
So if you’re looking for a reliable and affordable security camera, Blink Outdoor Cameras are definitely the way to go.
Preparing for Installation
Preparing for the installation of a Blink outdoor camera involves a few important steps. First, it’s important to choose the right location for your camera. You’ll want to choose an area that allows the camera to have a good range of view, such as above a door or near a window facing an entry point.
Next, make sure your camera is charged and ready to go. You don’t want to run into any issues with a dead battery during installation. Finally, make sure you have a strong Wi-Fi connection in the area where you’ll be installing the camera.
This will ensure that the footage from your camera is being sent to your device without interruption. With these simple steps, you’ll be ready to set up your Blink outdoor camera and start monitoring your home or business with ease.
Camera placement considerations
When it comes to setting up a security camera system, one of the most important factors to consider is camera placement. Before installation, you should thoroughly assess your property and create a plan for where each camera will be positioned. This includes thinking about the areas of your property that are most vulnerable to theft or other security breaches.
In order to achieve maximum coverage and visibility, it’s crucial to strategically place cameras in locations that will capture any suspicious activity. Consider installing cameras at entrances, points of entry, and areas that are not well-lit. One important thing to keep in mind is to make sure the camera is placed high enough so that it is out of reach of potential vandals.
Additionally, using a variety of camera types, such as indoor and outdoor cameras, can help provide comprehensive coverage and increase the overall effectiveness of a security camera system. By taking the time to plan and consider camera placement, you can optimize the security of your property and protect your valuable assets.
Requirements for successful installation
Preparing for Installation of software or hardware requires careful planning and consideration of certain factors to ensure a successful outcome. One crucial requirement is to ascertain that all the necessary components and tools needed are available before commencing the installation process. This means understanding the product’s specifications and requirements, including its compatibility with the operating system, available RAM, disk space, and other hardware requirements.
Additionally, it is essential to have a backup plan in case of software malfunction or device failure during installation. In this case, the backup can be a system restore point or an alternate device. Besides, adequate preparation also means adhering to the manufacturer’s installation instructions, ensuring that the process is carried out as per the manual’s guidelines.
Overall, the key to a successful installation process is proper preparation, which minimizes the risk of errors and guarantees a successful outcome.
Gathering necessary tools
Preparing for installation of any new software or product requires gathering the necessary tools. In the same way a carpenter wouldn’t begin building a house without the right tools, installing a new software requires specific tools to complete the job. You’ll need to begin by first checking the system requirements and making sure that your computer has the necessary processor speed, RAM, and disk space.
Additionally, some software will require specific versions of other programs to be installed on your computer. After you’ve confirmed your computer meets the necessary requirements, you’ll need to download the installation files and save them in a location you can easily find later. Finally, ensure you have a stable and fast internet connection, as the installation process may involve downloading additional files.
By gathering the necessary tools and preparing your computer, you’ll be ready to successfully install your new software with ease.
Step-by-Step Installation Process
Looking to install your new Blink outdoor camera? Not sure where to start? Don’t worry, we’ve got you covered! Follow these simple steps to get your new security camera up and running in no time. First things first, make sure your Blink camera is fully charged and within range of your Wi-Fi network. Then, download the Blink Home Monitor app on your smartphone and create an account.
Next, add your camera by scanning the QR code on the back of the device or manually entering the serial number. Once your camera is added, you can customize your settings, such as creating motion detection zones and adjusting sensitivity levels. Finally, mount your camera in your desired location using the included mounting bracket, and you’re ready to start monitoring your home.
With easy-to-follow instructions and user-friendly features, installing your Blink outdoor camera has never been easier. Enjoy the peace of mind that comes with a reliable and secure home security system.
Mounting the camera to desired area
Mounting a security camera can be an overwhelming experience for some homeowners or business owners. The process can seem difficult, but with some effort and a few steps, it can be a simple DIY project. Before you begin, determine the area where you want to install the camera.
Some important factors to remember are the camera’s range, power source, and accessibility for maintenance. Once you have identified the area, mount the bracket to the wall with screws and plugs, making sure it is level and securely attached. Depending on the type of camera, you can attach it directly to the bracket or use a mounting plate that allows for wider movement and rotation angles.
Before drilling, always check for hidden wiring or piping behind the wall. Once the camera is mounted, secure any wiring and ensure the power source is connected correctly. Double-check the camera’s alignment and angle before finalizing the installation.
With these simple steps, you can successfully mount a security camera to your desired area and increase the safety and security of your property.
Setting up the camera via Blink app
Setting up the camera via Blink app can be a straightforward process when following the steps carefully. Begin by downloading the Blink app on your smartphone and registering for a new account. Next, plug in your Blink camera using the provided power cable and wait for it to turn on.
Within the Blink app, select the “Add a System” option and scan the QR code on the back of the camera. Follow the on-screen instructions to connect the camera to Wi-Fi and install any necessary updates. Once the camera is connected, it’s important to place it in an optimal location for monitoring.
The Blink app provides motion detection and temperature monitoring features that allow for easy customization to individual preferences. With a few simple steps, setting up your Blink camera via the app will be a breeze, and you’ll have peace of mind knowing your home or business is being monitored efficiently.
Customizing settings to fit your needs
When it comes to customizing settings on any new software, it can feel overwhelming at first. But with a step-by-step installation process, you can easily customize your settings to fit your needs. Start by taking a look at the default settings and deciding if they work for you or not.
If not, make a list of specific changes you want to make. Next, go through each setting and adjust as necessary. Don’t be afraid to test things out and make adjustments as you go! Remember, the goal is to create a personalized experience that works best for you.
With a bit of time and patience, you’ll have everything set up just the way you want it. Whether you’re customizing your smartphone or a new piece of software, taking the time to adjust settings can make a big difference in your overall experience. So go ahead and take the plunge!
Troubleshooting Tips
If you’re having trouble installing your Blink outdoor camera, there are a few troubleshooting tips you can try. First, make sure you have a strong Wi-Fi signal where you’re installing the camera. A weak signal can result in poor performance or even prevent the camera from connecting.
You can also try resetting the camera by holding down the button on the back for 20 seconds, then releasing it. If the camera still isn’t connecting, you may need to move it closer to your router or try using a Wi-Fi extender. Additionally, double-check that your Blink app is up to date so you have the latest features and fixes.
By following these tips, you should be able to install your Blink outdoor camera successfully.
Common issues and solutions
When it comes to troubleshooting common issues with technology, it’s important to begin by identifying the problem specifically. One common issue users face is slow internet speeds, which can be caused by a variety of factors, including distance from the router, interference from other devices, or outdated hardware. To improve speed, try rebooting the router, moving closer to the device, or upgrading to a newer model.
Another issue users encounter is loss of data or files, which can be particularly frustrating. This can often be resolved by regularly backing up data to an external hard drive or cloud storage service. Additionally, software issues such as unexpected crashes may require updates or reinstallations to resolve.
By understanding these common issues and their potential solutions, users can troubleshoot technology problems efficiently and effectively.
Contacting technical support
When it comes to troubleshooting technical issues, it can be frustrating and time-consuming. But before you decide to reach out to technical support, there are a few tips that can save you time and possibly solve the problem altogether. Firstly, restart your device or software – it might sound cliché, but it works more often than not.
If that doesn’t help, try updating your software, drivers, or firmware as old versions might be the cause of the problem. Another tip is to perform a virus or malware scan as these can cause unexpected issues. Additionally, you can try disabling any unnecessary programs or browser extensions that might be conflicting with the software.
Finally, if all else fails, don’t hesitate to reach out to technical support. They are there to help you and have the expertise to diagnose and resolve the issue. By following these troubleshooting tips, you can save yourself time and potentially resolve the issue on your own.
Conclusion and Final Thoughts
In conclusion, installing a Blink outdoor camera is like adding a bouncer to your home security team. It keeps an eye out for any unwanted guests and ensures that your property remains safe and secure. Don’t let the installation process intimidate you – with a little bit of patience and following the instructions carefully, you’ll have a top-notch security feature up in no time.
So why wait? Get your Blink camera installed today and let it be the watchful eye that gives you peace of mind!”
FAQs
What is included in the Blink outdoor camera installation kit?
The Blink outdoor camera installation kit includes the camera, mounting hardware, a sync module, and batteries.
Can the Blink outdoor camera be installed without drilling holes?
Yes, the Blink outdoor camera has a magnetic mount that can be attached to a metal surface without drilling any holes.
What is the range of the Blink outdoor camera?
The Blink outdoor camera can detect motion and record video up to 30 feet away.
How do I connect the Blink outdoor camera to my Wi-Fi network?
The Blink outdoor camera connects to a sync module, which then connects to your Wi-Fi network. Follow the instructions in the Blink app to set up the sync module and connect it to your network.
Can I view live footage from the Blink outdoor camera on my smartphone?
Yes, the Blink app allows you to view live footage from your Blink outdoor camera on your smartphone from anywhere with an internet connection.
How long do the batteries last in the Blink outdoor camera?
The batteries in the Blink outdoor camera can last up to two years with normal use.