

Have you ever experienced a break-in or unwanted activity outside of your home, leaving you unsure of how to identify the culprit? With the Blink Camera Recording, you can capture and view footage in real-time so that you can feel safe and secure in your own home. Whether you’re trying to keep an eye on your belongings, monitor your pets or just want to know who’s at your front door, Blink’s technology provides advanced motion detection, video recording and instant alerts to your phone. This article will show you how to maximize your Blink Camera Recording system, including how to capture and view footage, so you can stay on top of your home security and keep your family and possessions safe.
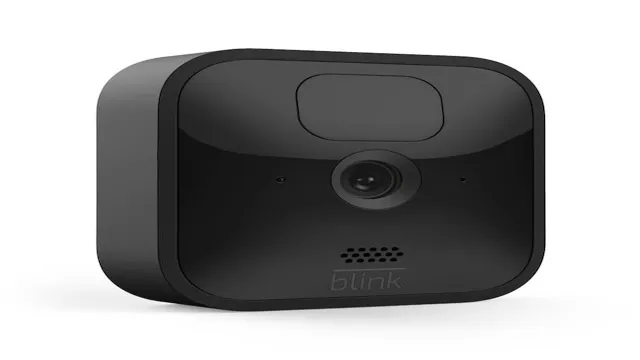
Choosing the Right Blink Camera
Blink cameras are a popular choice for those who want to monitor their homes or businesses. One of the key features of these cameras is their recording capabilities. Depending on the type of blink camera you choose, you can enjoy different recording options such as continuous recording or motion-activated recording.
This means that your videos will be saved either all day long or only when motion is detected. Another benefit of blink cameras is that they can store footage in the cloud, which allows you to access and review your videos from anywhere using a smartphone or tablet. It’s important to choose the right blink camera for your needs, so consider factors such as the location you want to monitor, the storage capacity you require, and the specific features you want in a camera.
With the right blink camera, you can ensure that your property and loved ones are safe and secure.
Comparing Blink Camera Models and Features
When it comes to choosing the right Blink camera, it’s important to consider your specific needs and the features offered by each model. The Blink Mini, for example, is a great option for those on a budget, offering 1080p HD video and customizable motion detection zones. The Blink Outdoor, on the other hand, is weather-resistant and has a longer battery life, making it perfect for outdoor use.
For those looking for even more advanced features, the Blink XT2 offers two-way audio as well as infrared night vision. Whether you’re looking to keep an eye on your home or your pets, there is a Blink camera model to suit your needs. So take the time to compare the features of each model before making your decision, and enjoy your newfound peace of mind!
Installation and Setup
When it comes to selecting the perfect Blink camera for your needs, you’ll want to consider a few factors to ensure you choose the right one. First, think about the location where you plan to install the camera. Do you need it for indoor or outdoor use? If you’re placing it outside, make sure the camera is weather-resistant and can operate in extreme temperatures.
Next, determine what kind of coverage you need. Do you need a camera with a wide-angle lens or one that can rotate to capture more movement? Lastly, consider the level of connectivity you desire. Some Blink cameras offer WiFi capabilities, while others require a direct connection to a power source.
By taking these factors into account, you can select the perfect Blink camera that meets your specific needs and provides the peace of mind you’re looking for.
Configuring Camera Recording
If you’re wondering how to configure your Blink camera recording, it’s a relatively simple process. To begin, open the Blink app and navigate to the device settings for the camera in question. From there, scroll down to the “Recording” section and select “Advanced Settings.
” Here, you’ll be able to adjust a variety of settings related to your camera’s recording capabilities, such as clips length, motion detection settings, and more. Additionally, you can choose to enable or disable audio recording for your camera, giving you even greater control over your footage. Once you’ve configured your settings to your liking, hit “Save” and you’re all set.
With just a few simple steps, you’ll be able to ensure you’re getting the most out of your Blink camera’s recording capabilities. So why wait? Get started today and enjoy the peace of mind that comes with knowing your home is secure.
Adjusting Recording Settings
Adjusting recording settings can greatly enhance the quality of the camera output. Whether you’re shooting a film, capturing a video, or taking pictures, making the right adjustments can make a big difference. One of the first things to consider when configuring camera recording is the resolution.
Higher resolutions tend to produce better quality, but also require more memory space. Other settings that can be adjusted include frame rate, shutter speed, aperture, and ISO. Each of these will impact the image in a unique way.
Experimenting with these settings can help you achieve the desired effect. It’s important to remember that these settings may need to be adjusted based on the environment and lighting conditions. It’s always best to test beforehand, so you don’t miss out on capturing that perfect moment.
By making the right adjustments to your recording settings, you can take your camera work to the next level.
Scheduling and Managing Recordings
Configuring Camera Recording One of the most important aspects of a security camera system is the ability to schedule and manage recordings effectively. The process of configuring camera recording can vary depending on the specific model and software used, but generally involves selecting the time and duration of recordings, as well as the type of recording mode (such as continuous or motion-activated). It’s important to carefully consider these settings to balance the need for comprehensive coverage with efficient use of storage space.
Some systems may also offer options for remote access and real-time monitoring, allowing you to keep an eye on your property even when you’re not on site. By taking the time to properly configure your camera recording settings, you can help ensure that your security footage is there when you need it most.
Viewing Saved Footage
When it comes to configuring camera recording, one of the most important things to consider is how to view the saved footage. Depending on the specific camera system, there are different ways to access recorded videos. Some cameras come with built-in storage, while others require a separate hard drive or cloud storage.
To ensure that footage is easily accessible, it’s essential to set up the recording settings correctly. This means selecting the appropriate resolution, frame rate, and storage capacity. Additionally, it’s crucial to choose a reliable software or application that allows you to easily view and manage the saved footage.
By properly configuring camera recording, you can ensure that your surveillance system works smoothly and provides reliable security for your property or business. So, take the time to research your camera system’s recording features, and choose the best options that meet your security needs.
Maximizing Blink Camera Security
If you’re looking to maximize the security of your Blink camera, there are a few things you can do to ensure that it’s recording efficiently and effectively. First and foremost, make sure that your camera is positioned in a location that offers a clear view of the area you’re looking to monitor. This will not only give you a better picture of potential intruders, but it will also reduce false alarms caused by environmental factors such as shadows or movement from nearby trees.
Additionally, ensure that your camera is set to the proper sensitivity level so that it’s not triggered by every passing car or animal. Finally, consider setting up motion detection alerts on your phone or computer so that you’re immediately notified if something triggers your camera. With these simple steps, you can rest assured that your Blink camera is doing everything it can to keep your home or business safe and secure.
Best Practices for Securing Your Blink Camera
Blink Camera Security When it comes to securing your Blink Camera, there are a few best practices to keep in mind. First and foremost, it’s essential to make sure that your camera’s firmware is always up-to-date. This ensures that any known security vulnerabilities are patched, making it harder for hackers to gain access to your camera.
It’s also a good idea to use a strong and unique password, preferably a combination of letters, numbers, and symbols, to prevent unauthorized access. Additionally, it’s crucial to keep your Wi-Fi network secure by using encryption and changing your password at least once every few months. Finally, be mindful of where you place your camera, making sure it’s not easily accessible or visible to potential intruders.
By following these best practices, you can help maximize the security of your Blink Camera and have peace of mind knowing that you’re protecting your home and family.
Common Security Risks and How to Mitigate Them
When it comes to securing your home, Blink cameras are an excellent choice. However, there are still security risks that you need to be aware of and mitigate. One of the most common risks is weak passwords.
Make sure that you choose a strong password that is not easy to guess. It is also recommended to enable two-factor authentication for an additional layer of security. Another risk is physical theft or damage to the camera itself.
To mitigate this, ensure that the camera is mounted in a secure location and that it is not easily accessible. Finally, be sure to keep your Blink system up to date with the latest firmware updates to ensure that any potential vulnerabilities are addressed. By following these steps, you can maximize the security of your Blink camera system and ensure that your home is protected.
Conclusion: Enhancing Home Monitoring with Blink Camera Recording
In the blink of an eye, anything can happen – and with a blink camera recording, you can always be sure that you’ll catch it. With its quick response time and reliable technology, you’ll never miss a beat. Whether you’re looking to keep an eye on your home security, capture hilarious moments with your pets, or just document life’s unexpected surprises, a blink camera recording has got you covered.
So go ahead – blink, and you’ll never miss a thing.”
FAQs
How do I set up my Blink camera to start recording?
To set up your Blink camera to start recording, first ensure it is properly installed and connected to your home’s Wi-Fi network. Then, go to the Blink app and select the camera you want to set up. Under “Device Settings,” select “Record Motion” and choose how long you want the camera to record for.
Can I view my Blink camera’s recordings remotely?
Yes, you can view your Blink camera’s recordings remotely through the Blink app. Simply open the app, go to the camera you want to view, and select “View Clip” to see the recorded footage.
What happens when my Blink camera’s storage is full?
When your Blink camera’s storage is full, it will automatically overwrite the oldest recordings with new ones. However, you also have the option to download and save important clips to your device or cloud storage before they are overwritten.
How long does the Blink camera record for?
The Blink camera can record for up to 60 seconds per clip, but you can customize the length of time it records for under “Record Motion” in the device settings. Note that longer recording times may impact battery life.